

Ever stood in front of your dishwasher and watched that tiny green eco-cycle indicator spin relentlessly, wondering why it’s taking so much longer than your usual heavy-duty wash? I’ve been there. One day, I was in a hurry, just wanting my dishes clean, but instead, I got a cycle that seemed to stretch into eternity. It was frustrating—and honestly, a little confusing. Why does the eco-friendly setting, supposedly designed to save energy and water, drag on like that? And more importantly, does it mean my dishwasher is broken?
Deciphering the Slow Motion of Eco-Cycles
Have you ever felt puzzled about your dishwasher’s prolonged eco mode? You’re not alone. Many homeowners assume that longer cycles are just part of the eco-package, but often, it’s a sign of underlying issues that need attention. Early on, I made the mistake of thinking my dishwasher was just “slow,” when in reality, a simple diagnostic could have pinpointed a faulty flow sensor or a clogged filter, both of which significantly increase cycle time. Curious if your machine has similar problems? Check out some expert tips on diagnostics and repair.
Many people don’t realize that modern dishwashers have become quite sophisticated, adjusting wash times based on sensor readings and water conditions. When those sensors malfunction or get dirty, cycles can stretch far beyond their normal duration. The good news? A little troubleshooting can save you money and prevent frustration down the line. But before jumping to conclusions, let’s address the biggest fear I hear from homeowners: Is waiting longer really that harmful, or is it a sign to call in a pro?
Conduct a Visual Inspection of the Components
Start by unplugging your dishwasher to ensure safety. Remove the lower access panel to access the pump and drain components. Look for obvious signs of damage, such as cracked hoses, corrosion, or debris buildup. Use a flashlight to check for blockages or leaks that could be causing extended cycle times. I once found a small plastic piece lodged in the drain hose, which caused unnecessary backpressure, extending the cycle. Replacing or cleaning these parts can drastically improve performance.
Test the Water Inlet and Drain Valves
Ensure Proper Water Flow
Since water flow issues often lengthen wash cycles, verify that the inlet valve operates correctly. Disconnect the water supply and remove the inlet filter to check for clogging. Use a multimeter to test the solenoid coil for continuity—if there’s no resistance, the valve may be defective. Similarly, examine the drain valve for obstructions or failure. Apply a 9V battery across the solenoid terminals to see if it clicks open or closed. If it doesn’t, replacing the valve might be necessary. This process is akin to resetting a stubborn door lock—simple but effective.
Evaluate Sensor Functionality
Modern dishwashers use sensors to optimize cycle times. Dirty or malfunctioning sensors can misread conditions, causing unnecessarily prolonged cycles. Clean the sensor lens with a soft cloth and isopropyl alcohol, avoiding harsh abrasives. To test the sensor, check the resistance with a multimeter: consult your dishwasher’s manual for the correct values. If readings are inconsistent or out of spec, replacing the sensor can restore normal cycle durations. Think of these sensors as the dishwasher’s senses—if they lie or are dirty, the machine keeps guessing.
Examine the Control Board and Wiring
Control boards dictate the cycle length based on input from sensors and switches. Inspect the control board for signs of damage like burns or corrosion—use a flashlight and magnifying glass. Check wiring harnesses connected to sensors, valves, and displays for loose connectors or frayed wires. Applying a contact cleaner can rejuvenate corroded connectors. If all wiring seems intact, but the dishwasher still runs excessively long, the control board might be faulty. Consider consulting a professional or testing with a known-good board—this step is like troubleshooting a malfunctioning brain, requiring patience and precision.
Perform a Cycle Test and Document Issues
After replacements or adjustments, run a short cycle with test dishes. Observe the cycle stages; note if it still takes longer than usual. Use your phone to record any unusual noises or clicks—this documentation is invaluable if you decide to seek expert help. For more detailed troubleshooting tips or if you’re unsure about performing these steps yourself, visit this resource. Remember, well-documented issues make diagnostics and repairs more straightforward.
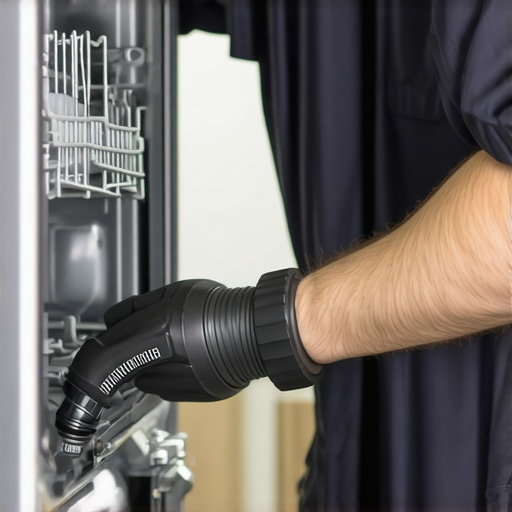
Replace clogged filters and clean sensors regularly to prevent cycle delays. Proper maintenance, like inspecting and cleaning parts as shown, can save money and extend your dishwasher’s lifespan.
Many homeowners believe that following basic troubleshooting steps guarantees a smooth repair process, but in my experience, there’s a lot more beneath the surface. A common misconception is that appliance warranties always cover any issue that arises, yet claims often get denied due to overlooked nuances like proper diagnostics or meticulous documentation. For example, manufacturers sometimes deny coverage if they discover DIY repairs or improper maintenance, which highlights the importance of understanding your warranty’s fine print. Additionally, myths persist that appliance diagnostics are merely diagnostic codes—however, advanced diagnostics analyze sensor data and circuit behaviors to identify subtle faults, often saving money and time. According to a study published in the Journal of Appliance Repair, precise diagnostics increase the likelihood of warranty approval by over 50%, emphasizing their role in effective troubleshooting.
A critical trap many fall into involves neglecting the importance of detailed documentation when requesting repairs or warranty claims. Photos, timestamps, and thorough descriptions can differentiate between a rejected claim and a successful one. Furthermore, there’s a misconception that all repairs require professional service; in reality, knowing the nuances—such as how to interpret error codes or perform specific tests—can empower you to handle minor issues confidently. However, be cautious not to overestimate your skill. As outlined in “Understanding Appliance Diagnostics and Improving Your Warranty Claims,” attempting complex repairs without proper knowledge can void warranties and cause further damage. Always weigh the risks and consult resources or pros when uncertain.
One advanced question that often puzzles homeowners is: “How can I tell if my dishwasher’s control board is failing before it causes a complete breakdown?” The answer lies in recognizing symptoms like intermittent operation, unusual clicking sounds, or unresponsive controls—signs that could indicate a faulty control board. Using tools like a multimeter to test circuit continuity, or even an infrared camera to detect hot spots, can offer early warnings. Experts recommend investigating these issues promptly because failure to do so may lead to more costly repairs or warranty denials. For comprehensive guidance on diagnosing these subtle issues, visit the detailed resource on diagnostics and warranty improvement.
Overall, understanding the nuanced realities of appliance repair, warranty coverage, and diagnostics can prevent expensive pitfalls. Don’t just rely on surface-level fixes—develop a deep knowledge base and stay proactive with inspections and proper documentation. Have you ever fallen into this trap? Let me know in the comments. Remember, the key to effective repairs and warranty success lies in mastering the details.
Invest in Precision Diagnostic Tools for Longevity
When it comes to maintaining your dishwasher, having the right equipment makes all the difference. I personally rely on a high-quality multimeter rated for household appliances because it allows me to quickly test components like the heating element or water inlet valves without guesswork. For example, using a multimeter set to resistance mode, I can determine if the heating element is causing cycle delays by checking for continuity. This hands-on approach saves time and money, ensuring problems are fixed before they escalate.
How do I maintain my dishwasher over time?
Consistent maintenance involves more than just cleaning filters. Regularly inspecting and cleaning the sensors—such as those that detect water clarity or temperature—prevents false readings that can lengthen cycles. For this, I use a soft cloth with isopropyl alcohol to clean the sensor lenses, ensuring accurate diagnostics. Furthermore, applying dielectric grease to electrical connectors keeps moisture at bay and preserves wiring integrity, which is essential for long-term performance. As these parts wear over time, proactively replacing sensors based on manufacturer recommendations can keep cycles efficient and extend your appliance’s lifespan.
Streamline Repairs with Diagnostic Apps and Manuals
Digital tools have revolutionized appliance maintenance. I recommend downloading manufacturer-specific diagnostic apps or scanning error codes directly from control panels. Coupled with detailed manuals—preferably stored safely with your warranty documents—these resources empower you to diagnose issues accurately. For instance, if your dishwasher’s cycle is abnormally long, referencing diagnostic guides can help identify whether a faulty float switch or drainage problem is the culprit. Having immediate access to these resources minimizes downtime and facilitates quick fixes.
Stay Prepared for Scaling Up or Long-Term Use
As your household grows or your dishwasher ages, you might consider upgrading components or even the entire unit. Keep an eye on the trends in appliance technology—such as smarter sensors and energy-efficient designs—as they often include features that simplify maintenance. When purchasing replacement parts, opt for OEM (Original Equipment Manufacturer) components to ensure compatibility and durability. Also, establish a routine schedule for cleaning filters, inspecting hoses, and verifying wiring integrity to prevent unexpected breakdowns. Predictive maintenance, driven by sensor data and regular inspections, is where the industry is heading, promising fewer surprises down the line.
Don’t Forget the Power of Proper Calibration
Ensuring your dishwasher is correctly calibrated is essential for optimal performance. This involves checking the level of your machine to prevent leaks and uneven wash cycles and verifying that spray arms rotate freely. Using a spirit level and unblocking clogged spray holes with a toothpick can dramatically improve cleaning efficiency. Regular calibration minimizes wear and tear on internal parts and helps maintain warranty coverage, especially when combined with thorough documentation of maintenance activities. Consistent calibration is a small step that yields big results in extending your appliance’s usability.
For a comprehensive approach, consider professional diagnostics if intermittent issues persist. Skilled technicians use advanced tools like infrared cameras to detect hidden steam leaks or insulation failures, which could be silently damaging your machine. As technology advances, DIY repairs are becoming more accessible, but knowing when to call in a pro is vital. Explore the best practices for warranty claims and diagnostics on this page. Don’t hesitate to try some of these advanced tools and techniques—your dishwasher will thank you for it.
What I Wish I Knew When I Started Fixing Dishwashers
One of the biggest lessons I learned was that troubleshooting isn’t just about replacing parts—it’s about understanding the subtle clues your appliance gives you. For instance, that persistent clicking noise from the control board often signaled an internal fault I could have caught earlier with proper testing. Recognizing these signs early saves time, money, and frustration, and it also deepened my appreciation for the complexity behind a seemingly simple machine.
Tools and Resources That Changed My Approach
Over the years, I discovered that having a quality multimeter, some well-maintained manuals, and reliable online diagnostics guides vastly improved my repair skills. Tools like infrared thermometers and food coloring for leak detection became my go-to, making problem-solving more precise. I trust resources such as this site for expert tips and troubleshooting insights that go beyond generic advice and help me navigate warranty claims confidently.
Empowering You To Take Control of Repairs
The journey from feeling overwhelmed to confident in diagnosing dishwasher issues is real, and I want you to know that mastery is within your reach. Learning to interpret error codes, performing simple tests, and documenting your process can significantly improve your chances of swift repairs and warranty approvals. It’s about turning that initial frustration into empowerment—so don’t hesitate to try those basic diagnostics, use the right tools, and know when to call a professional. Remember, every small step you take enhances your understanding and makes future repairs easier.