

Ever been in the middle of a dishwasher cycle, only to hear that dreaded hum or click, then nothing? I’ve been there, standing with a dripping towel and a sinking feeling, convinced I’d have to call in a pricey technician or worse, replace the entire machine. That lightbulb moment when I realized I could troubleshoot this little problem myself was a game-changer. Turns out, testing a dishwasher solenoid isn’t as intimidating as it sounds—and a simple 9V battery can be your best friend in diagnosing the issue.
Why Knowing How to Test Your Dishwasher Solenoid Matters
Dishwasher repairs can be costly, especially if you’re unaware of what’s actually causing the problem. The solenoid is a small but vital component that controls water flow within your dishwasher. When it malfunctions, your machine might not fill or drain properly, leading to overflowing or incomplete washes. By mastering a basic test with a 9V battery, you can accurately identify whether the solenoid is faulty—saving you time and money.
Is Testing Your Solenoid Really Worth the Hype?
Initially, I thought, “This won’t make a difference,” and I almost skipped this step. That was a mistake. Technical errors from small components like solenoids are common, yet many homeowners overlook simple DIY diagnostics due to fear or assumptions. According to appliance repair experts, understanding how to diagnose parts can significantly improve your troubleshooting skills—and avoid unnecessary replacements or service calls. I learned early on that my mistake was assuming that all faults required professional help when a basic test could reveal the culprit. Curious if you’ve faced similar doubts? Keep reading, because I’ll walk you through this straightforward process to empower your repairs.
Locate the Solenoid and Prepare Your Tools
Start by unplugging your dishwasher to ensure safety. Find the solenoid, usually attached near the water inlet valve or drain pump. Identify the electrical connector and disconnect it carefully. Grab a 9V battery, a multimeter (optional but helpful), and insulated test leads. Think of the solenoid as a tiny gatekeeper controlling water flow—testing it is like checking if this gate opens and closes properly without dismantling the entire machine.
Disconnect and Isolate the Solenoid for Testing
Remove the wires connected to the solenoid’s terminals, noting their positions or taking a photo. Next, set your multimeter to measure continuity if you’re planning to check the solenoid’s internal coil. Imagine the coil as a tiny spring that should conduct electricity; if it’s broken, the coil acts like a snapped spring—no continuity, no operation.
Perform the Continuity Test
Touch the multimeter probes to the solenoid terminals. A healthy coil typically shows a low resistance reading. If there’s no reading or an infinite resistance, the coil is likely burnt out. This step saves you from replacing the entire dishwasher or ordering parts unnecessarily. Remember, a broken coil is like a bent valve; testing confirms whether it’s stuck or just broken.
Using the 9V Battery for Functional Testing
Connect the positive terminal of the 9V battery to one terminal of the solenoid and the negative to the other. You might hear a clicking sound—indicating the solenoid’s plunger is moving—and see the coil energize. If it clicks and the plunger moves freely, the solenoid is functioning; if not, it’s faulty. This test is akin to giving the gate a push to see if it opens smoothly, which helps determine if the part is salvageable or needs replacing.
Observe and Interpret Results
If the solenoid responds to the battery test but shows no continuity, it might have an internal break. Conversely, if it fails to activate with the battery, the solenoid is likely dead. Before replacing parts, consider if your dishwasher’s warranty might cover repairs—check out how diagnostics can improve your warranty chances. If testing confirms a faulty solenoid, order a genuine replacement part or seek professional assistance.
Reattach and Test Your Dishwasher
Once you’re confident the solenoid is operational, reconnect the wires securely. Plug in the dishwasher, and run a short cycle to see if water flows correctly. If issues remain, revisit your diagnostics or consult a professional. Remember, this hands-on testing approach is like a health check-up for your dishwasher—saving you time, money, and frustration, especially before considering complex repairs or replacements.
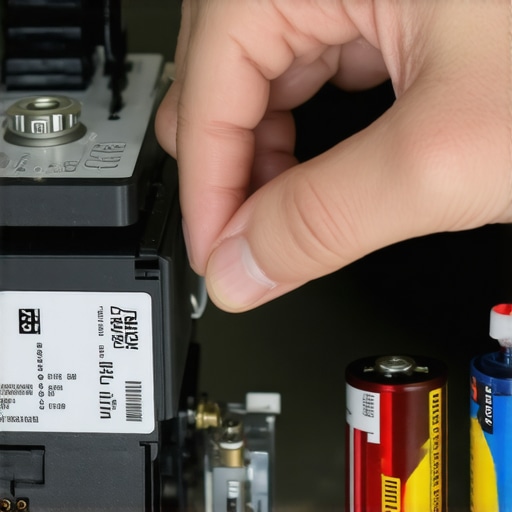 Many homeowners approach appliance repair with misconceptions that can lead to costly mistakes and wasted time. One prevalent myth is that all issues warrant a complete replacement of the appliance. In reality, understanding nuanced diagnostics, like testing a dishwasher solenoid with a simple 9V battery, can often pinpoint the exact problem, saving money and effort. Another misconception is that warranties cover all repairs automatically; however, many warranties exclude wear and tear or specific components, making it essential to read the fine print and know when to trust the warranty or seek professional advice. Believing that DIY fixes are always straightforward may tempt you to attempt repairs without proper knowledge, which can cause further damage. For instance, misinterpreting a solenoid’s symptoms or incorrectly performing continuity tests may lead to unnecessary replacements. Expert guidance emphasizes that accurate diagnostics—like verifying internal coils or performing functional tests—are crucial steps often overlooked by amateurs.
How can homeowners avoid common pitfalls in appliance diagnostics and protect their warranties?
Consulting detailed guides and expert resources can enhance your troubleshooting skills. For example, understanding how to check your dishwasher’s inlet valve or float switch properly can prevent misdiagnoses. Moreover, regularly reviewing your appliance’s warranty policy—accessible through resources like this page—ensures you’re aware of coverage limits. Remember, pushing beyond your expertise without thorough diagnostics may void warranties or lead to more expensive repairs. Always consider professional assistance when unsure, especially if your DIY efforts don’t resolve the issue swiftly. The key is balancing knowledge with caution, ensuring your repair efforts are both effective and warranty-friendly. Have you ever fallen into this trap? Let me know in the comments.
Investing in the Right Tools for Long-Term Success
Maintaining your dishwasher’s performance demands more than just a brush and some soap; it requires precise tools that empower you to diagnose and fix issues efficiently. One indispensable instrument I personally rely on is a high-quality digital multimeter. Unlike basic models, my multimeter offers auto-ranging capabilities and a True RMS feature, which prove invaluable when testing components like the heating element or water inlet valves. An accurate reading helps avoid unnecessary replacements and saves money in the long run.
Another tool I find essential is a flexible inspection camera. Small enough to navigate tight spaces, it allows me to visually inspect internal parts without disassembly, spotting corrosion or debris buildup that might impair function. When combined with a smartphone app that allows me to record and analyze footage, this approach enhances diagnostic precision and reduces guesswork.
Future Trends in Maintenance Tools
Advancements in IoT and smart diagnostics are poised to revolutionize appliance upkeep. Imagine a future where your dishwasher itself alerts you to impending failures via your smartphone, recommending specific troubleshooting steps based on collected data. Investing in compatible smart sensors now can prepare you for this evolution, turning maintenance from reactive to proactive—a trend that industry experts predict will dominate home appliance care in the coming years.
How do I keep my dishwasher functioning over time?
Routine maintenance is crucial. Regularly cleaning filters, checking spray arms for clogs, and inspecting door seals can prevent minor issues from escalating. Using diagnostic tools periodically, like testing components with a multimeter or visually inspecting wiring connections, ensures ongoing reliability. Also, keeping logs of repairs and diagnostics can streamline future troubleshooting and warranty claims, especially when referencing actions taken before contacting professionals. Remember, many warranties specify that proper maintenance and diagnostics are your responsibility; ensuring these steps can protect your coverage, as detailed here. Practice proactive upkeep, and your dishwasher will serve you well for years to come.
3 Lessons That Changed My Approach to Dishwasher Diagnostics
One of the most impactful lessons I learned was that patience and methodical testing often reveal more than rushing into replacements. Relying solely on visual cues or assumptions can mislead you; instead, hands-on tests like using a 9V battery uncover real issues, saving time and money. I also discovered that understanding the internal components deepens trust in your repair process—knowing what a healthy coil versus a burnt one looks like empowers better decisions. Lastly, I realized that maintaining a calm mindset when troubleshooting prevents mistakes—it’s tempting to get frustrated, but clarity leads to accurate diagnosis and effective fixes.
Smart Tools That Make Every Repair Count
I swear by a quality digital multimeter because it transforms guesswork into certainty when testing coils or wiring. The investment in a flexible inspection camera opened my eyes to hidden corrosion or debris without disassembling the entire dishwasher—saving me headaches and potential further damage. Additionally, keeping a repair log helps track recurring issues, so I can spot patterns or parts that frequently fail. For anyone serious about DIY appliance care, these tools are game-changers that turn a novice job into professional-level diagnostics.
Embrace the Next Level of Dishwasher Mastery
If you’re eager to keep your dishwasher running smoothly and confidently handle minor issues, your proactive approach makes all the difference. Regular diagnostics, using trusted tools, and learning from each repair build your skills and extend your appliance’s lifespan. Don’t forget—staying informed through resources like this guide and engaging with the appliance repair community can boost your confidence and competence. Your dishwasher deserves your attention—take charge of its health today and enjoy hassle-free cycles for years to come.