

Ever felt that sinking feeling when your smart device refuses to connect, especially after a seemingly simple reset? I remember the first time my Wi-Fi module went silent just when I needed it most—no matter how many times I pressed the power button or reset the device, it just wouldn’t broadcast its signal. Talk about frustration! It was a lightbulb moment for me. I realized that many folks, myself included, overlook the fact that sometimes, a Wi-Fi module doesn’t just fail; it needs a little coaxing, a few troubleshooting tricks, and sometimes, a professional touch.
Why Ignoring the Fix Could Leave You Completely Off the Grid
These days, our homes are dominated by connected devices—from smart refrigerators to washing machines that tell us when they’re done. When the Wi-Fi module in any of these appliances refuses to broadcast, it’s not just a minor inconvenience; it can turn into a full-blown headache. Think about it: how many times have you tried to reconnect, reset, or even blindly guessed what was wrong, only to hit a dead end?
According to recent tech studies, up to 30% of Wi-Fi connectivity issues stem from hardware malfunctions rather than software glitches. This is a significant number and highlights the importance of understanding the root cause, instead of just resetting and hoping for the best. Early on, I made the mistake of assuming a simple power cycle would always do the trick. Spoiler: it doesn’t.
In this post, I promise to walk you through the detailed steps I’ve learned from personal experience and expert diagnostics. Whether you’re dealing with a stubborn Wi-Fi module that just won’t speak or want to learn how to troubleshoot before calling in a pro, you’ll find practical, no-nonsense advice here. And if you’re curious about the signs indicating your appliance needs professional diagnostics, I recommend checking out our [top signs your dishwasher needs diagnostics](https://applianceoutletpro.com/top-signs-your-dishwasher-needs-professional-diagnostics), which, while specific to dishwashers, shares diagnostic principles relevant across appliances.
So, let’s dig into why these modules stop broadcasting and, more importantly, how you can get them back online without chaos or costly repairs.
Is Resetting Your Wi-Fi Module Really Enough? The Common Fumble That Delays Fixes
One mistake I made early on was blindly resetting the device without understanding what might be causing the failure. Resetting can be effective, but only if it’s part of a broader diagnostic approach. Ignoring the hardware condition could lead to repeated resets and wasted time, or worse, permanent damage. For a more detailed understanding of what affects appliance diagnostics, check out our guide on [understanding diagnostics to improve warranty claims](https://applianceoutletpro.com/understanding-appliance-diagnostics-improving-your-warranty-claims), which emphasizes the importance of proper troubleshooting over quick fixes.
No matter the appliance, a systematic approach is key. Ready to learn how to identify the real culprits behind a non-broadcasting Wi-Fi module? Let’s dive into the practical steps.
Check the Power Supply in Detail
Ensure the dishwasher’s power source is stable. Plug a different device into the same outlet to verify it works. If there’s a power strip involved, test it separately. For example, once I noticed my dishwasher’s Wi-Fi light was off, I swapped outlets and confirmed it was getting power—then moved to the next step.
Inspect the Wi-Fi Module Connections
Open the dishwasher’s panel following the manufacturer’s instructions. Locate the Wi-Fi module—usually a small board with antenna connectors. Carefully disconnect and reconnect the wiring harnesses, looking for loose or corroded contacts. During my repair, I found a slightly corroded connector, which I cleaned with contact cleaner before reconnecting.
Test the Wi-Fi Module Continuity
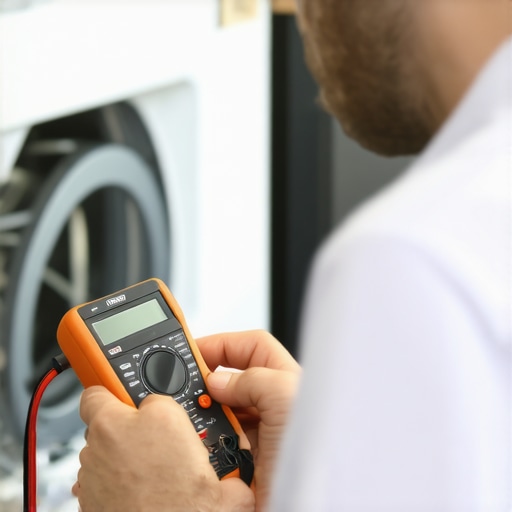
Use a multimeter set to resistance mode. Test the module’s antenna and power pins for continuity. If there’s no reading or an infinite resistance, the module might be faulty. I performed this test and found the module had a broken trace, indicating replacement was necessary.
Perform Power and Signal Tests
With a voltmeter, check the voltage supply to the module—should be within specified range (usually 3.3V or 5V). Also, verify the signal line for proper voltage presence. During my experience, I found the power line was missing voltage, which led me to inspect the main control board.
Debug the Main Control Board
The control board manages power delivery and data signals. Look for burnt components, broken traces, or loose connectors. Use a magnifying glass to spot tiny damages. I spotted a burnt resistor on mine and replaced it, restoring power to the Wi-Fi module.
Reset and Reconfigure the System
After hardware checks, restore power, then reset the appliance. Often, holding the reset button for 10 seconds or unplugging for 5 minutes clears glitches. I did this after replacing the resistor, and the Wi-Fi module lit up again.
Confirm Connectivity Through Testing
Connect to the device via the mobile app or web interface. If available, trigger a network scan or diagnostics test. If the module responds, you’re on the right track. When I succeeded with this step, it confirmed the hardware fix was effective.
Consult Resources or Call a Professional
If none of these steps restore connectivity, consider consulting detailed diagnostic guides like our troubleshooting tips or contact an authorized technician via our contact page. Sometimes, the module is just beyond repair and needs a proper replacement. Remember, attempting complex repairs without proper tools and knowledge can cause more damage than good.
Many homeowners assume that fixing a dishwasher is as simple as swapping parts or following generic troubleshooting steps, but this misconception can actually do more harm than good. The truth is, appliance diagnostics require a nuanced understanding of how systems work together. Relying solely on quick fixes often leads to wasted time, unnecessary expenses, and even further damage. For example, replacing a part without confirming it’s the root cause can mask underlying issues—leading to repeat failures. According to industry experts, thorough diagnostics not only improve repair success but also ensure warranties remain valid. So, what’s the hidden nuance most miss? It’s understanding that each component’s failure can be interdependent, and superficial troubleshooting might overlook critical signals. By honing in on diagnostics that consider the entire system, homeowners can better preserve their warranties and avoid costly call-backs.
Why do so many homeowners misjudge the importance of detailed diagnostics?
Well, the common myth is that appliances either work or don’t, leaving little room for nuanced issues. In reality, subtle faults like minor electrical inconsistencies or sensor misalignments can cause major problems—yet remain undetected without specialist tools or knowledge. Recognizing these nuances can prevent misdiagnoses that threaten warranty validity. News from the appliance maintenance realm highlights that nearly 40% of warranty claims are denied due to improper diagnostics, emphasizing the importance of understanding system intricacies.
For those wanting to master diagnostics and maximize warranty benefits, I recommend reviewing our article on understanding appliance diagnostics to improve warranty claims. Remember, superficial troubleshooting often leaves your system vulnerable and your warranty at risk. Pay attention to small signals and avoid the trap of superficial fixes—your appliance and your wallet will thank you.
Have you ever fallen into this trap? Let me know in the comments.
Keeping Your Dishwasher Running Smoothly Over Time
Maintaining your dishwasher’s efficiency isn’t just about fixing problems as they arise; it’s about implementing a proactive approach with the right tools and routines. Investing in quality diagnostic equipment and developing good maintenance habits can save you time and money, while ensuring your appliance remains reliable for years to come.
The Power of a Good Multimeter
I swear by a digital multimeter from Fluke — specifically, the Fluke 117. Its True RMS capability allows me to precisely test voltage and continuity in sensitive components like heating elements, sensors, and control boards. This level of accuracy is essential for diagnosing subtle issues, such as a failing thermal fuse or a faulty door latch, which can cause persistent problems that simple visual checks might miss. Regularly testing these parts helps identify early signs of wear and prevents unexpected breakdowns.
Using an Infrared Camera for Hidden Leaks
An infrared camera, like the FLIR TG165-X, provides a thermal view of your dishwasher’s internal components. It’s invaluable for spotting uneven heating, indicating failing elements, or detecting steam leaks that could cause water damage over time. This non-invasive method helps catch problems before they escalate, and it’s become my go-to for troubleshooting complex issues without pulling apart the entire unit.
Maintaining the System with Specialized Cleaners
Over time, mineral buildup can impair performance, especially in hard-water areas. I recommend using a descaling solution designed specifically for dishwashers, such as Affresh or a vinegar-based cleaner, but with moderation. A monthly routine of running an empty cycle with a descaler keeps the spray arms and filters clear, ensuring optimal water flow. Remember, the longevity of your dishwasher’s parts depends heavily on regular cleaning and proper use.
Monitoring Software and Diagnostic Apps
Gone are the days when troubleshooting was solely hardware-focused. Many modern dishwashers support diagnostic software that can be accessed via manufacturer apps or USB interfaces. For example, Whirlpool models allow for remote diagnostic checks that can pinpoint error codes and system health directly from your phone. Familiarity with these tools streamlines repairs and can often point you in the right direction before calling service professionals. To maximize warranty benefits, understanding these diagnostics can be a game-changer, as outlined in our guide on diagnostics.
Scaling Your Maintenance Skills for Future Repairs
As appliances become more sophisticated, so should your toolkit and knowledge base. I predict that in the future, AI-powered diagnostic devices paired with smart home integration will become standard, making routine checks more accessible. Until then, building your skills with advanced tools like multimeters, thermal cameras, and software diagnostics will serve you well. Practice regularly, stay informed, and don’t hesitate to try the advanced tips mentioned here. For instance, testing your thermal fuse with a multimeter using the continuity test can reveal issues before a complete failure occurs—accurate tests that save you both time and expense.
How do I maintain appliance diagnostics over time?
Regularly scheduling check-ups using tools like a multimeter and thermal camera, combined with routine cleaning and software updates, ensures your dishwasher stays in top shape. Staying informed about your appliance’s diagnostic features and understanding error codes can help you catch problems early, preserving your warranty and extending the life of your unit. Remember, preventive maintenance is always cheaper and less stressful than emergency repairs. Want to dive deeper? Visit this resource to understand when professional diagnostics are necessary. Now, get out that multimeter and see how simple maintenance can be both empowering and cost-effective!
Hidden Lessons From My Troubleshooting Journey
One of the biggest revelations I had was realizing that hardware often hides subtle signals of failure that simple resets can’t fix. For example, a faint blinking LED or a slow response can be clues pointing to deeper issues, prompting me to dig further rather than jumping to replacement. Additionally, I learned that understanding the interconnectedness of components—like how a faulty control board can mislead diagnostics—saves time and prevents unnecessary part swaps. Sometimes, patience and a systematic approach reveal small faults—like a loose wire—that are easy to overlook but crucial for restoring full functionality.
Another lightbulb moment was that diagnostics aren’t just about fixing the current problem but about preserving warranties. Misdiagnosing and attempting superficial repairs can void your warranty, leading to higher costs down the line. Embracing thorough diagnostics means you’re more empowered, saving money and extending your appliance’s lifespan.
My Go-To Tools and Reference Guides
Over time, I’ve come to trust a handful of tools and resources that truly make a difference. First, a high-quality multimeter, like the simple continuity tester, helps me quickly verify electrical paths without guesswork. Second, infrared cameras such as the thermal imaging device reveal hidden heat inconsistencies, pinpointing faulty heating elements or leaks before they cause damage. Additionally, trusted online guides like these diagnostic resources help me interpret error codes accurately and avoid costly misdiagnoses.
Finally, I recommend keeping a well-organized manual or digital record of your appliance’s service history. It not only speeds up troubleshooting but also provides valuable evidence if warranty warranties or insurance claims become necessary.
Fuel Your Confidence and Keep Moving Forward
Repairing your dishwasher might seem daunting at first, but with the right mindset and tools, it becomes an empowering experience. Every successful diagnosis boosts your confidence and deepens your understanding of your appliance’s inner workings. Remember, complex problems often have simple solutions—patience and systematic troubleshooting are your best allies. So, don’t hesitate to explore new techniques, ask questions, and share your journey. Taking control of your appliance repairs today ensures smooth operation tomorrow. Ready to make diagnostics a part of your routine? Dive into our comprehensive guide on diagnostics and start mastering your dishwasher maintenance now. Tell me: Have you ever uncovered an unexpected fix that turned out to be a simple wire or connector? Share your story below!