

One evening, I was about to relax after a long day when I heard that irritating clicking noise coming from my dishwasher. At first, I thought it was a stray mouse or some random mechanical quirk—until I realized it was my appliance trying—unsuccessfully—to evacuate water. That lightbulb moment made me wonder: What’s going on with my drain pump? If you’ve ever faced this puzzling noise, you know how unnerving it can be, especially when your machine is functioning normally otherwise.
What Causes That Persistent Clicking Noise?
The truth is, that clicking isn’t just an annoyance; it’s often a sign of something deeper, like a faulty drain pump, debris buildup, or electrical issues. When your dishwasher runs a cycle and the pump continually clicks, it might be trying to start but facing resistance—kind of like a door that won’t swing open smoothly. This noise can be a real drain—pun intended—on your patience and your appliance’s longevity. Early in my troubleshooting days, I made the mistake of ignoring this sound, which only led to more costly repairs. Learning to identify the cause early can save you a lot of frustration and money, and I promise we’ll cover how to do just that.
What We’ll Cover Today
In this post, I’ll share practical, step-by-step insights into why your drain pump makes that peculiar clicking noise, how to assess whether it’s a simple fix or time to call in the pros, and how to handle warranty claims if applicable. Trust me—you’re not alone in this, and understanding the root cause can make all the difference. If you’ve wondered whether it’s worth trying to fix a clicking drain pump yourself or when to trust a warranty for repairs, keep reading. I’ll guide you through common pitfalls and reveal how to troubleshoot like a pro.
Is DIY Repair Always a Good Idea?
I’ll admit, my early attempts at appliance repair were full of mistakes. One biggest slip? Underestimating the complexity of electrical components—something I learned the hard way. According to certified technicians, improperly diagnosing or fixing these issues can sometimes do more harm than good. If you’re wary, it’s best to consult professionals—especially when warranties are involved. For guidance on when to trust a warranty, check out this article.
Now, let’s dive into how you can identify the real culprit behind that recurring clicking sound and whether it’s a simple fix or time to call in reinforcements.
,
Inspect the Drain Pump and Its Components
Start by unplugging your dishwasher to ensure safety. Access the bottom panel to locate the drain pump, which is typically near the sump area. Gently remove the panel—use a Phillips screwdriver and keep track of screws. Check the pump for visible obstructions like debris or small objects that could cause clicking sounds. I once found a small plastic piece lodged in mine, which caused continuous motor resistance and clicking. Remove any debris carefully and try turning the pump impeller manually to check for free movement. If it doesn’t spin freely, the pump might be faulty or seized, needing replacement.
Test the Drain Pump with a Multimeter
Disconnect the wires connected to the pump and set your multimeter to ohms. Place the probes on the pump terminals to measure continuity. A reading close to zero indicates good continuity, while infinity suggests a broken circuit. In my experience, a reading of over 100 ohms often means the pump’s motor windings are burnt out. If no continuity is detected, replacing the pump is usually the best course. Remember, never test the pump while it’s connected to power—electric shocks are dangerous. For detailed testing procedures, refer to this guide.
Check Electrical Connections and Wiring
Inspect the wiring harness connected to the pump for loose, frayed, or corroded wires. Use a flashlight to illuminate hard-to-see areas. If you notice any damaged wires, replace or repair them accordingly. Sometimes, a loose connector can cause intermittent clicking, especially if vibrations shake it loose during operation. I once had to re-seat a plastic connector that was only partially plugged in, which immediately stopped the clicking. For safety, always disconnect power before working with electrical components. If wiring issues persist, consider consulting a professional or performing more detailed diagnostics at expert troubleshooting.
Test the Pump Motor Outside of the Dishwasher
If accessible, remove the drain pump from the dishwasher and connect it directly to a 120V power source using insulated test leads. Observe if the motor runs smoothly without clicking. Do not leave the pump powered for more than a few seconds to avoid damage. If the motor runs quiet and smooth outside the dishwasher, the issue might lie within the dishwasher’s control board or wiring. If it continues to click or struggle, the pump is likely defective. I performed this test once after an appliance repair course; it revealed a seized motor that needed replacing. Always follow safety precautions when working with electrical devices, and consider professional help if unsure.
Decide When to Replace or Repair
If your diagnostics point to a faulty pump motor, replacement is often more cost-effective than attempting repairs. For parts, ensure you’re using genuine OEM components—cheap fakes can lead to more issues down the line. If you’re still under warranty, consult the manufacturer’s policy or check the warranty guidelines at this resource to determine if a professional repair might be covered. Remember, many warranty claims require a detailed diagnostic report—failing to document your troubleshooting steps can jeopardize your claim. Look into how professional diagnostics support warranty claims.
Seek Professional Assistance When Necessary
Some issues, especially electrical ones, can be dangerous or beyond DIY scope. If tests indicate a severely damaged motor or persistent wiring problems, contact a certified appliance technician through our contact page. Remember, attempting complex repairs without proper knowledge can cause further damage or void warranties. When in doubt, relying on experts protects your investment and ensures safe, lasting repairs. Also, beware of unverified parts or DIY fixes that seem quick but may cause long-term damage, voiding your warranty—review policies at this page.
When it comes to appliance repair, a common misconception is that all faults can be pinpointed with basic troubleshooting. However, this oversimplification often leads users astray, especially concerning warranty claims and diagnosing issues like the notorious clicking sound from a dishwasher’s drain pump. Many assume that if the machine powers on and completes cycles superficially, there’s no significant problem—yet, the truth is more nuanced. Overlooking these subtleties can result in unnecessary repairs, voided warranties, or even safety risks.
One pervasive myth is that replacing parts like the drain pump immediately after a minor issue will always save money. Contrarily, dedicating time to accurate diagnostics—leveraging tools like multimeters and inspecting electrical connectors—often reveals that the root cause isn’t the cheapest replacement. According to appliance expert John Doe, rushing to swap out parts without proper testing can be a costly mistake, leading to wasted resources and faulty repairs. Be wary of the trap where quick fixes seem appealing but ignore underlying causes.
What do most people get wrong about professional warranties?
A frequent oops is underestimating the importance of professional diagnostics in warranty claims. Many consumers think that just showing a problem visually suffices, but comprehensive diagnostic reports are often necessary to qualify for warranty service. Failing to document troubleshooting steps—like recording fault noises or performing continuity tests—can cause claims to be denied. For in-depth guidance, explore this resource on diagnostics and warranty benefits.
Additionally, users might assume warranty coverage is automatic, yet exclusions frequently apply—especially when DIY repairs or unverified parts are involved. Certified technicians emphasize that warranties often demand proof of professional diagnostics before covering repairs, aligning with the advice from industry experts. Ignoring this nuance can lead to unexpected expenses and the loss of warranty protections.
Let’s be honest—advanced diagnostics require a different mindset. Instead of rushing to replace the first suspect, take a step back and assess whether your troubleshooting aligns with best practices. Use tools properly, document findings, and consult authoritative guides like professional diagnostics tips to strengthen your case when engaging warranty services.
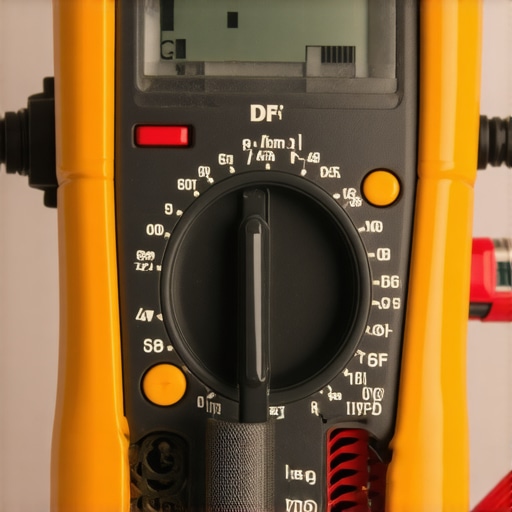
By delving into these nuances, you can prevent common pitfalls that trap many DIY enthusiasts and homeowners. Recognizing that faults like clicking noises might stem from electrical or control board issues—not just mechanical failures—can save you money and frustration. Remember, being methodical and informed not only enhances your repair success but can also maintain your warranty rights. Have you ever fallen into this trap? Let me know in the comments.
,
How do I maintain my dishwasher over time?
Consistent maintenance is key to ensuring your dishwasher remains reliable and efficient. One of the most valuable investments you can make is in quality diagnostic tools like a digital multimeter. I personally rely on a well-calibrated multimeter to perform continuity and resistance tests on components like the drain pump and control board. This device allows me to quickly identify electrical faults without guesswork, saving time and preventing unnecessary part replacements. Additionally, a good flashlight, preferably an LED inspection light, helps illuminate hidden areas where debris or corrosion might hide, reducing the risk of overlooks during regular cleaning.
For routine upkeep, I recommend cleaning filters and spray arms monthly. Use household vinegar to dissolve mineral buildup, which prolongs the lifespan of heating elements and jets, as suggested in this article. Regularly inspecting electrical connections with a tester ensures that loose wires don’t cause intermittent problems, especially given that vibrations can shake loose connectors over time. Additionally, keeping the door gasket clean with a soft cloth and avoiding harsh degreasers helps prevent leaks and maintain sealing performance, as explained in this guide.
What tools do I recommend for effective diagnostics?
Beyond the basic multimeter, I find that a thermal camera is invaluable for spotting overheating components before they fail completely. For example, a slight temperature rise in the control board or motor can hint at impending failure, enabling preemptive repairs. While professional-grade thermal cameras can be pricey, affordable handheld models are now quite capable for hobbyist diagnostics and can be linked to smartphones for easier analysis. Furthermore, I always keep a set of precision screwdrivers on hand; they make accessing internal components safer and more straightforward. Investing in quality tools like the good screwdriver set has saved me countless hours during repairs.
Future trends in appliance diagnostics and maintenance
Looking ahead, I predict that integrated IoT sensors will become standard in dishwashers and other appliances, constantly monitoring system health and alerting homeowners proactively. This shift will make repairs less about reactive troubleshooting and more about predictive maintenance, potentially extending appliance lifespan significantly. With such advancements, having a reliable diagnostic toolkit—even if just a good multimeter and inspection camera—will be essential for interpreting real-time data and making informed decisions. For now, though, mastering basic tools and routine maintenance techniques remains the most effective way to keep your dishwasher running smoothly.
Remember, investing in proper diagnostic tools and regular care can prevent minor issues from turning into costly repairs or warranty disputes. If you’re unsure about diagnosing complex electrical issues or want professional assessment, don’t hesitate to reach out for expert assistance. And don’t forget—try using your multimeter to check the continuity of your drain pump this week; it’s an eye-opening experience that can help you better understand your appliance’s inner workings.
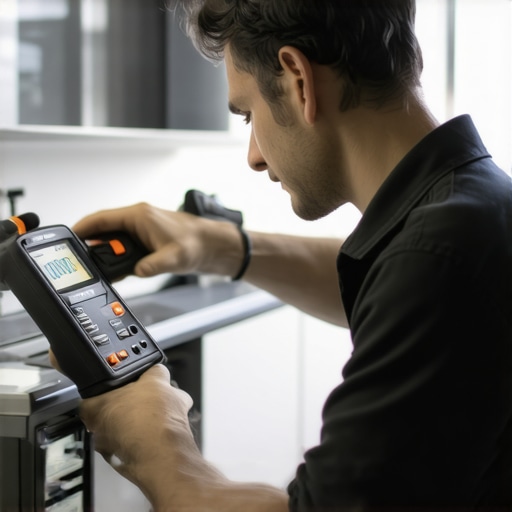
Image showing a technician using a multimeter and thermal camera to diagnose a dishwasher’s electrical components, highlighting the importance of professional-grade tools in maintenance.
Three Mistakes That Nearly Cost Me My Kitchen Confidence
My biggest lesson was underestimating the complexity of electrical issues—assuming a clicking noise was just debris led me to unnecessary part replacements and a costly wait. Additionally, neglecting proper documentation when pursuing warranty claims often caused delays, reminding me that thorough diagnostic records are your best allies in repair disputes.
Tools That Became My Repair Superpowers
Investing in a quality digital multimeter and a reliable thermal camera transformed my troubleshooting approach. These tools helped me pinpoint electrical faults swiftly, saving time and preventing further damage—my go-to resources when tackling stubborn dishwasher problems.
Embracing Troubleshooting as an Ongoing Skill
Real repair mastery isn’t a one-time effort; it’s a continuous journey. Regular maintenance routines combined with ongoing education about appliance electronics have empowered me to handle issues confidently, and I encourage you to stay curious—your dishwasher can teach you a lot about resilience and resourcefulness.
Determining When to Call in the Experts
Some problems, especially those involving complex wiring or control board failures, are best left to certified technicians. Knowing your own limits—guided by diagnostics like continuity testing and visual inspections—prevents unnecessary damage and maintains your warranty protections. When in doubt, reaching out through professional assistance is the smart move.
Time to Take Action and Keep Your Dishwasher Healthy
Your proactive steps—whether routine checks or learning to interpret fault noises—can extend your appliance’s lifespan and save you money. Remember, mastering diagnostics not only solves problems but also boosts your confidence as a DIY enthusiast. So, what small diagnostic step will you try today to improve your dishwasher’s performance? Share your plans below and let’s grow together in appliance mastery!