

I remember the first time my dishwasher started its relentless series of beeps right in the middle of dinner cleanup. That high-pitched, insistent noise felt like a personal challenge—an unexpected alert that left me scrambling, uncertain if I had broken something crucial. It was a lightbulb moment that countless homeowners myself included have faced: modern appliances are more intelligent, yes, but also more temperamental. That beeping? Typically, it’s a warning sign, but deciphering what it actually means can be bewildering.
Decoding the Beep: What’s Really Going On Inside Your Machine?
Modern dishwashers don’t just wash dishes—they keep tabs on their own health, alerting us to problems through beeps and error codes. But what exactly triggers these alarms? Often, it’s a minor issue—like a door not sealing properly or a water supply hiccup—that can escalate if ignored. I used to dismiss those early signals, thinking they were just irritating noises. However, I realized that neglecting these alerts can lead to more costly repairs or warranty voids. In fact, studies show that addressing appliance faults early can extend their lifespan significantly (source: [applianceoutletpro.com](https://applianceoutletpro.com/how-appliance-diagnostics-can-save-your-warranty-benefits)).
Have you ever experienced a situation where your dishwasher just won’t stop beeping, even after rinsing and restarting? You’re not alone, and I’ve been there. Troubleshooting these issues can seem intimidating, especially when diagnostics aren’t your forte. But worry not—what I’ve learned from firsthand experience is that most common beeping faults are fixable with some simple checks and adjustments.
In this post, I’ll guide you through the most effective steps to diagnose and fix the beeping, so you can restore calm and confidence in your kitchen. Whether it’s a sensor issue, a latching problem, or a minor electrical glitch, I’ll help you decode what your appliance is trying to tell you and how to respond effectively.
Ready to stop the noise and start fixing? Let’s dive into the practical solutions that have saved me—or prompted me to call in the pros when needed. No more guessing, just clear, actionable steps to get your dishwasher back to silent service.
Check the Door Seal and Latch
The first step is to ensure the door is firmly closed and the latch engages properly. I once had a beeping dishwasher that wouldn’t stop, and it turned out the door wasn’t fully latched due to a misaligned seal. To verify, gently open and close the door, pressing around the edges to see if the latch clicks into place. Use a small mirror or flashlight to inspect the latch for debris or damage. If the latch or seal looks worn or broken, replacing it can resolve the beeping issue, and you can find part replacement guides on sites like here.
Reset Your Dishwasher’s Control Board
Often, glitches in the control system cause persistent beeping. To reset, disconnect the power supply by unplugging the unit or switching off the circuit breaker for about 5 minutes. I did this once after a cycle completed with an error and the beeps wouldn’t stop; a quick reset cleared the fault. Restoring power reinitializes the control board and clears temporary faults. Make sure to check the reset instructions for your model, as procedures can vary.
Inspect the Water Supply and Valves
If your dishwasher thinks it’s not getting enough water, it may beep to alert you. Check the water inlet valve for blockages or kinks, as debris or scale can restrict flow. To test, turn off the machine, disconnect the inlet hose, and look for obstructions or use a multimeter to test the solenoid’s continuity (~https://applianceoutletpro.com/the-magnet-hack-for-testing-door-latch-continuity). I had a clogged inlet valve that caused constant beeping and poor cleaning; cleaning or replacing the valve solved the issue. Also, ensure the water pressure exceeds the minimum requirement; a low-pressure situation can mimic a fault.
Investigate Sensor and Float Switches
Dishwashers have sensors that detect water levels and cleanliness, which can trigger beeping if they malfunction. Locate the float switch—usually a small plastic ball or rectangle inside the tub—and make sure it moves freely. If it’s stuck or dirty, clean or unfurl it to restore proper function. Using a screwdriver handle to gently manipulate or testing with a multimeter can confirm if it’s operational (~https://applianceoutletpro.com/the-magnet-hack-for-testing-door-latch-continuity). Similarly, turbidity sensors can cause false alarms, so cleaning the filter and sensor chamber might help.
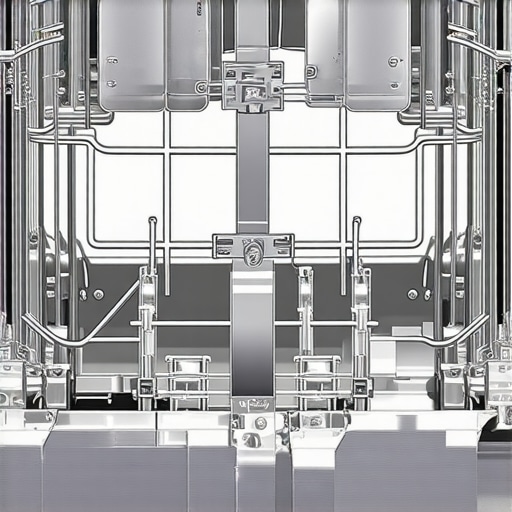
Visual aid showing dishwasher float switch movement and cleaning technique.
Clear Clogged Drainage and Filters
A clogged drain pump or filter can cause error beeps by preventing water from draining correctly. Remove the kickplate and locate the filter or drain screen, often covered with grime. Use warm soapy water and a soft brush to clean, and inspect for blockages. After cleaning, run a short cycle to test if the beeping persists. Regular maintenance like this can extend your appliance’s warranty benefits (~https://applianceoutletpro.com/how-appliance-diagnostics-can-save-your-warranty-benefits).
When to Contact a Professional
If after these steps your dishwasher still beeps incessantly, it’s time to consult an expert. Diagnosing electrical faults or replacing control boards is complex and risky without proper training. You can request professional diagnostics through companies that specialize in appliance repair, ensuring that your warranty remains intact (~https://applianceoutletpro.com/contact-us). Remember, attempting repairs beyond basic troubleshooting can void your warranty if not performed correctly.
Many homeowners believe that troubleshooting dishwasher issues is straightforward and that all repair costs are fully covered by warranties. However, this can be misleading due to nuanced factors that often go unnoticed. One prevalent misconception is that replacing a faulty part automatically qualifies for warranty coverage, but in reality, warranties frequently exclude damages caused by user neglect or unapproved third-party repairs. According to experts at appliance diagnostics, understanding your warranty terms is crucial to avoid unexpected out-of-pocket expenses.
Another myth is that all error codes indicate a hardware failure requiring professional repair. In fact, some codes are false alarms, triggered by minor issues like clogged filters or misaligned components, which homeowners can often fix themselves. Overlooking these nuances may lead to unnecessary service calls, increasing costs and extending downtime. Recognizing the difference between simple fixes and genuine faults is essential; detailed guidance can be found in expert troubleshooting tips.
A common trap is to ignore early warning signs, assuming they’re inconsequential. This is risky because small faults—such as a slightly misaligned door latch or minor sensor glitches—can escalate into major breakdowns if ignored. Skilled technicians know that catching these issues early, through proper diagnostics, can save significant money and prolong appliance lifespan. The top signs for professional diagnostics provide valuable insights.
For advanced users, understanding the sophisticated nature of certain error detection systems can be enlightening. Modern dishwashers utilize sensors and control algorithms that may malfunction due to environmental factors like hard water buildup or electrical interference. These issues are often misdiagnosed as hardware failures, but a deeper analysis reveals underlying causes. Improving your diagnostic skills enables more accurate repairs.
Be cautious to avoid the trap of over-reliance on generic troubleshooting guides that lack specifics for your model. Each appliance can have unique quirks, and blindly replacing parts without proper testing can void warranties or lead to wasted expenses. Instead, consult detailed diagnostic procedures tailored for your dishwasher, as outlined in professional diagnostics. Remember, a little knowledge combined with precise testing methods is your best defense against costly mistakes.
Have you ever fallen into this trap? Let me know in the comments.
Prioritizing Routine Checks for Longevity
Keeping your dishwasher running smoothly over the years hinges on consistent maintenance. I swear by using a high-quality digital multimeter to test electrical continuity—this practice helps me quickly identify issues with control boards or sensors before they escalate. Regularly inspecting and cleaning components like filters and spray arms with dedicated tools extends their lifespan and ensures optimal performance, reducing costly repairs down the line.
Smart Tools for Precision Diagnostics
One tool I find invaluable is a dedicated ultrasonic cleaner, which effectively removes stubborn scale and debris from spray arms and filters—something simple household items can’t match. Paired with a reliable infrared thermometer, I can monitor heating element temperatures during cycles, catching anomalies early. These precise diagnostics prevent minor issues from becoming major failures, often saving me from calling a technician.
How do I maintain diagnostic accuracy over time?
Staying ahead involves regularly updating your knowledge and tools. Software-based diagnostic apps tailored to specific dishwasher brands are emerging, providing step-by-step troubleshooting and firmware updates. Investing in a good-quality USB diagnostic interface compatible with your appliance can give you real-time data and facilitate firmware resets when necessary. As appliances evolve, integrating these technological aids will become crucial for proactive maintenance—predicting breakdowns before they happen, rather than just reacting to them. Looking ahead, I predict smart diagnostics and IoT-enabled appliances will seamlessly notify us of issues, even suggesting fixes via mobile apps, revolutionizing appliance longevity.
Long-Term Benefits of Proper Maintenance
Consistently applying these tools and practices not only prevents unexpected breakdowns but also preserves your appliance’s warranty coverage. Many warranties require documented routine upkeep—keeping records of inspections and part replacements can be vital if a claim arises. To stay informed about the latest techniques, I regularly consult expert guides like these troubleshooting tips.
Don’t Forget the Final Step
If you haven’t tried using a multimeter to verify the thermistor’s resistance or to test control board circuits recently, I recommend doing so now. These steps are simple yet powerful for verifying core components. For detailed guidance, check out the comprehensive troubleshooting articles shared earlier. Incorporating these precise diagnostic practices will empower you to maintain your dishwasher well beyond its warranty period, ensuring reliable service for years to come.
The Hardest Lesson I Learned About dishwasher,diagnostics,warranty,appliance repair
One of my biggest takeaways was realizing that not every beeping sound indicates a catastrophic failure; sometimes, it’s a tiny sensor misread or a forgotten reset that causes a mountain of anxiety. Early in my repair journey, I underestimated the value of thorough diagnostics, assuming that all issues were hardware-related. That misconception almost led me to replace parts unnecessarily, risking warranty voids and wasted money.
3 Myths About dishwasher,diagnostics,warranty,appliance repair That Held Me Back
For years, I believed that DIY fixes would always void warranty coverage or that error codes were foolproof indicators of broken parts. These myths delayed my ability to troubleshoot effectively, forcing costly professional calls. When I learned that many issues stem from simple sensor or electrical glitches, I realized the importance of understanding your machine’s diagnostic system and warranty terms.
What Experts Won’t Tell You About dishwasher,diagnostics,warranty,appliance repair
Most technicians know that a significant part of their job involves interpreting error codes and understanding warranty nuances. What’s less obvious is how crucial regular maintenance and early diagnostics are for prolonging appliance life and ensuring warranty coverage. Experts often recommend adopting a proactive approach—using tools like multimeters or firmware updates—to stay ahead of potential failures, rather than waiting for a breakdown to strike.
My Essential Toolkit for dishwasher,diagnostics,warranty,appliance repair
Over time, I’ve come to rely on a few tools that make diagnostics straightforward: a good-quality multimeter for electrical testing, a smartphone app that interfaces with certain smart models, and a clean, organized workspace. These allow me to identify issues like a failing thermistor or a clogged inlet valve quickly. I trust these because they’ve saved me hours of guessing and trips to the repair store, keeping my appliances within warranty and out of landfills.
Where to Go from Here
If you’re serious about mastering dishwasher diagnostics and understanding your warranty coverage, start by familiarizing yourself with your model’s error codes and recommended maintenance routines. Document your repairs and keep records of parts replaced—this can be invaluable if warranty disputes arise. Consider investing in diagnostic tools and staying updated with online tutorials from trusted sources like expert troubleshooting guides. Empowerment begins with knowledge, and every successful fix adds to your confidence and long-term savings.
Don’t Be Afraid to Start Your Repair Adventure
Handling appliance issues can seem daunting, but with the right mindset and a few essential tools, you’re capable of tackling many problems yourself. Remember, each troubleshooting step you master not only saves money but also deepens your understanding of how your dishwasher operates. So, next time you hear those persistent beeps, you’ll approach them as clues rather than obstacles. Dive in, learn something new, and enjoy the satisfaction of keeping your appliance—and your warranty—intact.