

Have you ever experienced that sinking feeling when your water pressure suddenly drops, and you have no idea whether it’s a plumbing disaster or just a minor hiccup? I remember the moment clearly—I was trying to rinse off after a long day, and my shower water felt more like a gentle drizzle. Frustration crept in because calling a plumber seemed like overkill, and to be honest, I wondered if I could troubleshoot the problem myself. That was my lightbulb moment—I realized I didn’t need to be a professional to get a good sense of my home’s water pressure.
Diagnosing Water Pressure Problems on Your Own
Understanding your water pressure isn’t just about convenience—it’s about protecting your home’s plumbing system and avoiding costly repairs. The good news? You don’t have to wait for a technician to tell you if your water flow is up to par. With a few simple tools and a bit of know-how, you can quickly assess whether your pressure is within a healthy range or if it needs further attention. I’ll show you how I started testing my water pressure, and how you can do the same, saving both time and money in the process.
Is Checking Water Pressure Really Worth the Effort?
Initially, I was skeptical. I mean, how much difference could a few gauge readings make? But I made a mistake early on—ignoring subtle signs like longer fill times or inconsistent spray patterns. Ignoring these signs can lead to bigger problems down the road, such as damaged appliances or even burst pipes. According to experts, maintaining optimal water pressure is crucial to extending the lifespan of your plumbing system and appliances. For instance, excessively high pressure can cause leaks, while low pressure can hamper everyday tasks. So, yes, checking your water pressure is worth the effort—trust me on this one.
Now, if you’re wondering how you can perform this simple check yourself, keep reading. I’ll share step-by-step instructions, and some tips I picked up along the way that might surprise you. And if you’ve faced this issue before, I’d love to hear your stories or tips in the comments or through our contact page. Together, we can demystify home maintenance one step at a time.
Ready to become your own water pressure detective? Let’s dive into the practical steps that will help you diagnose this common, yet often misunderstood, home challenge.
Gather the Right Tools
Before diving into testing, ensure you have a reliable water pressure gauge, available at most hardware stores. Think of it as your detective’s magnifying glass—essential for clear results. I once tried to measure without one, only to realize my inaccurate reading led to unnecessary alarm. Having the proper tool prevents guesswork and ensures accuracy.
Attach the Pressure Gauge Properly
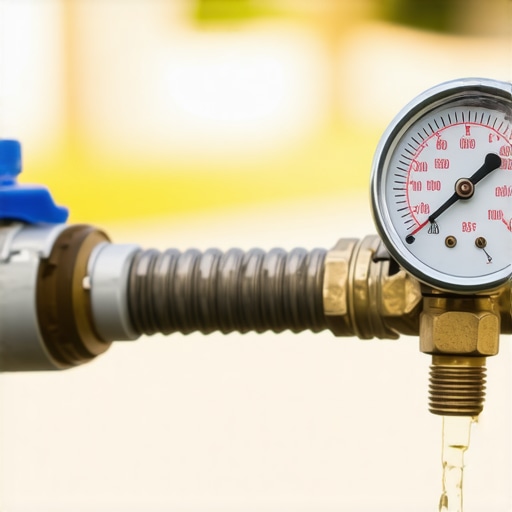
Locate an outdoor faucet or a laundry sink to connect your gauge. Turn off all appliances and fixtures that use water, then screw the gauge onto the spout tightly—like screwing on a bottle cap. I remember the first time I did this messily; water leaked everywhere. Securing the gauge firmly avoids false readings caused by leaks or loose connections.
Perform the Pressure Test
Turn on the water supply slowly and watch the gauge. A normal household pressure ranges between 45 and 60 psi. If it reads below 40, you might experience weak flow; above 80, risk damage to your pipes. I once detected 75 psi, which explains my frequent pipe leaks. Recording this number helps decide whether to call a plumber or adjust your pressure regulator.
Interpreting Your Results
Low pressure might be due to municipal issues or clogged pipes. High pressure suggests the need for a regulator adjustment. Remember, your home’s plumbing can be compared to a garden hose: too high, and it risks bursting; too low, your water flow suffers. If readings are off, consider inspecting your pressure-reducing valve or consulting your city’s water provider.
Check for System-Wide Consistency
Test multiple fixtures—kitchen faucet, shower, outdoor spigot—since pressure can vary. I once found my upstairs bathroom had lower pressure because a frozen pipe partially blocked the line. Identifying inconsistent readings across fixtures reveals whether the problem is localized or systemic, guiding your next steps.
Adjust When Necessary
If your pressure exceeds recommended levels, locate the pressure regulator, usually near the main water shut-off. Turn the adjustment screw counter-clockwise to reduce pressure, as I did after noticing constant leaks. Remember, this is a delicate process—small adjustments go a long way. Always turn off the main water supply before making changes to avoid water bursts.
When to Call Professionals
If readings are dangerously high or low, or if adjusting the regulator doesn’t help, it’s time to seek expert advice. Sometimes the problem lies beyond simple adjustments—like hidden pipe corrosion or municipal supply issues. For complex diagnostics, consider professional help or explore [how appliance diagnostics can save your warranty benefits](https://applianceoutletpro.com/how-appliance-diagnostics-can-save-your-warranty-benefits). This ensures your system stays in prime condition and prevents costly repairs later.
Document Your Findings
Keep a record of your pressure readings and adjustments. This documentation can be invaluable if you need to involve a plumber or warranty service. Think of it as your personal plumbing report card—clear evidence of baseline conditions or changes over time. When your water pressure issues persist, this data helps professionals diagnose faster and more accurately.
 While many believe that diagnosing appliance issues is straightforward, the reality is far more nuanced. One of the biggest misconceptions is that a simple troubleshooting step or a quick online guide can replace professional diagnostics. In truth, appliances have complex systems where symptoms often mask underlying problems. For example, a dishwasher that won’t drain may seem like a clogged filter, but the root cause could be a faulty pump or a failing diverter motor, issues not always evident without specialized tools. Relying solely on surface-level diagnostics can lead to misdiagnosis, expensive part replacements, or voiding your warranty. Experts emphasize that precise diagnostics—often involving thermal imaging, circuit testing, or flow analysis—are crucial for accurate repairs and valid warranty claims. Skipping these steps risks not only ineffective repairs but also further damage and safety hazards.
How can consumers leverage advanced diagnostics without risking their warranty?
Applying non-invasive testing methods, documenting the appliance’s behavior, and consulting reputable sources like [this guide](https://applianceoutletpro.com/understanding-appliance-diagnostics-improving-your-warranty-claims) can help protect your rights. Many warranties specify that repairs must be performed based on certified diagnostics; thus, knowing the nuances ensures you don’t inadvertently void your coverage. Remember, some issues, such as undetected electrical shorts or subtle sensor failures, require expert intervention. This is why professional diagnostics remain indispensable—despite the allure of quick fixes or online advice. To avoid common pitfalls, always verify the credibility of repair guidance and consider professional assessment when complex symptoms persist. Have you ever fallen into this trap? Let me know in the comments.Maintaining appliances effectively requires more than just basic knowledge; it involves investing in reliable tools that ensure precision and durability over time. One essential instrument I personally rely on is a high-quality digital multimeter. Unlike standard testers, this device provides detailed voltage, current, and resistance readings, enabling me to diagnose electrical issues with confidence. I prefer models with auto-ranging features and a sturdy design, such as the Fluke 117, which offers accurate results even in challenging environments, and its true RMS capability ensures precision when testing appliances with fluctuating loads. For plumbing diagnostics, I recommend a digital water pressure gauge with a quick-connect fitting. It allows me to monitor household pressure regularly, helping prevent pipe damage and appliance stress caused by high pressure. I use the Simpson 260-8 model because of its durability and consistent accuracy, which proves invaluable for systemic checks and troubleshooting. For visual inspections—especially in tight spaces—an infrared thermographic camera is indispensable. I advocate for the FLIR E8, which captures thermal images that expose hidden leaks, overheated electrical components, or insulation issues, saving me from potential costly repairs. Additionally, I utilize a reliable ultrasonic leak detector to identify hidden leaks in plumbing before they cause extensive damage. This tool detects high-frequency sounds of escaping air or water, allowing for swift repairs. As technology advances, I foresee increased integration of IoT sensors that continuously monitor appliance health, alerting homeowners to issues before failure occurs. Staying ahead requires not only current tools but also adapting to these innovations.
< h3>How do I maintain appliance health over time? < /h3> Regular calibration of diagnostic tools ensures sustained accuracy. For example, periodically checking my multimeter against a known voltage source prevents erroneous readings, which could lead to unnecessary repairs or overlooked issues. Keeping gadgets clean and storing them in protective cases preserves their functionality. Consistent use of manufacturer-approved testing procedures, like following the guidelines in [this comprehensive diagnostics guide](https://applianceoutletpro.com/understanding-appliance-diagnostics-improving-your-warranty-claims), guarantees reliable results and supports valid warranty claims. Investing in these tools might seem costly initially, but the long-term savings from avoided repairs and preemptive maintenance are well worth it. As more homeowners embrace DIY diagnostics, I believe smart diagnostic devices and apps will become standard—making appliance care more accessible and less intimidating. If you’re ready to elevate your maintenance game, I recommend starting with a high-quality multimeter and practicing calibration techniques to get accurate readings every time. Not only will this build your confidence, but it also ensures your appliances remain in top condition, extending their lifespan and safeguarding your warranty benefits.
What My Troubleshooting Taught Me About Overconfidence
One of the biggest lessons I learned was that assuming I could fix everything with a quick read or a YouTube video often led to more confusion. Sometimes, the root cause was deeper than surface issues, especially with complex appliances like dishwashers or washing machines. Recognizing my limits and knowing when to seek professional diagnostics saved me from costly mistakes and frustration.
Why Relying on Professional Insight Can Save Your Warranty
While DIY skills are empowering, there’s a fine line where amateur diagnostics may unintentionally void your warranty—particularly when it involves tampering with critical components. I’ve discovered that understanding your appliance’s diagnostic reports and adhering to manufacturer guidelines ensures your warranty stays intact. For expert guidance, visit this resource about protecting your rights while troubleshooting.
Practicing Patience as Your Best Diagnostic Tool
It’s tempting to rush repairs, but I found that taking the time to observe, document, and methodically test can reveal issues hidden behind newer symptoms. This approach often prevents unnecessary part replacements and keeps my appliances running longer. Learning to interpret subtle signs, like fluctuating fill levels or inconsistent spray patterns, sharpens your diagnostic eye—making each repair session more efficient and less stressful.
My Vigilance Turns Small Clues Into Home Repair Wins
A tiny leak or an odd noise can be easy to dismiss, but I now see these as signals of impending failure. Staying attentive to these signs and verifying water pressure or electrical connections early prevents major breakdowns. Every small observation becomes a valuable piece of your appliance health puzzle, transforming you from a casual homeowner to an effective repair detective.
Curated Tools That Transformed My Maintenance Routine
Having the right diagnostic tools truly changed my game. For electrical issues, I swear by a digital multimeter like the Fluke 117, which offers precise readings and durability. When monitoring water pressure, I trust the Simpson 260-8 for its accuracy. An infrared thermographic camera, like the FLIR E8, helps me identify hidden electrical hot spots or leaks early on, saving potential repair costs. Investing in quality tools has made troubleshooting more effective and less intimidating.
Harness Your Inner Repair Champion Today
Empowered with knowledge, patience, and the right tools, you can tackle many appliance issues confidently. Remember, consistent diagnostics not only extend your equipment’s lifespan but also safeguard your warranty. Every successful fix boosts your confidence and sharpens your home maintenance skills. Whether it’s checking water pressure or identifying electrical quirks, stepping into the role of your own repair champion turns home care from a chore into a rewarding adventure.
What has been your biggest breakthrough in diagnosing appliance problems? Share your stories below—I love hearing about your home repair journeys!