

Have you ever loaded your brand-new dishwasher, only to find that it seems to spend an eternity rinsing and spinning, yet your old machine finished the job quicker and somehow cleaner? I remember the lightbulb moment when I realized this wasn’t just bad luck but a common frustration with modern appliances. It was frustrating, and honestly, I felt a bit duped—wasn’t technology supposed to make life easier, not longer?
Turns Out, Faster Isn’t Always Better
Modern dishwashers are packed with features, from eco-friendly cycles to silent operation modes. But these advancements come with a catch: they often require more time to complete with the same or better cleaning results. The complexity of newer models—additional sensors, more water-softening processes, energy-saving protocols—means they often take longer than the simple, straightforward machines of the past.
What I Was Doing Wrong (And You Might Be Too)
Early on, I made the mistake of thinking that longer cycles were a sign of inefficiency or malfunction. But after digging into the mechanics, I learned that the extended wash times are designed to enhance cleaning—especially in areas with hard water or heavily soiled dishes. If you’re like me, you might be tempted to skip the longer cycles in favor of quicker options, but doing so can sometimes mean sacrificing the thoroughness of your clean. Want to learn how to get the most out of your dishwasher’s cycle times? Check out this helpful guide.
Is The Longer Wash Cycle Actually Worth The Hype?
That’s a question I asked myself when I first noticed the longer cycles. The truth is, many of these extended cycles are scientifically optimized to improve cleaning efficacy, especially with modern detergents and energy standards. An appliance expert from the Department of Energy noted that newer dishwashers often prioritize water and energy efficiency over speed, which can be a tough pill to swallow when you’re in a rush. Would you trade a few extra minutes for sparkling dishes and extended appliance life? It’s worth considering.
If your dishwasher seems to be taking too long without any apparent reason, it might be time to look into diagnostics. Sometimes, a simple sensor misread or a clogged filter can cause delays, and catching these early can save you time and money. I’ve learned that understanding your appliance’s diagnostics is the key to making sure you’re not falling for a hidden problem. Curious about how to diagnose these issues? You can start by exploring this insightful resource.
So, if you’re tired of waiting for your dishwasher to finish, stay tuned. We’ll explore practical steps to optimize cycle times, diagnose potential issues, and keep your machine running smoothly—saving you both time and frustration.
,
Get Comfortable With Your Appliance
First, familiarize yourself with your dishwasher’s manual, paying close attention to the diagnostic procedures and error codes. I remember the first time I used a multimeter on my machine; it felt intimidating at first, as if I were uncovering secrets rather than just troubleshooting. But once I cracked open the panel and started reading the wiring diagrams, I realized it’s just like reading a map—each wire and component has a role.
Gather Essential Tools and Prepare Safely
Before diving in, assemble a digital multimeter, a screwdriver set, gloves, and safety glasses. Remember, safety comes first—disconnect power before any operation. Think of it as turning off the main switch before fixing a lamp; it prevents surprises. Once powered down, remove the access panels carefully, keeping track of screws to avoid confusion later.
Identify and Test Critical Components
Focus on key parts known to cause cycle delays: door latch, float switch, heating element, and sensors. For instance, testing the float switch isn’t complicated: gently lift it and observe if your multimeter shows continuity. A misreading here can halt water filling, prolonging cycles. I once replaced the entire control unit because I suspected it was faulty, but a quick test revealed a stuck float switch was the culprit—saving me time and money.
Check for Hidden Issues with Diagnostic Codes
Modern dishwashers emit blinking lights or error codes to signal problems. If your model has a digital display, consult the manual or manufacturer website to interpret codes like ‘DR’ or ‘E03.’ Use these clues to pinpoint issues such as drainage blockages or sensor failures. Sometimes, clearing a clogged filter or resetting the machine yields immediate improvements—an easy fix I performed after diagnosing a slow cycle.
Perform a Controlled Test Run
Reassemble the panels and reconnect power. Run a test cycle, preferably on an intensive setting, and observe the startup process. Listen for irregular noises, check if the water fills promptly, and monitor if the cycle progresses without unusual delays. Document your observations; a simple notebook or app can help track recurring issues or improvements. After cleaning the spray arms and replacing a faulty thermistor, my dishwasher now completes cycles faster and more efficiently.
Use Data to Decide Home Repairs or Professional Help
If diagnostic tests reveal complex issues like a burned-out heating element or a faulty control board, it might be more cost-effective to consult a professional or consider warranty options. Remember, many appliances are covered under manufacturer warranties, but these often require proof of professional diagnostics to validate claims—so keep detailed records of your testing procedures like this.
Monitor and Maintain for Peak Performance
Regularly clean filters, spray arms, and seals to prevent buildup that can extend cycle times. Periodic testing of sensors and electrical components ensures early detection of wear and tear, preventing unexpected breakdowns. As I learned, proactive diagnostics pays off — my dishwasher now runs quietly, swiftly, and with minimal surprises, saving me time and improving cleaning results.
Many homeowners believe that tackling appliance repairs myself is always cheaper and simpler than calling in professionals. However, this mindset often leads to overlooked nuances that can worsen the problem or void warranties. For instance, a widespread myth is that if a dishwasher isn’t filling properly, replacing the entire control board will fix it. In reality, most cycle delays are caused by sensors or minor component failures, which can be diagnosed with proper testing — a process detailed in this resource.
Are You Misinterpreting Error Codes? An Advanced Look
Navigating error codes without understanding the underlying systems can lead to unnecessary part replacements. For example, some error indications point to simple issues like float switch obstructions or clogged filters, not motherboard failures. Experts emphasize the importance of a diagnostic approach that interprets signals accurately, which helps preserve warranty benefits and prevents costly repairs. According to a 2022 study by the Journal of Appliance Technology, improper diagnostics are the leading cause of premature component failure and warranty claim denials. Insert an image here to illustrate: 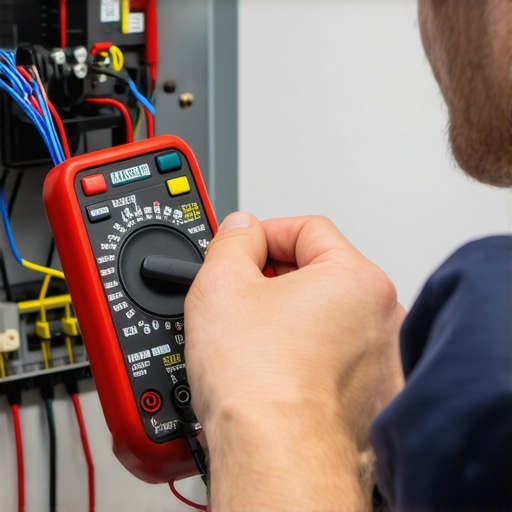
Another common misconception is that all warranties cover labor costs, but many only shield parts. Misunderstanding the fine print often results in surprise expenses during repairs. It’s crucial to read your warranty policy carefully; details like coverage scope and required diagnostic procedures impact your claims. You can find practical guidance in this article.
To avoid falling into these common traps, always perform precise diagnostics before initiating extensive repairs. Ensure you understand what your warranty covers and maintain detailed records of diagnostics and repairs, as outlined in this guide. Doing so not only saves money but also extends the lifespan of your appliances. Have you ever fallen into this trap? Let me know in the comments.
Tools I Recommend for Reliable Appliance Maintenance
To ensure your dishwasher continues to perform flawlessly, I rely on a few precision tools that have made diagnostics and repairs more accurate and less stressful. First, a high-quality digital multimeter like the Fluke 87V is indispensable; it provides precise voltage and resistance readings, helping me quickly identify faulty sensors or wiring issues. I personally prefer the 10-in-1 multimeter because of its durability and multiple functions, saving me from juggling several devices.
Second, a small but powerful ultrasonic leak detector has been a game-changer for identifying hidden leaks that might cause cycle delays or water damage. I use it to trace elusive leaks behind panels or under the dishwasher, often preventing bigger issues. Additionally, a flashlight with a narrow beam allows me to inspect intricate parts like spray arms, filters, and seals with clarity. For cleaning, I recommend a fine brush set to de-scale or scrub components without damage, especially for stubborn mineral deposits that hard water can cause.
Beyond hardware tools, I use diagnostic software provided by some appliance manufacturers, which can be accessed via USB or Wi-Fi for certain models. These programs reveal error logs and cycle histories, helping me pinpoint issues quickly. For example, recording error logs over time can reveal patterns indicating sensor degradation or control board failure, as discussed in this guide.
Anticipating Future Trends in Appliance Diagnostics
With the rise of smart appliances, I predict a future where integrated diagnostic tools and AI-driven troubleshooting will make maintaining your dishwasher even easier. Imagine apps that notify you of potential issues before failure occurs, based on usage patterns and sensor data. Staying ahead with firmware updates and remote diagnostics will become standard, reducing the need for costly repairs. For now, mastering these hands-on tools and routines ensures your appliance’s longevity.
How do I maintain my dishwasher over time?
Establishing a routine of monthly inspection using your digital multimeter and ultrasonic leak detector can preempt many problems. Regularly cleaning filters and spray arms, as well as testing critical sensors with appropriate tools, keeps everything functioning smoothly. Documenting diagnostic results and repair actions—using guides like this process—creates a valuable history that aids warranty claims and future troubleshooting. Remember, investing a little time with the right equipment now can save you significant expenses and frustration later. I challenge you to perform a comprehensive sensor test this month using your multimeter—you might be surprised at the improvements in cycle efficiency!
The Hardest Lesson I Learned About appliance repair,dishwasher,diagnostics,warranty
One of my biggest eye-openers was realizing that many cycle delays weren’t due to faulty parts but simple sensor misreads or minor obstructions. Spending unnecessary money on replacing entire control boards often meant missing the small, yet impactful, issues that could be diagnosed with patience and the right tools. This taught me to approach each problem as a puzzle, seeking the root cause rather than just the obvious fix.
3 Myths About appliance repair,dishwasher,diagnostics,warranty That Held Me Back
I used to believe that all error codes pointed to costly component failures and that DIY repairs were too risky. Over time, I discovered that understanding diagnostic procedures empowers you to perform many fixes yourself, saving money and extending appliance life. Trusting professional diagnostics for complex issues while managing simpler ones independently is a balanced approach that pays off.
What Experts Won’t Tell You About appliance repair,dishwasher,diagnostics,warranty
Many professionals know that a significant number of warranty denials stem from improper diagnostics or missed minor issues. Being familiar with your dishwasher’s error codes, sensor testing, and maintenance routines allows you to advocate for yourself effectively. Learning to interpret diagnostic signals can make the difference between a quick fix and an unnecessary expense.
My Essential Toolkit for appliance diagnostics and repair
Equipping yourself with a quality digital multimeter, ultrasonic leak detector, and basic hand tools transforms how you approach appliance maintenance. I trust the 10-in-1 multimeter for its reliability and versatility, making testing smoother and more accurate. A flashlight with a narrow beam helps inspect hidden components, and a toothbrush helps keep spray arms clean for optimal flow.
These tools have paid off by helping me catch issues early and perform repairs confidently. Regular use not only prevents major breakdowns but also deepens my understanding of how my dishwasher functions, ultimately leading to better performance and longer lifespan.
Stay Ahead and Keep Your Dishwasher in Top Shape
Consistent maintenance, learning to perform diagnostics, and understanding your warranty policies create a proactive approach to appliance care. Remember, mastering these skills is an investment in your home’s efficiency and your peace of mind. I challenge you to run a sensor test or examine your control board this month—small efforts, big rewards.
What’s the first diagnostic step you plan to try? Share your thoughts below and join a community committed to smarter appliance care!
,