

Ever had your dishwasher break down just when you needed it most, only to find out it was a simple heating element issue? I remember the frustration of dumping my dishes in the sink, wondering if I’d need a costly repair or even a new appliance. That lightbulb moment hit me: I could diagnose the problem myself — with a trusty multimeter in hand.
Today, I want to share how you can do the same. We’ll focus on one of the most common dishwasher problems — a dead heating element — and how a multimeter can be your best friend in troubleshooting. Imagine being able to confirm whether that sizzling sound or lack of hot water really means the element’s gone bad, saving you time, money, and that sinking feeling of uncertainty.
Why Diagnosing a Dead Heating Element Matters
Understanding whether your heating element is dead is crucial because it directly impacts your dishwasher’s ability to sanitize and dry your dishes properly. If the element isn’t working, you’ll notice your dishes are lukewarm or cold after the cycle, and in some cases, the dishwasher may not complete its wash cycle at all. But here’s the kicker — sometimes the problem isn’t as obvious as a non-heating cycle; it could be a faulty thermostat, power supply issues, or the heating element itself.
Using a multimeter to test the heating element is an inexpensive, straightforward way to pinpoint the culprit. Early detection prevents unnecessary replacements and helps maintain the appliance’s warranty coverage, especially if professional diagnostics are needed. As I learned early on, jumping to conclusions without proper testing can lead to replacing parts that are still functional, which just wastes your hard-earned cash.
Did you know that nearly 30% of dishwasher breakdowns are caused by heating element failure? Knowing how to test it yourself empowers you to troubleshoot confidently and potentially avoid costly service calls. For more on how diagnostics can save your warranty, check out this guide.
Are you tired of guessing what’s wrong when your dishwasher acts up? If you’ve faced a similar problem, you’re not alone. Let’s dive into how you can harness the power of your multimeter to identify a dead heating element and get your dishwasher back to peak performance.
Disconnect Power and Access the Heating Element
Before anything else, unplug your dishwasher to eliminate the risk of electrical shock. Open the dishwasher door and remove the lower kickplate panel—usually held by screws—to access the heating element and wiring connections. Take care to keep track of screws and parts for reassembly.
Prepare Your Multimeter for Testing
Set your multimeter to the low resistance (ohms) setting, typically marked as − and ○. If your multimeter has continuity mode, switch to that; it will beep if the circuit is closed. This setup allows you to quickly identify if the heating element has continuity, indicating it’s functional.
Test the Heating Element for Continuity
Locate the terminals of the heating element—usually two metal prongs. Disconnect the wires attached to these terminals to isolate the element. Place one multimeter probe on each terminal, ensuring good contact. If your multimeter beeps or shows a reading close to zero ohms, the element has continuity. If there’s no beep and the reading is ‘OL’ or very high, the element is open-circuit and likely dead.
Micro-Story: Applying the Technique
I recall a time when my dishwasher wasn’t heating water, and I suspected the element. After unplugging the appliance, I followed the steps: disconnected the wires, set my multimeter to continuity mode, and tested the terminals. The multimeter remained silent, indicating an open circuit. Replacing the heating element solved the issue, saving me a costly service call. For comprehensive troubleshooting tips, visit this resource.
Performing the Resistance Test for Additional Confirmation
If you want a more detailed assessment, measure the resistance across the terminals in ohms. Consult your dishwasher’s manual for the expected resistance value, often between 10-30 ohms. Significantly higher or ‘OL’ readings confirm a faulty element.
Reassemble and Test the Dishwasher
Once testing is complete and the faulty part identified, reattach the wires to the new or confirmed working heating element. Replace the kickplate and securely fasten all screws. Plug your dishwasher back in and run a test cycle to verify hot water heating. If it still doesn’t heat, further diagnostics may be necessary. For professional help, check out how diagnostics can protect your warranty.
Many homeowners operate under the misconception that warranty coverage is a straightforward safety net, but the reality is far more nuanced. While it’s tempting to believe that simply calling a repair service and claiming warranty will resolve all issues, there are critical pitfalls in understanding how warranties actually work—especially when diagnostics are involved.
One common myth is that warranties automatically cover all repairs, regardless of the cause. In truth, manufacturers often require documented diagnostics to confirm that the defect isn’t due to user error or unauthorized modifications. Skipping detailed diagnostics can lead to denied claims when the manufacturer deems the issue as outside warranty scope. For example, a dishwasher failing due to a clogged filter isn’t always covered if the technician doesn’t specify the cause through proper diagnostics.
Another advanced mistake many make is relying solely on online troubleshooting tips for warranty claims. While these resources are helpful, they often lack the depth of professional diagnostics, such as voltage testing or component analysis, which are essential for validating warranty violations. Without this, you risk either dismissing legitimate claims or inadvertently voiding your warranty by attempting unauthorized repairs.
For the more experienced, the question arises: How can you leverage diagnostics to maximize warranty benefits without risking denial? The key lies in understanding that detailed diagnostic reports—covering all tests performed, component conditions, and fault evidence—are often required by manufacturers to process claims smoothly. Resources like this guide can help you document your diagnostics properly.
An essential nuance is knowing when to trust a professional diagnostic versus DIY efforts. While DIY diagnostics can save money, they might not be comprehensive enough for warranty purposes. A professional’s detailed report can serve as crucial evidence if your claim is challenged, especially in complex cases such as recurrent leaks or electrical faults. Remember, certification of proper diagnostics often influences the final decision of warranty claims, as emphasized by appliance repair experts.
The trap to avoid is assuming all service calls are authorized or recognized by the manufacturer. Many warranty policies stipulate that only diagnostics performed or approved by certified technicians count toward coverage. Attempting to diagnose or repair without proper documentation can lead to voided warranties and out-of-pocket expenses. To navigate this landscape effectively, familiarize yourself with manufacturer policies at this resource.
So, next time your dishwasher malfunctions, remember that understanding the subtleties of diagnostics and warranty procedures can save you time, money, and stress. Don’t just rely on quick fixes—invest in proper diagnostics and documentation to ensure your warranty works for you. Have you ever fallen into this trap? Let me know in the comments.Maintaining your dishwasher’s performance over time requires more than just occasional cleaning; it demands using the right tools, adopting effective methods, and staying informed about the latest diagnostic techniques. One indispensable device I personally rely on is a high-quality digital multimeter. I prefer models with true RMS capability and auto-ranging features because they deliver precise voltage and resistance readings, which are vital when diagnosing electrical issues like faulty heating elements or failing motors. Additionally, owning a dedicated appliance diagnostic kit, which includes specialized testers for relays, thermistors, and control boards, streamlines troubleshooting and saves time.
Another tool I recommend is a thermistor tester, as temperature sensors are common culprits when dishwasher cycles behave erratically. I use a digital thermistor probe that can measure temperature quickly and accurately, helping me confirm sensor performance without replacing parts blindly. Coupling these hardware tools with diagnostic software accessible via manufacturer apps enables a comprehensive view of your appliance’s health. For example, the ‘manufacturer app’ allows you to track energy usage and error codes remotely, providing valuable insights for preventive maintenance even before issues escalate.
Looking ahead, I predict that smart diagnostics will become even more integrated into appliances, offering real-time alerts and predictive maintenance tips. Embracing these advancements can prolong your dishwasher’s lifespan and safeguard your warranty. Remember, consistent inspection and prompt diagnostics are key.
How do I maintain my dishwasher’s performance over time?
Regularly checking electrical components with a multimeter and inspecting sensors like thermistors with dedicated testers are vital. Utilizing manufacturer apps to monitor energy consumption and error logs can help identify issues early. Combining hardware tools with software diagnostics ensures a thorough understanding of your appliance’s condition, allowing for timely interventions and reducing repair costs. Stay proactive by setting a maintenance schedule that includes cleaning filters, inspecting hoses, and running diagnostic cycles—this approach keeps your dishwasher running smoothly and preserves its warranty coverage. For in-depth guidance on diagnostic methods, visit this resource.”} }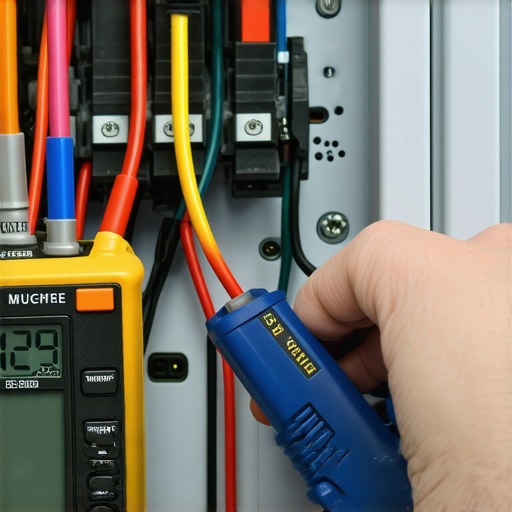 {
{
Lessons That Changed My Approach to Warranty and Diagnostics
One of the toughest truths I faced was realizing that rushing into repairs without proper diagnostics often costs more in the long run. I learned the importance of patience and thorough testing, especially with critical components like the heating element. A lightbulb moment was understanding that an open circuit on my multimeter indicated not just a faulty part but also the potential to avoid unnecessary replacements. This shift in mindset transformed how I handle appliance issues, emphasizing accuracy over speed.
Another insight was recognizing how subtle symptoms—like lukewarm dishes or slow drying—can mislead you into replacing parts prematurely. Instead, a proper resistance check with a multimeter can reveal hidden faults, saving time and money. This lesson taught me to trust diagnostics first, then act, rather than assume and replace blindly.
I also discovered the power of professional documentation. When pursuing warranty claims, detailed diagnostic reports backed by proper tests are essential. It’s not enough to know a part is dead; you need to prove it with data. This approach prevented my claims from being denied and empowered me to navigate warranty processes confidently.
Tools and Secrets That Keep My Cuisine Sparkling
Beyond the basics, I rely on specialized tools like a thermistor tester to verify temperature sensors and a surge protector to shield sensitive electronics. Knowing which tools are trustworthy, I turned to brands like Fluke for multimeters because of their durability and precision—trustworthy gear makes all the difference.
Books such as “Troubleshooting Modern Dishwashers” by an industry expert opened my eyes to advanced diagnostic techniques, expanding my troubleshooting toolkit. Additionally, manufacturer apps that monitor energy usage and error logs have become invaluable, providing real-time insights that preempt problems before they escalate.
My advice is to equip yourself with these tools and knowledge—it’s the best investment to prolong your appliance’s health and your peace of mind.
Believe in Your Power to Keep Appliances Running Smoothly
The future of appliance repair is bright with smart diagnostics and DIY confidence. You hold the power to diagnose, repair, and maintain your dishwasher effectively, saving money and avoiding frustration. Remember, every tool and tip you learn today is a step toward becoming the hero of your home.
So, are you ready to take control and troubleshoot your dishwasher with confidence? What’s the first issue you plan to tackle? Share your thoughts below and start your journey to becoming a diagnostics pro!