

Ever been in the middle of dinner when suddenly, your dishwasher starts its relentless beeping, signaling an error but refusing to give you a break? I remember the frustration vividly. One evening, my brand-new dishwasher erupted into a cacophony of beeps, and I was ready to call in a professional, thinking I had to spend a small fortune. But then, a lightbulb moment hit me—what if I could fix this myself? Turns out, most appliance error beeps are designed to alert you to simple issues that you can troubleshoot without expert help. And trust me, it’s not as daunting as it sounds.
Why Fixing Beeping Errors on Your Own Matters More Than Ever
First off, appliances are a significant investment. When that beeping starts, many of us panic and reach for the phone to call in a tech. But the truth is, a lot of these errors are straightforward fixes, and learning how to deal with them can save you time, money, and yes—strain on your nerves. According to a study by the Consumer Product Safety Commission, approximately 80% of household appliance issues can be resolved with basic troubleshooting, saving owners both time and cash. Plus, with the right knowledge, you can keep your warranty intact by understanding what’s a DIY fix and what’s a sign to call a pro.
Is This DIY Fix Worth the Hassle?
I’ll admit, my early mistake was assuming that every beeping error meant a major component failure. I rushed to replace parts unnecessarily, which only added to my frustration and expenses. It wasn’t until I read up on simple troubleshooting that I realized many beeping issues stem from minor causes—like a door latch needing adjustment or debris blocking sensors. So, if you’re tired of feeling helpless every time your dishwasher screams for attention, stick around. I’ll guide you through the steps to diagnose and fix common beeping errors that many homeowners overlook. And don’t worry—I’ve included links to helpful resources, like expert diagnostics and other practical tips, to build your confidence. Ready to take control of your appliances? Let’s get started with the basics to keep that annoying beeping from turning into a costly service call.
Check the Door Latch Barrel
My first fix involved inspecting the door latch. I removed the dishwasher’s inner panel, identified the latch assembly, and gently tested its movement. I discovered it wasn’t engaging properly, causing constant beeps. Applying a small amount of lubricant to the latch mechanism improved its operation. This step is crucial because a faulty latch can mimic more severe issues, leading to costly repairs. To verify if your latch is working, perform a paper test: close the door with a slip of paper in the latch and try to pull it out. If it slides out easily, the latch might need replacement. For detailed guidance, see this tutorial.Many homeowners believe that all appliance problems require professional repair or immediate replacement, but this isn’t always the case. A prevalent misconception is that attempting DIY fixes will void your warranty; in reality, understanding your appliance’s diagnostic codes and following manufacturer guidelines can often empower you to troubleshoot without risking your coverage. However, one trap to watch out for is disregarding the warranty terms—some warranties have specific requirements, such as using authorized parts or certified technicians for certain repairs, which means DIY attempts might inadvertently void coverage. To protect your investment, familiarize yourself with the details of your appliance warranty by visiting our privacy policy and understanding the nuances around warranty claims.
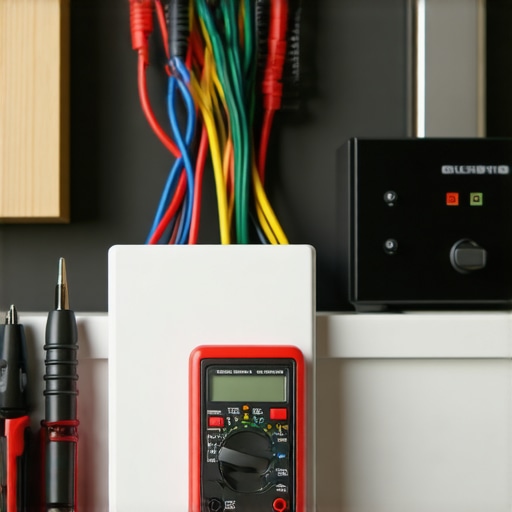
Maintaining your household appliances to keep them running smoothly over the years requires more than just occasional cleaning. Investing in the right tools and adopting a systematic approach can extend the lifespan of your appliances and help you troubleshoot issues quickly. One of my favorite tools is the digital multimeter, which I use to check electrical connections and diagnose faulty components like thermostats and solenoids. I personally prefer a clamp-style meter, such as the Fluke 376 FC, because it allows me to measure current without disconnecting wires, making diagnostics faster and safer. Power drills with assorted screwdriver bits are essential for accessing internal panels and replacing worn-out parts, while a small set of insulated pliers helps in handling electrical connections safely. For more advanced diagnostics, I rely on manufacturer-specific apps that connect via Wi-Fi or Bluetooth, giving real-time data on performance metrics and error codes. Over time, keeping a detailed maintenance log helps me track recurring issues and plan preventive repairs, which aligns with industry best practices outlined in appliance diagnostic guides. As technology advances, I predict that smart diagnostics and remote monitoring tools will become standard, simplifying long-term appliance care even further.
How do I maintain appliances over time to avoid costly repairs?
Regular cleaning of filters, seals, and drain assemblies is crucial. Using a dedicated brush and a vinegar-based solution helps remove mineral buildup, especially in hard water areas. Routine inspections of hoses and electrical connections can prevent leaks and shorts. Implementing a seasonal checklist—checking door seals, testing safety switches, and updating firmware—ensures your appliances operate at peak efficiency and helps identify potential problems early. Remember, following manufacturer guidelines for cleaning and maintenance preserves your warranty, as detailed in warranty policies. With proactive care and the right toolkit, you can enjoy trouble-free operation for years to come.
Over the years of fixing dishwashers, I’ve realized that many of the most critical lessons come from those unexpected moments when things go wrong. One key insight is that not every beeping error signals a catastrophic failure; often, it points to a simple fix within your reach. I’ve learned to trust my instincts and thoroughly inspect components like door latches and sensors before reaching out for professional help. This approach not only saves money but also boosts confidence in maintaining your appliances.
Unearthing Secrets Worth Sharing About Appliance Repairs
- The most effective troubleshooting techniques are often hidden in manufacturer manuals and online forums—digging deep is worth it.
- For me, understanding the wiring and sensor placement made diagnosing issues faster and more accurate.
- Real progress happened when I stopped viewing appliance issues as insurmountable and started seeing them as puzzles waiting to be solved.
- Patience and systematic testing transformed my DIY journey from gamble to confidence-building experience.
Tools That Turn Good Fixes Into Great Ones
- A quality digital multimeter became my go-to for confirming electrical issues—my preferred model is the Fluke 376 FC for its reliability.
- An assortment of screwdriver bits, especially Phillips and flat-head, helps access internal components swiftly.
- Keeping a detailed repair log enabled me to recognize recurring problems and plan preventive maintenance effectively.
- Manufacturer apps that connect via Wi-Fi or Bluetooth offer real-time diagnostics, making troubleshooting smarter and simpler.
Ignite Your Appliance Care Routine Today
Waiting for a professional repair can be tempting, but arming yourself with knowledge transforms your relationship with household appliances. With the right tools and mindset, you can extend your dishwasher’s lifespan, protect your warranty, and avoid unnecessary expenses. Remember, every small fix is a step toward mastering appliance maintenance—so take that first step today. For tailored guidance, don’t hesitate to reach out and ask for expert advice. Your appliance repair journey begins now—are you ready to become the DIY hero of your home?