

It was a typical Saturday morning when I opened the dishwasher and immediately noticed something was off—a sagging, wobbling top rack threatening to fall at the slightest nudge. I had just ignored it for weeks, telling myself it was a minor issue, but today, it finally crossed the line from an annoyance to a real concern. Have you ever experienced that sinking feeling when your dishwasher rack starts to tilt crazy? Trust me, you’re not alone, and I know that helpless frustration all too well.
After a bit of digging and experimenting, I discovered a surprisingly simple trick that fixed my falling rack in just five minutes—no tools, no major repairs, just a quick fix that saved me from a costly service call. And today, I want to share that secret with you because I believe every homeowner should have this hack up their sleeve.
Stop Worrying About That Wobbly Top Rack—Here’s the Fix
But first, a quick question—have you ever tried to fix your dishwasher’s rack only to make things worse? Early on, I made the mistake of fiddling with the wheels without considering if they were properly aligned or if the rack was sitting correctly on the tracks. That little mistake set me back hours, and I wish I knew then what I know now. According to appliance experts, many dishwasher issues, including falling racks, are caused by simple track misalignments or worn-out wheels, which are inexpensive and easy to replace if you know what to look for. For more insights on diagnosing dishwasher problems, check out [Troubleshooting Dishwasher Problems](https://applianceoutletpro.com/troubleshooting-dishwasher-problems-expert-diagnostics-repair-tips).
If your top rack is starting to sag or tilt, it’s likely due to worn or misaligned rollers, or sometimes, a buildup of grime that hampers smooth movement. Ignoring this can cause further damage, leading to cracked or broken racks, which are significantly more costly to replace. Luckily, a quick inspection and some simple adjustments can often restore your rack’s stability—saving you money and frustration.
In the next section, I’ll walk you through my tried-and-true method to get your top rack back in perfect shape—fast and fuss-free. Ready to keep your dishwasher functioning smoothly and prevent future mishaps? Let’s dive in.
Inspect the Wheels and Tracks Carefully
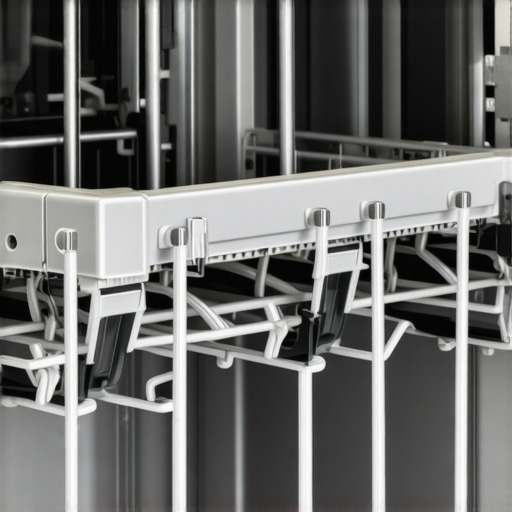
Start by pulling out your top rack and examining the wheels that glide along the tracks. Locally, I noticed my wheels were covered in a thin layer of soap scum and mineral deposits, which made them stick and wobble. Using a flashlight, look for signs of wear or cracks. If wheels are chipped or broken, replace them immediately; if just dirty, clean with a damp cloth and a mild vinegar solution.
Realign the Track Guides for Smooth Movement
Next, check the alignment of the track guides—those little metal or plastic pieces that hold the wheels. Gently lift and reposition them if they appear bent or misaligned. I once had a misaligned guide that was causing my rack to tilt and fall—once I fixed its position, the wobbling stopped. For detailed guidance on track repair, see this troubleshooting guide.
Adjust the Rollers and Springs
Many dishwasher racks use springs to keep them taut and level. Over time, these springs can loosen or stretch out. Inspect the springs attached to the wheels—if they look worn or detached, replace or reattach them. When I replaced a stretched spring, it instantly restored the rack’s stability. Consider consulting professional diagnostics when in doubt about internal component status.
Lubricate for Better Glide
Use a silicone-based lubricant sparingly on the wheels and tracks to ensure smooth operation. Avoid petroleum-based greases, which can attract dust and grime, worsening the problem. Once lubricated, move the rack back and forth to distribute the lubricant evenly. After doing this, my top rack glided like new, with no wobble or tilt. Remember, proper lubrication extends the life of your components and maintains optimal alignment.
Test and Secure Everything
Finally, slide the rack in and out multiple times, observing its movement. Confirm that it stays level and doesn’t wobble. Check for any loose screws or clips holding the wheels in place and tighten if needed. This small step ensures your fix is durable and prevents future issues. If you notice persistent wobbling despite these adjustments, investigate whether the track itself is warped or cracked.
 Many homeowners operate under misconceptions about appliance warranties and diagnostics that can cost them time and money. One pervasive myth is that warranty coverage automatically includes all repairs, but in reality, many warranties require proper diagnostics and adherence to specific conditions to be valid. According to industry experts, neglecting detailed diagnostics often leads to warranty denials because the root cause of the failure isn’t correctly identified or documented. For instance, some assume that only manufacturer-certified repair services can honor warranty claims, but independent diagnostics—when documented properly—can actually support your case and expedite repairs.
Another frequent mistake is relying solely on surface-level troubleshooting. Homeowners often try quick fixes without understanding the underlying issues, like mistaking a simple clog for a faulty pump in a dishwasher. This approach can lead to unnecessary part replacements and increased costs. An advanced diagnostic process involves reading error logs and testing internal components, which significantly improves repair accuracy, as detailed in this guide.
People also believe that DIY repairs void their warranties, but this isn’t always true if repairs are performed correctly or diagnostics are documented and communicated to the manufacturer. In fact, many warranty policies encourage consumers to attempt basic diagnostics and minor repairs themselves. The key is understanding the nuance—knowing when to DIY and when to seek professional help for complex issues. External studies show that proper documentation during diagnostics not only enhances the success rate of warranty claims but also prevents future damage due to improper repairs.
For advanced users, a common trap is dismissing the importance of component testing, such as using a multimeter to assess voltage and resistance. Overlooking these details can lead to misdiagnosing problems, like confusing a faulty inlet valve with an electrical issue, wasting time and resources. As seen in this resource, mastering diagnostic tools significantly improves repair outcomes.
So next time you’re facing an appliance issue, remember—quick fixes and assumptions can backfire. Invest in proper diagnostics, understand your warranty’s fine print, and document everything thoroughly. This approach saves money, time, and future headaches. Have you ever fallen into this trap? Let me know in the comments.Maintaining your dishwasher’s performance over time requires more than just luck; it demands the right tools and a systematic approach. One indispensable piece of equipment I rely on is a digital multimeter. This device allows me to assess electrical components like thermostats, relays, and switches with precision. For example, when troubleshooting a control board issue, testing the thermistors with a multimeter has saved me hours of guesswork and potential misdiagnosis. I always ensure my multimeter has a min/max recording feature to catch transient voltage spikes—a common occurrence in faulty wiring scenarios. Additionally, a mechanic stethoscope is invaluable for pinpointing noises within motors or pumps, like when I suspected a failing diverter motor, which I confirmed by listening closely during operation. For detailed diagnostics, I consult resources such as this guide on reading error logs, which complements my use of diagnostic tools.
In terms of software, I recommend installing a dedicated diagnostic app compatible with your dishwasher model—many manufacturers offer firmware updates or diagnostic modes accessible through these apps. Keeping your firmware current ensures optimal performance and can preempt issues related to outdated control algorithms. Looking ahead, I predict that smart diagnostics integrating IoT technology will become standard, providing real-time monitoring and predictive maintenance alerts directly to your smartphone.
Exactly how do I keep my diagnostics effective over time? Regularly update your device firmware, clean your sensors and contacts, and log any anomalies to track recurring problems. This proactive approach not only extends the appliance’s lifespan but also strengthens your warranty claims when necessary. Remember, even the most advanced tools are only as good as your technique. I encourage you to try testing a thermistor with a multimeter today—it’s a quick step that can prevent bigger issues down the road. For guidance on how to perform this test, visit this resource. Keep your dishwasher running smoothly by investing in these tools and habits—your future self will thank you!
Secrets the Pros Often Keep Quiet About Repairing Dishwashers
One crucial lesson I’ve learned is that many homeowners overlook simple track adjustments, which are often the root cause of wobbly or falling racks. A quick glance at the wheels and guides can save hours of frustration. Additionally, replacing worn-out springs and lubricating moving parts regularly extend the life of your dishwasher, making DIY repairs much more manageable. The biggest breakthrough? Recognizing that proper diagnostics and equipment prevent costly misdiagnoses, ensuring your repairs are effective the first time.
My Go-To Tools That Keep My Repairs on Track
I rely heavily on a quality digital multimeter to test electrical components like thermostats and switches, ensuring they function correctly. A mechanic’s stethoscope has been invaluable for detecting motor or pump issues early. Additionally, keeping a detailed repair log helps track recurring problems, so I can spot patterns and prevent future breakdowns. For anyone serious about appliance diagnostics, investing in these tools has been a game-changer, and resources like this guide offers excellent tips for reading error logs effectively.
Empower Yourself to Fix Your Dishwasher and Save Big
Remember, the future of appliance repair is in your hands. By honing your diagnostic skills, using the right tools, and understanding the subtleties of your machine, you can prevent issues before they escalate. This proactive approach not only saves money but also ensures your dishwasher runs smoothly for years to come. Ready to troubleshoot your own unit or assist others? Your journey to confident repairs starts now—don’t wait for a breakdown to act. Curious—what’s the first component you’re planning to test? Share below and let’s learn together!