

Ever experienced the frustration of loading your dishwasher, only to find that your soap pod sits stubbornly undissolved at the bottom? That sinking feeling when you realize your shiny glasses still have water spots, and the dishes aren’t quite as clean as they should be. I remember the first time I encountered this issue—thinking I must have bought a faulty soap pod or that my machine was broken. It was a lightbulb moment: even the best-quality detergent can’t work its magic if something’s blocking its way.
Why Your Soap Pod Might Not Be Dissolving Completely
Is Hard Water to Blame?
One common culprit is hard water. Mineral buildup can interfere with the dissolving process, leaving behind soap residue and reducing cleaning efficiency. I’ve learned that checking your water hardness levels can be a game-changer—softening the water can significantly improve detergent performance. To learn more about how water quality impacts appliances, check out this detailed guide.
Early Mistake Alert
Early on, I used generic, low-quality soap pods without paying attention to water temperature or cycle settings. That was a mistake. Proper diagnostics and understanding of your dishwasher’s needs can prevent recurring issues. If you’re unsure whether your dishwasher is operating optimally, comprehensive diagnostics can help identify underlying problems—sometimes even before they cause damage. Learn more about how diagnostics can safeguard your warranty here.
Have you faced this stubborn soap residue problem? If yes, don’t worry—there are practical solutions that I’ll walk you through next. Staying proactive can save you time, money, and the headache of inefficient cleaning cycles. Ready to uncover what’s really going on behind that un-dissolving pod? Let’s dig into some effective troubleshooting steps that will help your dishwasher work like new again.
Check Your Water Temperature Regularly
Ensure your dishwasher heats water to at least 120°F (49°C). I once neglected this and kept blaming the detergent, only to realize my water heater wasn’t reaching the proper temperature. Use a digital thermometer or run a cycle with hot water while the door is open, then measure the temperature at the spin plate. If it’s too low, adjust your water heater settings or consult a plumber. Proper water temperature helps detergents dissolve effectively, preventing residue buildup and improving cleaning performance.
Inspect and Clear Spray Arm Nozzles
Clogged spray nozzles can prevent water from reaching dishes evenly, leading to poor cleaning and soap residue. To fix this, remove the spray arms and use a toothpick or small brush to clear debris. I had a stubborn spray arm clogged with mineral deposits, which caused uneven spray patterns. Soaking the arms in a vinegar solution for an hour dissolves mineral buildup. After reassembling, test by running the dishwasher empty and observing spray motion—use a phone’s slow-mo video feature to confirm the nozzles spin freely and spray water properly.
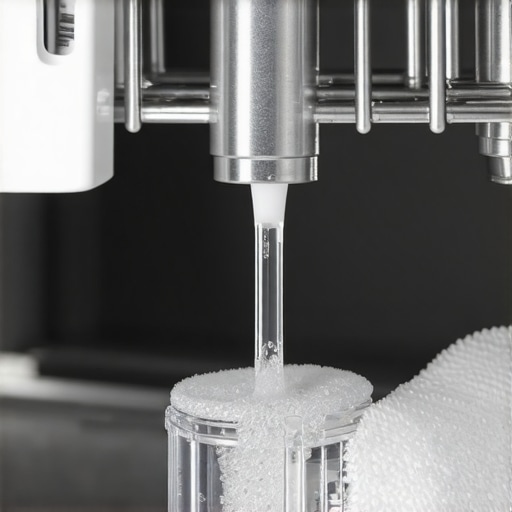
Confirm Water Inlet Valve Functionality
If the water isn’t flowing correctly into your dishwasher, the inlet valve might be faulty or clogged. Turn off power, disconnect the water supply, and remove the inlet filter—often a small mesh screen—to check for debris. Use a multimeter to test the valve’s solenoid coil for continuity; a no-read suggests replacement is necessary. I replaced mine after testing and noticed an immediate improvement in water flow, which resulted in more effective soap dissolution.
Test and Maintain the Drain System
Poor draining can leave soap residue and cause odors. Check the drain hose for kinks or clogs—detach and flush with water if needed. Also, inspect the sump area for blockages or debris. I once found a paperclip tangled around the drain pump’s impeller, impeding water flow. Clearing out the blockage restored proper drainage and eliminated residue issues. Regularly inspecting your drain system prevents backups that cause soap to sit un-dissolved.
Use Proper Detergent and Cycle Settings
Always choose high-quality detergent compatible with your water hardness—hard water requires more or specific formulations. Avoid overloading the dishwasher, which can trap soap and prevent proper dissolution. During my last load, I manually distributed detergent more evenly and selected a heated cycle, which significantly improved cleaning results. For detailed guidance, review this comparison.
When considering dishwasher repairs or warranty claims, many assume that following basic troubleshooting steps guarantees success. However, seasoned technicians warn against common myths that can actually hinder effective resolution. A prevalent misconception is that a simple reset or replacing a part always fixes underlying issues. In reality, the root causes are often more complex, involving nuanced diagnostics that many homeowners overlook. For example, presuming a malfunction is solely due to a faulty control board, without considering related components like sensors or wiring, can lead to unnecessary replacements and prolonged downtime. Advanced diagnostics, such as checking for proper amperage draw with a multimeter, can reveal hidden faults invisible to the untrained eye. Failing to document all symptoms meticulously before filing a warranty claim can also result in delays or denial—underscoring the importance of understanding what warranty companies really require. Experts emphasize that understanding the detailed inner workings of appliances and their failure modes helps prevent costly mistakes. Professional diagnostics often uncover issues like mineral build-up or clogged sensors that mimic more obvious failures. Moreover, homeowners should avoid the trap of assuming warranties will cover all repairs without eligibility checks; reading the fine print and knowing when to trust a technician’s assessment versus a warranty’s limitations is crucial. The claim process itself can be intricate, involving proper documentation and understanding of what constitutes a valid repair scenario. For those interested in how diagnostics can enhance warranty success, this guide offers valuable insights. Remember, becoming educated about the intricate details of appliance troubleshooting not only saves money but also extends the lifespan of your appliances. Don’t fall into the trap of superficial fixes; delve deeper with expert diagnostics to ensure lasting solutions. Have you ever fallen into this trap? Let me know in the comments.
Keeping Your Dishwasher in Top Shape with the Right Tools
Maintaining a dishwasher’s optimal performance doesn’t require guesswork—it’s about having the right set of tools and knowing how to use them effectively. Personally, I rely on a high-quality multimeter, specifically the $5 multimeter, because it offers precise voltage and resistance measurements crucial for diagnosing electrical issues. A digital thermometer is indispensable for verifying water temperature, ensuring cycles reach the necessary heat for proper detergent dissolution. I also keep a small brush and a toothpick handy to clear spray arm nozzles, preventing clogs that can lead to residue buildup.
Investing in these tools not only saves money but accelerates troubleshooting, allowing you to pinpoint problems before they escalate. Future trends suggest that smart diagnostics and IoT-enabled appliances will become standard, enabling remote troubleshooting and predictive maintenance—imagine receiving alerts about scaling or component wear directly to your phone.
How do I maintain my dishwasher’s performance over time?
Regular maintenance is essential for long-term reliability. Schedule periodic inspections of spray arms, filters, and inlet valves, using your multimeter to test electrical components or employing vinegar cleanings to tackle mineral deposits. Keeping an eye on water temperature and drainage efficiency prevents common issues like soap residue or odors. Moreover, consulting detailed diagnostic guides, like this expert resource, can help you understand when professional intervention is necessary.
Remember, proactively maintaining your dishwasher with these tools reduces repair costs and extends appliance lifespan. For instance, periodically inspecting the inlet valve with a multimeter or testing for voltage irregularities can prevent a sudden breakdown. Be sure to document any anomalies and reach out to a professional if needed—visit our contact page to connect with experts.
Looking ahead, I believe integration of advanced diagnostic software and augmented reality support will make DIY repairs even more accessible. So, start by adding a good multimeter to your toolbox, and try the quick voltage test on your inlet valve—it’s a game-changer for early problem detection. Want to learn more? Dive into how diagnostics can protect your warranty.
The Hardest Lesson I Learned About dishwasher,warranty,diagnostics,appliance repair
One unforgettable lesson was realizing that surface-level fixes often mask deeper issues. I once thought replacing a control board would solve intermittent cycles, only to find that mineral deposits in sensors were the real culprit. It taught me to look beyond the obvious and embrace detailed diagnostics, which saved me time and money in the long run.
Why Overestimating DIY Fixes Can Hurt Your Dishwasher’s Lifespan
Believing that a quick reset or a cheap part could fix complex problems led me to repeat issues and even cause new damage. It became clear that understanding when to call a professional or use advanced diagnostic tools is vital, especially to preserve warranty coverage and prevent costly repairs.
My Essential Toolkit for Staying Ahead of Appliance Troubles
Having a reliable multimeter, a digital thermometer, and a cleaning brush has been transformative. I trust tools like the $5 multimeter because it offers precision without breaking the bank. These tools empower you to diagnose electrical and thermal issues early, making maintenance feel less intimidating.
Don’t Miss Out on the Future of Dishwasher Maintenance
Imagine smart appliances that alert you before problems escalate. Embracing evolving diagnostic technology now means you’re prepared for the innovations ahead—saving money, extending lifespan, and gaining peace of mind. Start small: master the basic tests, like checking your inlet valve voltage, and build confidence for more advanced diagnostics.
Your Turn to Try
Applying these insights can dramatically improve your dishwasher’s performance and longevity. Take the leap—use your tools regularly, stay informed, and don’t hesitate to seek professional diagnostics when needed. Your dishwasher will thank you with reliable service for years to come. What’s the first troubleshooting step you’ll try today? Share your plan below!