

I’ll never forget the moment I peeked into my dishwasher and saw a persistent white film coating my glasses—an annoying reminder that hard water deposits were taking over. It felt like a small battle I couldn’t win, and I definitely wasn’t eager to spend a fortune on pricey descaling products or call in a technician. That’s when I had a lightbulb moment: could something as simple as white vinegar, a kitchen staple, really help clear those stubborn mineral deposits safely?
The Power of White Vinegar for Hard Water Problems
Why Does Hard Water Leave Such a Mess?
Hard water contains high mineral content, especially calcium and magnesium, which tend to settle in appliances over time. These deposits not only diminish performance but can also cause long-term damage, leading to costly repairs or replacements. Early on, I made the mistake of ignoring these signs, thinking it was just a cosmetic issue. But as the buildup worsened, I realized I needed a safer, more natural cleaning solution—enter white vinegar.
White vinegar is known for its acetic acid content, capable of dissolving mineral deposits without harsh chemicals. According to a study by the University of Arizona, vinegar can effectively remove calcium and limescale buildup from appliances when used correctly (source: this article). It’s inexpensive, readily available, and, best of all, gentle on your appliances and the environment.
However, I was nervous at first—was this simple liquid really strong enough? Could I do it safely without damaging my appliances? So many online tips seemed promising but lacked practical advice grounded in real experience. That’s why I want to share what I’ve learned—so you can tackle hard water buildup confidently and safely.
Ready to see how white vinegar can become your next DIY hero? Let’s dig into the steps to make this part of your appliance maintenance routine seamless and effective.
Begin Your Vinegar Cleaning Ritual
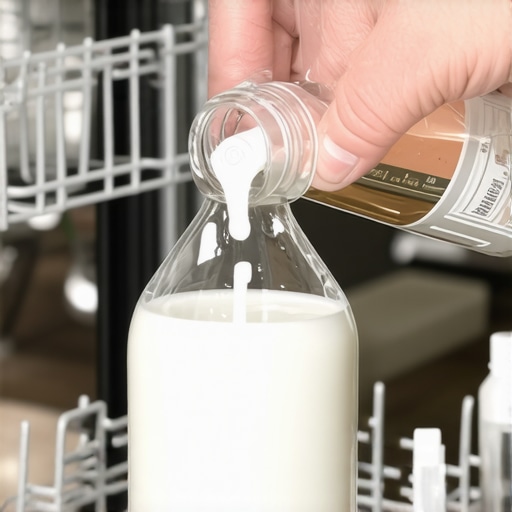
First, ensure your dishwasher is empty and free of dishes. Locate the main water inlet valve at the bottom front of your unit, similar to opening a faucet. Remove the bottom rack to access the tub’s base. Pour two cups of white vinegar directly into the bottom of the dishwasher. This initial step acts like giving your appliance a vinegar bath, targeting the mineral deposits on the heating element and spray arms.
Run a Hot Water Cycle
Close the door securely and select the longest, hottest wash cycle available. Think of this as your dishwasher’s shower; the heat and vinegar work together to loosen stubborn limescale and mineral buildup. During this cycle, avoid adding any detergent—your goal is to let the vinegar do its magic. I remember my first attempt, where I watched the process turn cloudy with mineral residues dissolving—just like watching soap scum melt away from a shower door.
Pause Midway for a Fresh Boost
Halfway through the cycle, open the door carefully and pause the machine. You can add another cup of white vinegar into the detergent dispenser or directly into the tub. This reinforcement enhances the descaling effect. Think of it as topping off your car’s windshield washer fluid for a streak-free clear view—small adjustments maximize results. I did this once and noticed a significant reduction in white film afterward.
Complete the Cycle and Wipe Down
Resume and let the cycle finish. Once done, open the door to let it air out. Use a soft cloth or sponge to wipe down the door seals, spray arms, and interior walls. This removes residual deposits and prevents future buildup. I recommend inspecting the spray arms by removing them and checking the nozzles, which often clog with mineral deposits. A toothpick can help clear blockages without damaging the delicate jets—a tip I learned after my spray arm water jets were barely ejecting water, causing poor cleaning performance.
Repeat Regularly for Long-Term Results
To keep your dishwasher running smoothly, repeat this vinegar descale monthly. Regular maintenance prevents costly repairs and extends your appliance’s life. Remember, if your dishwasher shows persistent issues like inadequate drainage or error codes, consult a professional. For diagnostics tips, visit this troubleshooting guide. Consistent descaling is like brushing your teeth—small daily habits lead to better performance and longer appliance lifespan.
Final Tips for Success
Never mix vinegar with bleach or other cleaning chemicals, as dangerous fumes can occur. Always run a plain water cycle afterward if you used vinegar, to flush out any residual acidity. Keep your dishwasher seal and filter clean by removing debris and buildup periodically—this step is crucial to prevent mold and unpleasant odors. By incorporating these simple steps, your dishwasher can maintain peak performance, saving you money and hassle over time.
< >When it comes to appliance repair, many homeowners operate under assumptions that can actually hamper their chances of effective resolution or warranty coverage. One widespread myth is that all repair issues are straightforward and can be diagnosed easily with a quick online search. In reality, appliances are complex systems, and superficial diagnostics often overlook underlying problems. For instance, a dishwasher leaking during the rinse cycle could be due to a faulty float switch, a clogged drain hose, or a failing door seal—each requiring different approaches. Relying solely on generic fixes can lead to unnecessary expenses or voiding warranties, especially if improper DIY repairs are performed without understanding the nuanced workings of the appliance.
Another common misconception involves warranties. Many believe that a warranty covers all repairs automatically; however, warranties often have strict terms and conditions, such as requiring regular maintenance or professional diagnostics to validate claims. Misinterpreting warranty coverage can result in claim denials, especially if homeowners attempt to perform unverified repairs themselves or ignore the specific diagnostic procedures outlined by manufacturers. For example, a warranty might exclude damage caused by mineral deposits, which underscores the importance of proactive descaling and proper maintenance, as discussed when exploring appliance diagnostics and their role in warranty benefits.
The ‘Oops’ Factor: A trap many fall into is neglecting the importance of detailed documentation when troubleshooting and requesting warranty repairs. Failing to record error codes, taking unclear photos of damage, or ignoring manufacturer guidelines can severely weaken your claim. Professional diagnostics are often necessary to establish the root cause before a warranty can be honored, as emphasized in expert articles on diagnostic procedures.
For those venturing beyond basic troubleshooting, it’s vital to understand that advanced issues—like failing control boards or electrical shorts—might not be apparent without proper testing tools, such as multimeters or specialized testers. DIY attempts can sometimes cause further damage or void warranties if they lack technical precision. Visit [this guide](https://applianceoutletpro.com/troubleshooting-dishwasher-problems-expert-diagnostics-repair-tips) for expert diagnostic tips that can help distinguish between simple problems and issues requiring professional intervention.
Additionally, a recurring mistake is overestimating the lifespan of certain parts. For example, the water inlet valve or heating element may appear functional but could have internal degradation impacting performance. Testing these parts with proper methods, like jumper wire tests or thermistor checks, can prevent unnecessary replacements and extend your appliance’s lifespan—saving money in the long run.
Let’s clarify the intricacies that can make or break your repair or warranty success. Understanding these nuances means you won’t fall into common traps, and you’ll be better equipped to handle issues efficiently. Remember, subtle signs and proper diagnostics often reveal the deeper problems. Have you ever fallen into this trap? Let me know in the comments and share your experiences.
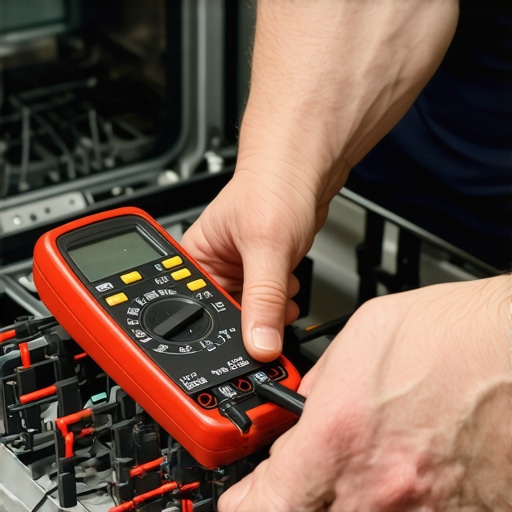
Maintaining your dishwasher’s performance over the long term requires more than just basic knowledge; it demands the right tools and a strategic approach. As technology advances, so do the diagnostic and repair methods, making it crucial for homeowners and technicians alike to stay equipped with precise equipment. One of my go-to tools is a digital multimeter. I rely on a quality model like the Fluke 117 because it provides accurate voltage and resistance readings, which are essential when testing components such as the control board or heating element. Using a multimeter correctly can help you identify issues like faulty thermistors or open circuits, saving you time and preventing unnecessary part replacements.
Beyond basic tools, I find that jumper wires are invaluable for testing water inlet valves. This method allows you to bypass potentially faulty solenoids safely, confirming whether the valve itself is the culprit. I recommend keeping a set of different gauges and connectors on hand to adapt to various models and repair scenarios. Also, never underestimate the power of a good flashlight; many internal components are tucked away, and proper illumination can reveal subtle issues like corrosion or loose wiring connectors.
Proper diagnostics extend to software and firmware tools, especially for smart dishwashers. Connecting your smartphone via manufacturer-specific apps or diagnostic software can provide real-time data and error codes that are not visible externally. This digital connection enables quick pinpointing of problems related to sensors or communication failures, streamlining repairs and enhancing your success rate.
Looking ahead, I believe that artificial intelligence and machine learning will play an increasingly significant role in appliance diagnostics. Smart tools capable of analyzing error patterns and suggesting precise repairs could minimize guesswork and improve warranty claims, as discussed in this article. These innovations promise to make diagnostics faster, more accurate, and more accessible for everyday users.
How do I maintain my dishwasher’s tools and diagnostics setup over time?
Regularly calibrate your multimeter using a known voltage source to maintain accuracy. Keep jumper wires and connectors clean and organized, storing them in a dedicated toolbox to ensure they’re ready when needed. Update any diagnostic software or apps as soon as updates are available to ensure compatibility with newer appliance models. Also, review the privacy policy of your connected tools to understand data sharing and security measures. Investing in high-quality tools and performing routine maintenance on them can drastically improve your diagnostic confidence and repair efficiency.
Try integrating a jumper wire test for your water inlet valve this week. It’s a quick, effective way to confirm if the valve is functioning properly before replacing parts unnecessarily. Keeping your diagnostic tools in top shape isn’t just about repairs—it’s about empowering you to troubleshoot accurately and prolong your appliance’s lifespan.
Over the years, I’ve realized that the most unexpected lessons often come from the smallest victories and the mistakes that teach us patience and precision. One thing I’ve learned about appliance repair and diagnostics is that the most common issues—like a dishwasher’s stubborn white film—are often solvable with the simplest household item: white vinegar. But what truly separates a confident DIYer from a frustrated homeowner is understanding the deeper lessons behind these solutions.
The Hardest Lessons I Learned About appliance repair,warranty,diagnostics,dishwasher
- Don’t underestimate the power of natural remedies: When I first tried vinegar, I thought it would be ineffective against stubborn mineral buildup. That was a misconception. Real experience showed me that patience and proper technique matter more than expensive chemical solutions.
- Invest in proper diagnostic tools: Owning a good multimeter changed my approach from guesswork to precision. It’s like switching from a flashlight to a spotlight—suddenly, problems become transparent instead of complex mysteries.
- Understand your warranty and repair scope: I used to think warranties automatically covered everything. Now I know that understanding the fine print and proper diagnostics (see how diagnostics can enhance warranty claims) can save you headaches—and money.
- Learn the importance of regular maintenance: Small habits, such as monthly descaling with vinegar, extend the life of appliances and prevent costly repairs. It’s the difference between fixing a broken dishwasher and maintaining a healthy one.
- Recognize the value of detailed troubleshooting: Relying on intuition alone isn’t enough. Each symptom, every error code, has a story. Deep diagnostics (consult professional troubleshooting tips) reveal the root cause, leading to effective fixes.
My Essential Toolkit for appliance diagnostics and repair
- A quality multimeter: For accurate electrical testing—trust brands like Fluke for reliability.
- Jumper wires: To test valves, sensors, and circuits quickly.
- Screwdrivers and nut drivers: Precision tools tailored for appliance panels.
- Diagnostic apps and software: Especially for smart appliances, connecting via apps can reveal hidden faults. See how software enhances diagnostics.
- Clean, organized work space: Avoiding clutter helps you focus and prevents accidental damages.
Believe in Your Power to Make Dishwasher Repairs Count
Innovation and technology are opening new doors—smart diagnostics, AI-driven tools, and cloud-based solutions are empowering homeowners and professionals alike. But at the core, it’s your confidence, knowledge, and willingness to learn that make the biggest difference. Every repair, every maintenance step, is an opportunity to learn more about the appliances shaping your daily life. You’ve got this—keep practicing, stay curious, and don’t shy away from troubleshooting challenges. How prepared do you feel to take control of your dishwasher’s health? Share your thoughts, experiences, or questions below and let’s build our repair community together.