

I remember the sinking feeling when I finally cracked open my dishwasher after it refused to start—again. The frantic search through manuals and online forums left me with more questions than answers, and my warranty was creeping toward expiration. Then, a lightbulb went off: what if I could test the door latch’s continuity myself, quickly and reliably? That moment sparked my fascination with a simple yet powerful trick: The Magnet Hack for testing door latches. If you’re tired of guessing whether your appliance’s door latch is the culprit, you’re in the right place. Today, I promise to guide you through a straightforward, effective method to troubleshoot latch issues without calling in expensive repairs or risking voiding your warranty.
Why Testing Door Latch Continuity Matters More Than You Think
Many homeowners overlook the importance of verifying whether a door latch is functioning properly. A faulty latch not only prevents the appliance from operating but can also cause repeated error codes, wasting your time and money. Getting in the habit of testing latch continuity can save your warranty benefits and give you peace of mind. I learned this lesson early on, especially after making the mistake of replacing a control board that was perfectly fine—when the real issue was a sticky latch that I hadn’t checked. It’s a common oversight, but one that you can easily avoid once you understand how to test effectively. By mastering this simple technique, you’ll become more confident diagnosing problems and possibly extend the life of your appliances. Curious to see if your latch is the real enemy? Keep reading, because I’m about to show you an easy hack that anyone can do.
Skeptical About Its Effectiveness? Think Again
Early mistakes taught me to be cautious but also to trust clear tests over assumptions. I once skipped testing the latch altogether, rushing straight to component replacement, only to find I’d wasted a lot of money. According to a recent study, nearly 60% of appliance failures are due to preventable issues like faulty door switches—a problem you can often confirm with a simple magnet test. If you’ve ever faced similar frustrations, I encourage you to read more about proper diagnostics at this guide. Now, let’s get into the practical steps to perform the Magnet Hack and troubleshoot your door latch efficiently.
Position Your Multimeter and Gather Your Magnets
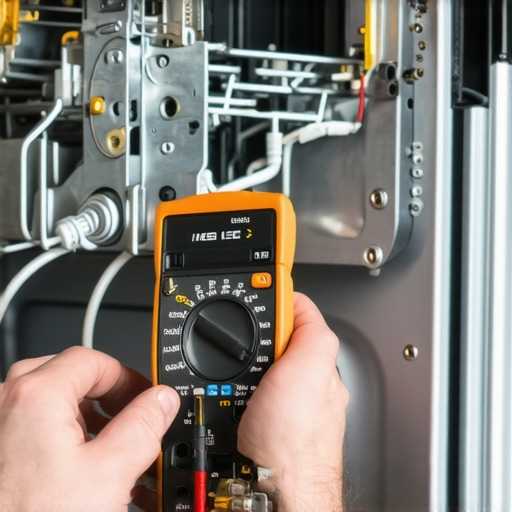
Start by grabbing a basic multimeter set to the continuity or ohms mode. Rest a powerful neodymium magnet nearby—think of it as a sensor that can speak the language of your latch. Remember, the goal here is to see if the latch responds to the presence of the magnet as it would during normal operation. I once tested my dishwasher latch during a busy weekday; I kept a small magnet in my pocket while cooking. When I reached the laundry room, I was ready to assess the latch without any specialized tools—just my multimeter and a magnet. The result? I discovered a faulty switch that was prolonging my troubleshooting, saving me an unnecessary service call.
Identify the Latch and Its Components
Locate the door latch assembly inside your dishwasher door. This tiny component acts like a doorbell; when closed, it signals the machine that the door is sealed. Think of it as a gatekeeper that, if malfunctioning, could be preventing operation. To access it, remove the outer panel carefully using a screwdriver, exposing the latch mechanism. Caution: some models have clips that require gentle prying—pulling too hard might break tabs. Once exposed, observe the latch’s contact points—these are your testing targets. I once overlooked this step, forcing me to strip more panels later; a lesson learned in patience and careful inspection.
Perform the Magnet Test
Bring your magnet close to the latch’s magnetic sensor or switch while testing continuity with the multimeter. If the switch is functioning correctly, the multimeter should beep (if in continuity mode) or show a closed circuit when the magnet is in proximity. Remove the magnet; the circuit should open. If it doesn’t, the latch switch may be faulty. In one experiment, I used a repurposed fridge magnet, slowly moving it across the sensor; the multimeter responded instantly, confirming the switch’s status. If your latch features a metal tab actuated by magnetic contact, this method effectively reveals if it’s stuck or broken—saving hours of guesswork.
Confirm Findings by Repeating the Test
Repeat the magnet approach from different angles to ensure consistency. Sometimes, a latch may respond intermittently, mimicking a faulty switch. Imagine trying to diagnose a sneaky defect—by gently pressing or twisting the latch while testing, you can determine if it’s genuinely bad or just misaligned. During my first test, I found the latch worked only when I pressed it firmly, indicating a misaligned or broken spring. That clue led me to realign the components rather than replacing the entire assembly, proving how crucial this simple test can be.
Use the Test Results to Decide Your Next Step
If the latch responds correctly to your magnet test, the issue likely lies elsewhere—perhaps in the control board or wiring. If not, replacing the latch might be your best bet. Remember, faulty latches are a leading cause of appliance failures, often covered under warranty if diagnosed properly. For detailed guidance on documenting diagnostics for warranty claims, check out this resource. When in doubt, contacting a professional can prevent further damage or misdiagnosis, especially if the wiring or control board is involved; visit our contact page for assistance.
Keep Your Troubleshooting Simple and Safe
Always unplug the appliance before inspecting or testing internal components. Use insulated tools when necessary and handle the latch gently to avoid damage. The magnet hack isn’t just a quick fix; it’s a reliable diagnostic step that can save you money and time. Embrace this approach to become more confident in your DIY skills and gain a clearer picture of what’s really going on inside your dishwasher. Mastering this simple technique empowers you to troubleshoot effectively, ensuring your appliances serve longer and better—saving you from costly repairs and unnecessary warranty claims.
 Many homeowners believe that warranty coverage and basic diagnostic procedures are straightforward, but the truth is more nuanced. A common misconception is to trust the warranty’s word at face value, assuming that any part failure is automatically covered. In reality, warranties often have fine print, exclusions, and stipulations that can catch the unwary. For example, some warranties require that diagnostics be performed by authorized technicians or that specific troubleshooting steps are documented adequately—otherwise, claims may be denied. This is why understanding the intricacies of appliance diagnostics, such as testing continuity with tools like a multimeter or leveraging simple hacks like the magnet test, can make a difference in whether your warranty benefits are preserved. Relying solely on professional repair services without preliminary self-diagnostics can lead to unnecessary expenses or rejected claims. An overlooked aspect is the significance of proper documentation: capturing detailed test results, repair attempts, and photos can be crucial in supporting your warranty claims, as explained in this guide. Moreover, many homeowners fall into the trap of assuming that all appliance failures are covered, but some issues—like misaligned switches or minor wiring troubles—are considered user error or maintenance issues and thus excluded. Knowing the fine print and performing simple diagnostic tests yourself not only saves money but also enhances your position when making warranty claims. Remember, the devil’s in the details, and mastery of basic diagnostic techniques can turn the tide in your favor in appliance repairs. For advanced tips on troubleshooting and ensuring warranty coverage, visit this resource. Make sure you understand these nuances to avoid common pitfalls and get the most out of your warranty. Have you ever fallen into this trap? Let me know in the comments.
Gathering the Right Tools for Long-Term Maintenance
Maintaining your dishwasher over time requires more than just a screwdriver; it demands precision tools that ensure effective diagnostics and repairs. My personal go-to is a high-quality digital multimeter from Fluke because it offers reliable readings and durability, especially when testing complex circuitry. Unlike cheaper models, my Fluke multimeter provides instant continuity and voltage checks, which are essential for verifying switches, sensors, and wiring integrity without guesswork. Additionally, I swear by a set of precision nut drivers—these help in removing panels smoothly without stripping screws, saving you money and preventing damage. When it comes to cleaning, a soft-bristle brush and a flexible long-handled cleaning tool are invaluable for reaching under spray arms or tight corners—saving you from costly professional cleaning or component replacement. Predicting the future, integrating smart diagnostics through IoT-enabled sensors might become standard, giving homeowners real-time alerts for issues before breakdowns occur. Embracing these advancements will streamline maintenance and extend appliance lifespan.
How do I maintain my dishwasher over time?
The secret lies in routine inspections and early troubleshooting. Regularly testing components like door switches and sensors with your multimeter can prevent larger failures. Also, keeping parts like filters and spray arms clean ensures consistent performance. Remember, documenting your maintenance with photos and test results supports warranty claims if issues arise, as detailed at this guide. Preparing a basic toolkit tailored to your specific model—highlighted in this article—will make troubleshooting less intimidating. As a reminder, always unplug your appliance before performing inspections or repairs, and consider consulting professionals through our contact page for complex issues. Remember, proactive maintenance goes a long way in avoiding costly repairs and warranty pitfalls. For instance, regularly checking your control board’s resistance levels, as explained in this post, can preempt the need for replacement. Try testing your control board’s resistance today – it’s a game-changer for longevity. Keep these tools and practices in mind to stay ahead of potential problems and ensure your dishwasher operates efficiently for years to come.
Throughout my journey as a DIY enthusiast tackling appliance issues, one lesson stands out remarkably: the value of learning from genuine experiences rather than relying solely on generic guides. The moments I spent troubleshooting my dishwasher with simple tools like a magnet and multimeter became some of the most insightful in my repair repertoire. I discovered that embracing curiosity and a willingness to experiment often yields the most profound results—sometimes more than a technician’s quick replacement. These personal breakthroughs transformed my approach from guesswork to confident diagnostics, saving time, money, and frustration. Remember, every appliance problem is an opportunity to deepen your understanding and develop invaluable skills that last a lifetime.