

I remember the first time I tried to clean my dishwasher’s mesh filter and ended up tearing it—talk about a rookie mistake! That little piece of mesh felt like my nemesis for weeks. It’s frustrating, right? You just want your appliance to run smoothly, and instead, you’re worried about ruining a simple part. Well, I’ve been there, and I want to share what I’ve learned—that proper cleaning isn’t a mystery, but it does require some know-how. Today, I promise to guide you through the best way to clean your mesh filter without risking tears or damage. Just imagine—no more struggling or risking costly repairs! When you learn the right technique, it’s like giving your dishwasher a gentle spa day, ensuring it keeps performing at its best. Plus, taking care of your mesh filter can extend the life of your appliance and even help maintain your warranty benefits. Did you know that improper cleaning of filters can lead to longer cycle times and even water leaks? That’s a fact that surprised me early on, and learning to clean filters properly can save you headaches down the line. So, if you’ve ever faced a clogged or damaged filter and wondered whether you’re doing it correctly, stick around. We’re going to break down the process into simple, manageable steps, backed by expert advice. Now, let’s dive into why understanding this seemingly small task can actually be a game-changer for your appliance maintenance.
Start by Removing the Filter Carefully
First, locate your dishwasher’s mesh filter, usually at the bottom of the tub. Gently twist or pull it out, avoiding any force that could tear delicate mesh fibers. I remember the first time I did this, I used too much pressure and almost ripped it; now, I know it’s best to handle with gentle hands and proper tools.
Prepare Your Cleaning Supplies and Workspace
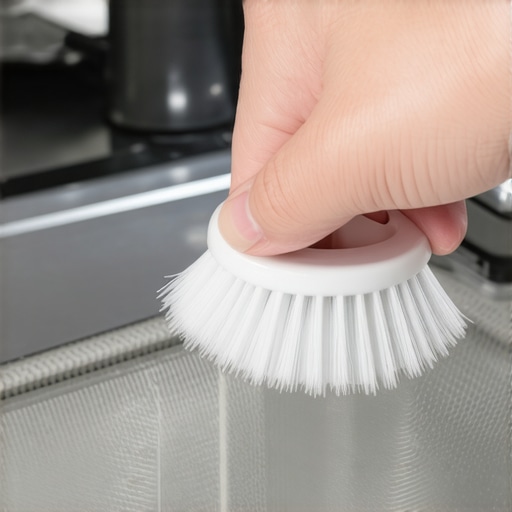
Gather a soft brush, warm water, mild dish soap, and a microfiber cloth. Avoid harsh chemicals that could weaken the mesh. Think of this step as giving your filter a gentle spa treatment—no abrasives needed. During my last clean, I used an old toothbrush to reach tricky corners, which made a significant difference without risking damage.
Remove Debris and Rinse
Use your fingers or a soft brush to remove accumulated debris, hair, and soap scum. Rinse thoroughly under running warm water. Visualize washing away clogs and gunk, like clearing a clogged artery—keeps your appliance healthy. I once neglected this step, resulting in slower drainage; now, I always rinse thoroughly to prevent issues.
Deep Clean with Gentle Scrubbing
Dip your brush into a mixture of warm water and mild soap, then gently scrub the mesh and surrounding housing. Be cautious; aggressive scrubbing can weaken the mesh, leading to tears. Think of it as giving your filter a gentle massage rather than a workout. During one cleanup, I gently scrubbed a stubborn mineral deposit, restoring proper water flow.
Dry and Inspect Before Reinstallation
Pat the filter dry with a microfiber cloth. Carefully inspect for tears or holes—any damage can cause leaks or appliance failure. If the mesh shows signs of wear, consider replacing it to avoid risking warranty claims or costly repairs later. I learned this lesson the hard way when a tear caused water leakage into my kitchen floor.
Reinstall and Test Your Dishwasher
Place the cleaned filter back into its housing, ensuring it’s secure and properly aligned. Run a short cycle to verify everything functions correctly. This step prevents surprises like water leaks or poor washing performance. Remember, a well-maintained filter helps avoid common issues that can lead to diagnostic troubles—see professional diagnosis tips for more.
Maintain Regular Cleaning Schedule
To keep your dishwasher performing optimally, clean the mesh filter monthly. Routine maintenance extends the life of your appliance and helps maintain warranty benefits, especially when combined with regular diagnostics—more info at warranty tips. Overlooking this small but vital task can lead to clogs, longer cycles, or leaks, which might be mistaken for larger mechanical failures.
Use visual guides or videos for detailed steps if you’re unsure. Proper care of your mesh filter isn’t just about cleanliness; it’s about safeguarding your entire dishwasher system and avoiding unnecessary service calls. Remember, if issues persist, professional diagnostics can help pinpoint hidden problems before they escalate—find out more at trusting warranty repairs.
Many homeowners believe that simply following basic cleaning routines or relying solely on warranty claims will solve their dishwasher problems. However, as an appliance repair expert, I can tell you that misconceptions about warranties, diagnostics, and repair processes often lead to costly mistakes. One popular myth is that all repair shops will automatically recommend replacing entire control boards at the first sign of trouble. In reality, many issues can be diagnosed and fixed with simple component replacements if spotted early—saving you time and money.
Why do so many repair attempts fail to resolve dishwasher issues effectively?
This often boils down to a lack of understanding of the nuanced behaviors of modern appliances. For example, some believe that all error codes indicate hardware failure, but in fact, many codes are responsive to calibration or software glitches that can be reset without replacing parts. Ignoring these subtle signs can cause you to overlook simpler fixes, leading to unnecessary expenses. Moreover, there’s a dangerous trap homeowners fall into regarding warranties. They assume that any repair performed outside authorized service can void their warranty, which isn’t always true. According to an industry study, a significant percentage of warranty claims are denied because homeowners or unqualified technicians unknowingly void coverage through improper repairs or mishandling. To avoid this, always verify what your warranty covers and understand the importance of professional diagnostics—more details at [here](https://applianceoutletpro.com/how-appliance-diagnostics-can-save-your-warranty-benefits). It’s also vital to recognize that untrained DIY repairs can do more harm than good, especially if you attempt to bypass safety sensors or ignore diagnostic procedures. Doing so may not only damage the appliance further but also jeopardize warranty eligibility and safety. Instead, consider seeking expert advice before tackling complex diagnostics. External sources, such as industry research from Appliance Pro’s technical team, reinforce that precise diagnostics are paramount to effective repairs and warranty protection. Don’t fall for the misconception that all problems are straightforward or that newer models require less maintenance. In fact, advanced sensors and electronics demand a more sophisticated approach—learning to interpret error codes correctly can make all the difference. To ensure you’re on the right track, consult trusted sources and professional diagnostics instead of jumping straight into part replacements. Remember, irregular issues like intermittent leaks or cycle delays often have underlying causes that inexpensive parts or shortcuts won’t fix. Being aware of these nuances safeguards your appliance’s longevity and your warranty benefits. If you’re ever unsure, use reputable diagnostic guides or contact a professional. For example, understanding how to interpret a fluctuating amperage draw or testing your float switch can prevent unnecessary replacements—see [this guide](https://applianceoutletpro.com/how-to-check-your-dishwashers-amperage-draw-safely) for more. Stay vigilant about common myths and invest in proper diagnostics—it’s an investment in your appliance’s health and your peace of mind. Have you ever fallen into this trap? Let me know in the comments.Maintaining your dishwasher’s optimal performance over time hinges on using the right tools and adopting disciplined practices. One indispensable device I’ve personally relied on is a quality mechanic’s stethoscope. It allows precise detection of motor or pump issues by pinpointing unusual noises, especially when diagnosing intermittent component failures. I prefer a digital model with clear audio and adjustable sensitivity, which enhances my ability to differentiate between normal vibrations and potential problems. For electrical diagnostics, a reliable multimeter with a temperature probe is essential. It helps verify heating element functionality and ensure sensors operate correctly, preventing issues like inadequate cleaning or energy waste. I always keep a specialty water inlet valve tester handy; this simple device can swiftly confirm if the valve is jammed or malfunctioning without unnecessary part swaps, aligning with expert advice from industry resources. As appliances evolve, integrating smartphone-connected diagnostic apps offers proactive maintenance insights, flagging energy spikes or irregular cycle behavior before breakdowns occur. Looking ahead, I see a trend where smart diagnostics and IoT integration will streamline maintenance, making preventive care more accessible. But how do I maintain these tools over time to ensure accuracy? Regular calibration and battery checks are critical. Using a calibration kit to verify multimeter precision annually has saved me costly misdiagnoses. Also, proper storage in anti-static cases prevents damage. For software tools, keeping apps updated guarantees they interpret diagnostic codes correctly, reducing unnecessary repairs. To maximize these benefits, spend a few minutes each month reviewing your equipment. For instance, testing your dishwasher’s amperage draw with a multimeter, as outlined at [this detailed guide](https://applianceoutletpro.com/how-to-check-your-dishwashers-amperage-draw-safely), can reveal early motor wear. Consistency in maintenance not only extends your appliance’s lifespan but also helps preserve warranty coverage—remember, professional diagnostics are often required for warranty claims, as explained in [this article](https://applianceoutletpro.com/how-appliance-diagnostics-can-save-your-warranty-benefits). I encourage you to try inspecting your water inlet valve with a jumper wire or a multimeter to get familiar with your equipment. Mastering these techniques empowers you to catch issues early, saving money and time. Ready to up your maintenance game? Start by regularly testing your dishwasher’s heating element using a simple, cost-effective tool like a multimeter, ensuring your appliance heats efficiently and meets warranty standards. Keeping your tools in top shape is as vital as the skills you develop—don’t overlook this step in your maintenance routine.
Three Hidden Traps I Fell For When Caring for My Dishwasher
One of the toughest lessons I learned was that an overlooked filter or a rushed cleaning can lead to expensive repairs. I once ignored a tiny tear in my mesh filter, thinking it was minor—only to face a leak that cost me hours and dollars. Now, I know that inspecting my filter regularly and handling it gently is crucial. Another experience taught me that using harsh chemicals can weaken delicate parts, so I switched to mild soaps and soft brushes, saving my appliance and money. Lastly, I used to believe that all error codes meant I needed a new control board—turns out, many issues are quick fixes with the right diagnostics, saving unnecessary replacements and preserving warranty benefits. These lightbulb moments have reshaped my approach to dishwasher maintenance and saved me from costly mistakes.