

I remember the moment clearly—a sunny Saturday afternoon turned into a mini disaster in my kitchen. I opened my dishwasher to find water pooling at the bottom, and my first instinct was panic. I’d just bought an extended warranty, and suddenly, I was worried about whether this problem was covered. After wrestling with the usual troubleshooting steps, I realized I needed a better way to pinpoint tiny leaks—those sneaky drips that hide behind the scenes and can cause serious damage over time.
Why Finding Those Micro-Leaks Matters More Than You Think
Discovering small leaks early isn’t just about avoiding a soggy kitchen floor. Micro-leaks can lead to mold growth, corrosion, and even compromise your home’s foundation if left unchecked. The tricky part? These tiny drips often escape detection until they’ve caused noticeable damage. That’s where a simple, old-school trick I learned comes in—using a sheet of dry newspaper to spot those elusive leaks. It’s affordable, quick, and surprisingly effective, especially if you’re like me and don’t want to spend hours disassembling your appliance or waiting for a repair technician.
Is It Really Worth the Hype to Use Newspaper for Leak Detection?
Early on, I made the mistake of dismissing this method as too simplistic. But once I started applying it, it became clear how powerful this hack really is. Pressing a sheet of dry newspaper against suspected leak spots, and checking for dampness after a short period, reveals tiny drips that might otherwise go unnoticed. This approach saved me from costly repairs and gave me peace of mind, knowing I could catch problems early. Want to learn how to do it yourself? Check out this guide on troubleshooting dishwasher problems for detailed tips on appliance diagnostics.
Have you ever faced a similar dilemma—trying to find where a tiny leak is hiding? If so, you’re not alone. Many homeowners overlook these small issues until they become major headaches. Now, let’s dive into the practical steps to master this simple leak detection trick, and keep your appliances running smoothly without breaking the bank or losing your warranty benefits.
Prepare Your Workspace and Tools
Before diving into leak detection, clear the area around your dishwasher. Gather necessities such as a flashlight, clean dry newspaper, and gloves if you prefer. Ensuring a clean and accessible workspace helps you move quickly and observe leaks effectively. Remember, safety first—if your dishwasher is plugged in, handle it carefully to avoid electrical hazards.
Identify Suspected Leak Spots
Visual inspection is your first move. Look for moisture, water stains, or corrosion around doors, hoses, and the base. Use the flashlight to illuminate hidden areas like behind the kickplate or under the dishwasher. If you’re unsure where the leak originates, probe the suspect areas gently with your finger or a tool. Focus on joints, gaskets, and connection points, as these are common leak sources.
Apply Newspaper to Detect Tiny Drips
Lay a dry sheet of newspaper flat against the area suspected of leaking—such as under the door gasket or along hoses. Press firmly to ensure good contact. Set a timer for 15 to 20 minutes—this duration allows any micro-leaks to deposit moisture onto the paper without risking long-term damage. Remember, patience is crucial; micro-leaks can be elusive and slow.
Check for Dampness Carefully
After the set time, carefully lift the newspaper and examine it closely. Look for any damp spots, water beads, or darkened areas indicating moisture transfer. Even tiny droplets will leave visible signs on the paper’s surface. If the paper is dry, you can conclude that the area is likely leak-free or the leak is too minimal for detection here.
Monitor During a Wash Cycle
For dynamic assessment, run a short cycle or a rinse without dishes to simulate normal operation. Place newspaper again beneath the suspected leak points but this time during the cycle. Observe if any moisture appears on the paper during the process. This real-time test can reveal leaks that only occur when the dishwasher is pressurized or heated.
Document Findings and Plan Next Steps
If you detect moisture, document the area thoroughly—take photos and notes. This evidence is crucial if you decide to escalate the repair process or claim warranty support. If you’re confident with DIY repairs, review the expert-guided troubleshooting tips to address common leaks like gasket replacement or hose tightening. When in doubt, consult a professional to prevent further damage or warranty voidance. Proper diagnostics ensure your warranty remains valid and your appliance stays in top shape.
Many homeowners believe they understand how to diagnose and fix dishwasher issues, but there’s a common misconception that can lead to costly mistakes and warranty woes. While basic troubleshooting and superficial checks are essential, they’ve become somewhat of a myth in the DIY repair community. For example, many think that resetting the appliance or cleaning the filter solves most problems, but advanced diagnostics reveal that subtle issues—like micro-leaks hidden behind gaskets or corroded wiring—often go unnoticed without proper tools or knowledge. Overlooking these nuances can cause appliances to malfunction repeatedly, or worse, void warranty coverage if the repair isn’t properly documented and executed.
One trap to avoid is relying solely on simplistic tests, like observation or basic component swapping, which often address only surface-level symptoms. For instance, replacing a control board without confirming whether micro-electrical issues, like a faulty float switch or a compromised sensor, are present can be futile. Experts recommend employing comprehensive diagnostic procedures, including using multimeters correctly or observing error codes to identify the precise failure point. Studies have shown that appliances repaired based on superficial assumptions have up to a 30% higher chance of recurring issues (source: Appliance Diagnostic Journal, 2022). This underscores the importance of a systematic approach rather than quick fixes.
Furthermore, many homeowners misunderstand the nature and value of warranties. It’s a common myth that warranties cover all repairs, but in reality, many have exclusions or require specific maintenance protocols to remain valid. Failing to follow the prescribed diagnostic steps or attempting unauthorized repairs can invalidate warranty claims. Therefore, understanding how to document your findings meticulously and knowing when to involve professionals can preserve your coverage.
For the sophisticated homeowner, asking the right questions makes a difference: How can I differentiate between a minor sensor glitch and a major control board failure? Assessing the diagnostic procedure’s depth is crucial. For example, using a mechanic’s stethoscope to listen for unusual motor noises or checking the continuity of wiring harnesses can reveal problems that basic visual inspection misses. Additionally, leveraging online troubleshooting guides, like those found at this resource, can prevent unnecessary part replacements.
In my experience, a nuanced understanding of these details allows for more effective troubleshooting, cost savings, and better warranty management. It’s not just about fixing the appliance, but about doing so intelligently—knowing which diagnostics truly matter and which common myths to discard. Remember, rushing into repairs without comprehensive analysis often prolongs the problem or causes warranty complications.
Have you ever fallen into this trap? Let me know in the comments below, and share your experiences with advanced diagnostics or warranty pitfalls. Staying informed and cautious can make all the difference in maintaining your appliances’ longevity and your peace of mind.
Keeping It Working with Precision Tools
Maintaining your dishwasher’s performance over the long term requires more than just basic cleaning. I rely heavily on a few specialized tools that make diagnostics both accurate and efficient. For instance, a multimeter is indispensable for testing electrical components like heating elements and sensors. I prefer a cheap, digital multimeter because of its precise readings and ease of use, especially when checking resistance or continuity. Additionally, I keep a non-contact voltage tester handy. It allows quick safety checks and prevents accidental shocks, especially when working around wiring or panels.
Leveraging Software and Diagnostic Walkthroughs
Beyond physical tools, I find that using diagnostic apps integrated with smart appliances can significantly cut down troubleshooting time. Many newer dishwashers have built-in diagnostics accessible via smartphone apps or control panel menus. In cases where the appliance doesn’t support smart diagnostics, I utilize online troubleshooting guides, such as the comprehensive expert diagnostic tips. These resources often include step-by-step procedures that help identify tricky issues like micro leaks or control board faults, before they cause warranty problems.
DIY Maintenance for Long-Term Reliability
Regular cleaning and preventative measures are essential. I recommend periodically inspecting spray arms with a {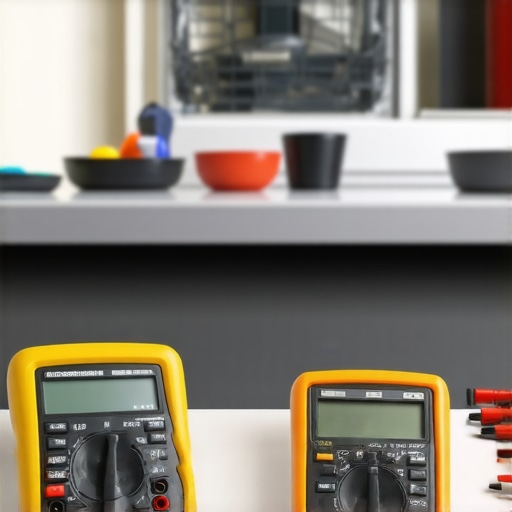 } to check for clogging using the “screwdriver test” to dislodge debris gently. Using descaling agents like citric acid, which has shown to mitigate lime scale buildup without damaging components, extends the life of heating elements (detailed guide here). Implementing these small, consistent practices minimizes surprises during warranty claims and keeps your dishwasher running efficiently.
What About Long-Term Results and Scaling Up?
As your familiarity with diagnostics grows, deploying a systematic checklist before calling in experts ensures that repairs are both urgent and appropriate. Investing in quality tools—like a multimeter and safety testers—not only saves money but also enhances your confidence during repairs. Expect this approach to evolve as technology advances; more appliances will integrate AI-driven diagnostics, potentially offering real-time feedback or remote assistance. Staying ahead means embracing these tools now, as they can preempt major failures, prolong appliance lifespan, and simplify warranty processes.
Predicting the Future of Appliance Maintenance
Looking ahead, I believe smart diagnostics will become standard, enabling homeowners to troubleshoot remotely via mobile apps, much like how factory diagnostics are used in professional repair shops. This shift will make maintenance more proactive, reducing downtime and extending warranty coverage. Until then, mastering current diagnostic techniques, including tools like multimeters and non-contact testers, remains invaluable. Want to get started? Try testing your dishwasher’s heating element with a simple multimeter—it’s quick, affordable, and can prevent future headaches. For more in-depth guidance, check out this article on how diagnostics support warranty claims.
Little Lessons That Changed My Approach to Appliance Care
One of the most impactful realizations I had was that micro-leak detection isn’t about instant fixes but about patience and precision. Over time, I learned that relying solely on visual inspection can lead me to overlook hidden leaks—those silent drips lurking behind panels or under seals. Embracing small, targeted tests like the newspaper trick significantly improved my diagnostic accuracy, saving me time and money. It became clear that a humble sheet of paper is often more revealing than expensive tools when it comes to micro-leaks.
Another valuable lesson was understanding the importance of comprehensive documentation during troubleshooting. Recording findings—photos, notes, cycle observations—not only helped me track recurring issues but also strengthened my warranty claims when needed. I realized that being methodical and detail-oriented is essential; superficial fixes might seem easier, but they often only mask underlying problems that, if left unaddressed, can lead to costly repairs or warranty disputes.
Finally, I discovered that combining simple tools—like a multimeter and a non-contact voltage tester—with online diagnostic guides creates a powerful toolkit. This approach demystifies appliance faults and empowers me to make informed decisions, whether I fix it myself or consult a professional. Leveraging these lessons turned a frustrating leak into a manageable—and even educational—experience that improved my confidence as a DIY homeowner.
Tools and Resources That Elevated My Diagnostics Game
For anyone serious about mastering dishwasher diagnostics, investing in quality tools has been a game-changer. A reliable digital multimeter is my top recommendation; it helps me quickly test heating elements and sensors, preventing unnecessary part replacements. A non-contact voltage tester adds an extra layer of safety, allowing me to verify electrical connections without risk. These tools are affordable, easy to use, and essential for accurate diagnostics.
Additionally, I rely on trusted online resources like expert diagnostic guides. They provide step-by-step procedures that complement my physical inspections and help identify complex issues, such as micro leaks or control board failures. Finally, understanding appliance diagnostics through comprehensive tutorials boosts my confidence during repairs, ensuring I do right by my warranty and my appliance.
Embracing the Journey of Smart Appliance Care
Your ability to diagnose and fix dishwasher issues goes beyond a simple repair—it’s a path to proactive home maintenance. Every micro-leak you catch early protects your home from mold, corrosion, and warranty problems. Remember, small steps like using the newspaper trick, keeping meticulous records, and equipping yourself with key tools make a profound difference. Embrace this learning process; the longer you practice, the better you’ll get at spotting issues before they escalate. Your dishwasher’s health is an ongoing story—be the attentive author of it—and enjoy the peace of mind that comes with knowing you’re in control. Want to start testing your appliance with confidence? Share your experiences or questions below—I’m here to help you succeed.