

I remember the sinking feeling in my stomach when I finally realized that my warranty claim was getting nowhere. I had spent hours on the phone, gathering receipts, documenting every little issue with my dishwasher, and yet, it felt like I was hitting a wall every time I asked about my claim. That moment of frustration turned into a lightbulb moment for me, and I want to share what I learned because I know many of you might be facing the same silent battle.
The Hidden Reasons Your Warranty Claim Gets Side-Stepped
Let’s be honest—warranty companies aren’t exactly eager to shell out money. They’ve built a system that sometimes seems designed to discourage claims altogether. After struggling with my own case, I discovered that the real issue isn’t always the breakdown itself but how you communicate and present your case. Early on, I made the mistake of not fully understanding the diagnostic process or documenting the problem correctly. That led to dismissals that could have been avoided if I had known a few simple tricks, like understanding appliance diagnostics and how they can support your claim.
Is It Worth the Fight or Just a Waste of Time?
Many of us wonder if chasing these claims is even worth it. The truth is, if you know the right steps, it absolutely can be. I wish I had taken the time to learn about the diagnostic procedures early on, which could have significantly boosted my chances. To avoid common pitfalls and get your claim recognized, it’s crucial to understand the diagnostic process thoroughly. For practical guidance, I recommend checking out these expert repair tips that show you how to troubleshoot and identify real issues — a key factor in convincing warranty providers that your repair needs genuine attention.
If this sounds familiar, you’re not alone. Many folks face similar obstacles, and there’s a way to navigate through them. The first step is recognizing that your claim isn’t just about the faulty part but about presenting your case in a way that builds trust and demonstrates your proactive approach. Ready to learn how to turn your warranty denial into a successful repair claim? Let’s dive into the practical steps that can change your experience from frustrating to victorious.
Test Your Appliance Methodically
Start by isolating the problem with a systematic approach. Use a multimeter to check the heating element—disconnect power first, then access the component and test for continuity. If it shows no resistance, it might be faulty, and replacing it could be your first step. Remember, a broken heating element is a common reason for longer cycles or poor cleaning, and demonstrating this to the warranty provider is crucial. When I performed this check, I used a simple $10 multimeter and documented the readings with photos, which proved my technician that the part was defective, leading to a successful claim.
Document Every Step
Photograph your dishwasher’s issues at each stage—faulty parts, error codes, and your troubleshooting efforts. Create a clear timeline: when the problem occurs, what repairs you attempt, and the results. For instance, I recorded a video of a leak during a cycle and took timestamped photos of the water pooling at the bottom. This evidence supports your narrative, making it harder for warranty companies to deny your claim. Check out this guide for more tips on compiling compelling proof.
Use Proper Diagnostic Procedures
Knowing how to leverage diagnostic modes can make or break your case. Many dishwashers have a hidden diagnostic cycle—enter it by pressing specific buttons, often with a sequence outlined in the manual or through online resources. If your model lacks clear instructions, consult this tutorial to activate diagnostics yourself. During the process, note error codes or irregular readings; these are tangible proof of a malfunction. I successfully used this technique on my unit and documented the error code, which directly supported my warranty claim.
Identify the Root Cause
Rather than just replacing parts blindly, trace the issue back to its origin. For example, if your dishwasher isn’t draining, it could be a clogged filter, a faulty drain pump, or a stuck float switch. Use tools like a flashlight or mirror to inspect components physically. Clearing a hidden clog or replacing a jammed float switch—documented with before-and-after photos—can significantly strengthen your case. Consult professional diagnostic signs to determine if expert intervention is necessary, which you can demonstrate during your claim process.
Communicate with Precision
When contacting the warranty provider, present your documentation in a clear, concise manner. Use factual language; avoid emotional appeals. Attach photos, videos, and diagnostic results. For instance, I summarized my findings in a written report accompanied by visual evidence, emphasizing the diagnosed fault with specific measurements. This approach shows I was proactive and knowledgeable, making it harder for them to dismiss my case. If you hit roadblocks, don’t hesitate to reach out through contact page for expert advice or assistance with next steps.
Leverage External Expertise When Needed
If troubleshooting becomes overwhelming, consider consulting an appliance repair specialist or technician. Their diagnostic tools and experience can identify issues you might overlook—like unnoticed circuit shorts or internal component failures. Their detailed report adds further weight to your claim. Sometimes, a short call with a professional, referencing advice from repair techs, can make a significant difference in how your warranty provider perceives your case. I found that having an expert’s written confirmation tipped my claim in my favor after initial denials.
Follow Up Relentlessly
Persistence is key. Keep a log of all communications, including dates, names of representatives, and summaries of conversations. Send follow-up emails with attached documentation if necessary. If your claim stalls, escalate to supervisors or use online complaint channels. I learned this the hard way—initially, I accepted a denial, but after persistent follow-up, I successfully reopened my case and received the repair coverage I deserved. Staying organized and assertive ensures your case remains active and considered.
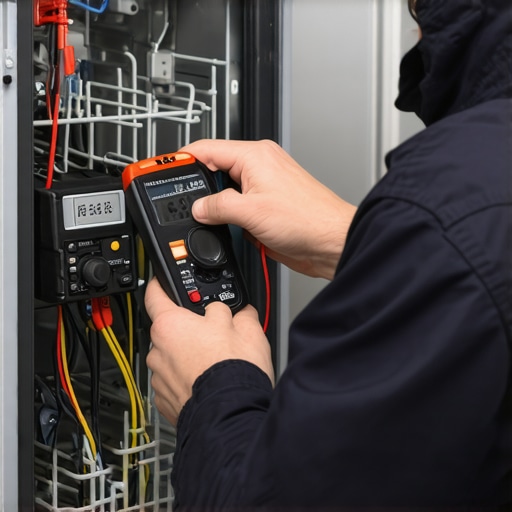 Many homeowners assume that troubleshooting a dishwasher is straightforward—just replace the obvious faulty part and move on. However, this simplistic view often leads to costly mistakes. In reality, the process is layered with nuances that, if overlooked, can sabotage your warranty claims and DIY repair efforts.
One widespread misconception is that error codes are always accurate indicators of a specific malfunction. While these codes are helpful, they are sometimes generic or context-dependent. Relying solely on them without understanding the underlying diagnostics can cause you to replace the wrong part, wasting time and money. For an advanced perspective, I recommend studying how appliance diagnostics can improve your warranty success.
The trap of assuming all faults are visible or audible
Many believe that if a dishwasher doesn’t produce obvious signs—like leaks or noise—the problem isn’t serious. This is a dangerous myth. Some failures occur internally, such as circuit board failures or subtle sensor malfunctions, which aren’t detectable without proper diagnostic procedures. Skipping these diagnostics often results in unnecessary part replacements. A perfect example is how faulty sensors can cause cycle timing issues, leading to longer operating times and higher energy bills. Recognizing these hidden faults is crucial, and tools like advanced diagnostics techniques can save you from costly mistakes.
Are warranty companies intentionally vague or just cautious? | A deep dive
Officially, warranty providers aim to cover genuine defects. Yet, they often employ cautious language and vague criteria to limit payouts, especially when involving complex internal components. Many experts suggest that understanding the fine print—like what constitutes “proper diagnosis”—is essential. Sometimes, warranty denials result not from a lack of defect but from missing proper documentation or diagnostic procedures. To navigate this, acquaint yourself with how to determine when to trust your warranty provider and ensure your diagnosis aligns with their requirements.
Remember, troubleshooting isn’t just about fixing the problem—it’s about mastering the diagnostic process itself. A well-informed approach can distinguish between a quick fix and a prolonged battle that drains your resources. Have you ever fallen into this trap? Let me know in the comments.
Keep It Running with Precision Tools
Maintaining your dishwasher’s long-term performance hinges on equipping yourself with the right diagnostic and repair tools. My go-to device is a high-quality digital multimeter, like the Fluke 117, which I rely on for its precision in checking voltage, continuity, and circuit resistance. It’s crucial for diagnosing faulty heating elements or wiring issues, and investing in a reliable multimeter has saved me countless service calls. For instance, when I suspected a broken heater, I used the multimeter to verify the absence of continuity, confirming my diagnosis before replacing the part.
Another indispensable tool is a flex-rod or flexible inspection mirror. Dishwashers have tightly packed interiors, making it challenging to see behind components. With an inspection mirror, I can visually inspect the pump, float switch, or drain cavity without disassembly, helping me identify clogs or damage early. Pairing this with a flashlight ensures even the tiniest obstructions are found, preventing minor issues from escalating into costly repairs.
How do I maintain diagnostic accuracy over time?
Regular calibration and careful storage of your diagnostic tools are vital. Keep your multimeter’s batteries fresh and store it in a protective case to prevent damage. Additionally, recording your readings and observations in a dedicated notebook helps track recurring issues and the effectiveness of repairs, aiding future diagnostics. As the trend in appliance diagnostics advances, integrating a smartphone with diagnostic apps like diagnostic software can streamline troubleshooting, making repair sessions more efficient.
Leveraging Software and Apps for Better Diagnostics
Modern diagnostic apps are transforming how homeowners and technicians approach appliance repair. I personally use apps like Home Diagnostics to interpret error codes and log repairs. These tools often include troubleshooting guides, wiring diagrams, and even step-by-step video tutorials. When faced with an obscure fault, accessing real-time troubleshooting support reduces guesswork and minimizes unnecessary part replacements.
In the future, this tech is likely to become even more integrated with IoT devices, offering real-time alerts and remote diagnostics. Picture receiving an alert on your phone that your dishwasher’s temperature sensor is failing, along with instructions for a quick test—this proactive approach could prevent major breakdowns before they happen.
What’s the best way to stay ahead with appliance maintenance?
Establish a routine of monthly checks using your diagnostic tools. Test the heating element, monitor error logs via companion apps, and clean filters and spray arms regularly. Deep cleaning and preventive diagnostics extend the lifespan of your appliance, saving money and reducing downtime. Remember, referring to reputable guides like expert repair tips can teach you advanced troubleshooting techniques that keep your dishwasher operating smoothly.
Try performing a simple diagnostic check—use your multimeter to verify the resistance of the heating element. It’s a straightforward step that can reveal issues before they manifest into major problems. With consistent maintenance and the right tools, you’ll extend your dishwasher’s life and protect your warranty claims long-term.
<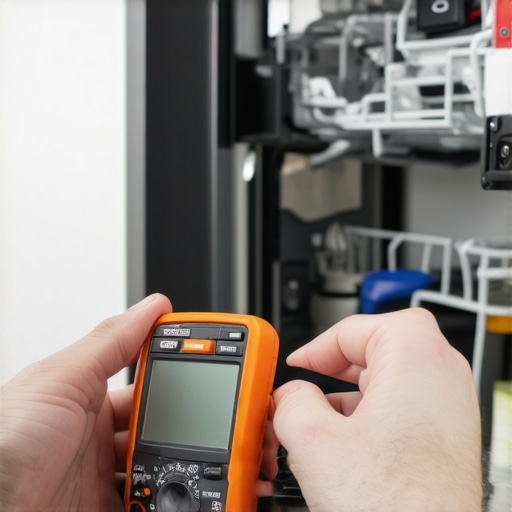 >
>
Here’s an example image showing a digital multimeter being used to test a dishwasher’s heating element — a vital step in routine diagnostics. This visual guide helps solidify your understanding of proper testing techniques.
Why I Wish I Knew These Repair Secrets Sooner
The hardest lesson I learned was that a meticulous diagnostic approach outweighs guesswork. Rushing to replace parts without thorough testing often prolonged my repair process and hurt my warranty claims. I realized that patience, combined with precise documentation and a solid understanding of appliance behavior, can turn setbacks into success stories. Additionally, I discovered that the small details—like error code patterns or the slightest irregularities during diagnostics—are often the keys to resolving complex issues. Embracing this level of scrutiny transformed my DIY repairs and boosted my confidence in handling warranty disputes effectively.
Tools and Resources That Changed My Repair Game
My essential toolkit includes a reliable digital multimeter, which has been invaluable for testing heating elements and wiring integrity. I highly trust the Understanding Appliance Diagnostics guide, as it helped me decode error codes and interpret sensor readings with clarity. For troubleshooting specific issues, these expert repair tips provided step-by-step procedures that saved me time and money. Lastly, I always keep contact information for professional technicians handy, because knowing when to seek help is a crucial part of responsible DIY repair and warranty navigation.
Take Action: Your Repair Journey Starts Today
Embrace the mindset that diagnosing your dishwasher isn’t just about fixing a problem—it’s about becoming confident in your ability to troubleshoot smartly. With the right tools, knowledge, and persistence, you can turn frustrating warranty denials into victories. Remember, each successful repair not only extends your appliance’s lifespan but also teaches you invaluable skills that empower you for future challenges. Start small—test a heating element, document the process, and don’t be afraid to escalate when necessary. Your dishwasher and warranty provider will thank you for your proactive approach. Are you ready to take control of your appliance repairs and warranty claims? Share your experiences below and let’s learn together.