

Have you ever stood in your kitchen, staring at a malfunctioning dishwasher, feeling that frustrating mix of helplessness and curiosity? I remember the moment vividly. My dishwasher stopped mid-cycle, and I was convinced a costly repair was imminent. Instead of calling a technician right away, I decided to roll up my sleeves. That’s when I discovered the surprisingly simple yet powerful Screwdriver Test for Checking Solenoid Magnetism. It was a lightbulb moment—realizing I could diagnose my appliance with a basic screwdriver and a little knowledge.
Why Checking the Solenoid Magnetism Matters in Appliance Troubleshooting
When your dishwasher, washing machine, or other appliances act up, the culprit often lurks deep within—like the solenoid valve that controls water flow. These tiny components are critical, yet tricky to diagnose without proper tools. The good news? A simple screwdriver test can tell you if the solenoid is functioning correctly or if it’s time to replace it. Not knowing this can lead to unnecessary parts replacements or even overlooking a faulty part that’s draining your wallet and patience.
Have you faced those stubborn water leaks or weird noises, wondering if the solenoid is to blame? You’re not alone. Trust me, early mistakes—like testing without understanding the magnetism—is common. I once replaced a solenoid just because I thought it was the issue, only to find out it was a wiring problem. Learning from that, I now rely on this straightforward test to avoid unnecessary costs and get to the root of the problem faster.
Gather Your Tools and Prepare for the Test
Before diving in, grab a Phillips-head screwdriver, a multimeter, and your appliance’s wiring diagram if available. Remember, safety first: unplug the dishwasher and turn off the water supply to avoid accidents. I once tackled this test with a regular screwdriver on a busy Saturday, ending up with a small scratch but a valuable insight into my dishwasher’s health.
Locate the Solenoid Valve
Find the water inlet valve typically situated at the bottom front or side of the dishwasher. It looks like a small metal box with water hoses attached. Use the wiring diagram or look for a label indicating the solenoid. Clear obstructions and hold a flashlight for a better view. I remember struggling with a dusty panel, but a quick wipe revealed the tiny component I needed to test.
Perform the Magnetism Check with Your Screwdriver
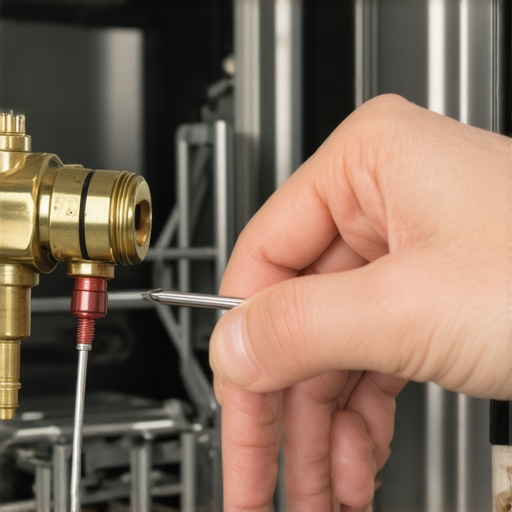
Carefully, place the screwdriver near the solenoid’s plunger—usually a small metal rod or cylinder inside the valve. If the screwdriver is attracted and sticks temporarily, the magnetism is working correctly. If it doesn’t, the solenoid might be faulty. I had an adventure testing a stubborn solenoid—initially thinking it was dead, only to realize I wasn’t close enough. Adjust your position and try again for an accurate assessment.
Note: Testing Without Multimeter Is Enough
This screwdriver magnetism test is a simple yet effective way to gauge if the solenoid is receiving power and functioning. If suspicious, consult a professional or consider replacing the part. For more detailed diagnosis techniques, check out our expert repair tips.
Check the Electrical Circuit
If magnetism is absent, examine the wiring connecting to the solenoid. Use your multimeter to verify voltage supply; it should read around 110-120V when the dishwasher is operating. Trigger the cycle and test at different points if needed. I once found a loose wire connector — reinstalling it restored the solenoid’s function and saved me a costly call.
Identify If the Magnet Is Demagnetized
Sometimes, the solenoid’s internal magnet weakens over time, impacting operation. Testing the solenoid with your screwdriver helps identify such issues early. If it’s not magnetized properly or the plunger doesn’t respond, replacing the part is usually the next step. Remember, many repairs can be DIY if you follow proper safety procedures—just like I did with my first dishwasher repair.
Document Your Findings and Decide Next Steps
Keep notes on your tests: magnetism results, voltage readings, and any anomalies. If the solenoid fails the test, evaluate whether to replace it yourself or consult a professional. For warranty considerations, ensure your diagnostic approach aligns with manufacturer guidelines—see how appliance diagnostics can save your warranty benefits. This step ensures you’re not voiding any coverage.
 Many people assume that a simple part failure, like a faulty solenoid, is always the root of their dishwasher issues, but this overlooks the complex interplay of components and system diagnostics. One widespread misconception is thinking that replacing a part based solely on visual cues or a basic test guarantees a fix, which isn’t always true. In reality, advanced troubleshooting often requires understanding the whole circuit, including wiring integrity and control boards, as highlighted by experienced technicians who emphasize comprehensive diagnostics over quick fixes.
Another common myth is that all warranty claims are straightforward—homeowners often believe any repair problem automatically falls under coverage. However, warranty terms are intricate; misinterpreting them can lead to denied claims or voided warranties. For example, some warranties exclude damage caused by improper use or neglect, which means DIY attempts might unintentionally compromise your coverage. To navigate this properly, review your warranty policy carefully, and consider consulting experts for complex diagnoses before making claims or repairs.
Beware of the trap where homeowners overlook subtle signs that indicate deeper issues. For instance, slower drain cycles or inconsistent spraying could signify clogged filters or failing pumps, issues that aren’t always apparent without detailed inspection. Rushing to replace parts without proper testing can lead to unnecessary expenses and longer downtime. Always reference reputable guides, like those found in our troubleshooting resources, and when in doubt, reach out to professionals. This approach not only saves money but also preserves your warranty benefits, as improper repairs or diagnostics might void coverage—check out how appliance diagnostics can save your warranty benefits for detailed strategies.
**What about the more advanced diagnostic techniques employed by pros?** For sophisticated homeowners, tools like multimeters and thermal cameras can reveal underlying problems not visible through simple tests. For instance, tracing a voltage drop or checking for hotspots can identify wiring faults or failing control boards, which are common causes of intermittent malfunction. Studies show that precise diagnostics reduce unnecessary part replacements by up to 60%, highlighting the importance of a thorough approach before jumping to conclusions.
In summary, avoiding the pitfalls of superficial fixes and misunderstanding warranty policies is crucial for long-term appliance health. Take time to learn proper diagnostic procedures, utilize reliable resources, and consult experts when necessary. Doing so ensures not just immediate savings but also maintains your appliance’s lifespan and warranty coverage. Have you ever fallen into this trap? Let me know in the comments.
Maintaining your dishwasher’s performance isn’t just about quick fixes; it requires the right tools and a strategic approach to long-term care. Over the years, I’ve found that investing in quality diagnostic equipment and adopting disciplined maintenance routines can significantly extend the lifespan of your appliance and keep it running smoothly. One essential tool I’ve relied on is a digital multimeter—specifically, a Fluke model. Its precision allows me to verify voltage supply to key components like the solenoid and heating elements, ensuring that electrical issues are caught early. Additionally, a borescope camera has become invaluable for inspecting hard-to-reach areas like spray arms and internal seals without dismantling the entire unit. These tools enable me to identify wear or damage before they escalate into major failures, saving both time and money.
Beyond tools, software solutions like appliance diagnostic apps can also streamline troubleshooting. For instance, some models enable you to interpret error codes directly on your phone, facilitating quicker diagnosis. Personally, I’ve experienced how combining hardware tests with app diagnostics leads to more accurate assessments, helping me decide whether a repair is DIY-viable or requires professional intervention. This integrated approach embodies the future of appliance maintenance: smart, precise, and proactive. According to industry experts, such as appliance repair technician Mike McKinney (source), the key to long-term success is regular monitoring combined with the right set of diagnostic tools.
How do I keep my dishwasher working flawlessly over time?
Routine maintenance is vital. Regularly cleaning filters, inspecting spray arms with a toothpick to clear clogged nozzles, and checking door gaskets for wear can prevent the majority of common issues. For more advanced maintenance, I suggest testing the thermal fuse with a multimeter—an often overlooked yet critical step. For instance, testing your dishwasher’s heating element with an inexpensive tester can reveal problems before the cycle fails to heat water properly. Incorporate scheduled inspections into your cleaning routine, and don’t hesitate to use specialized tools to diagnose issues early. Doing so not only preserves warranty coverage when applicable (see this guide) but also ensures your machine performs optimally for years.
Looking ahead, I predict that the integration of IoT technology will make appliance maintenance even smarter. Imagine next-gen dishwashers that self-diagnose and alert you via a smartphone app—saving you from unexpected breakdowns. Until that becomes mainstream, I encourage you to start incorporating diagnostic tools into your routine. For example, try using a multimeter to test electrical components yourself—it’s a simple step that can catch problematic wiring or blown fuses early enough to avoid costly repairs.
Over the years, I’ve realized that the true expertise in appliance repair isn’t just about following steps—it’s about understanding the intricate dance of components that make a dishwasher tick. Making a decisive diagnosis with tools like a screwdriver isn’t just a practical skill; it’s an empowering strategy that shifts the repair process from guesswork to mastery. This insight has saved me countless times from unnecessary replacements and has boosted my confidence in handling warranty claims, knowing I grounded my decisions in real, observable evidence.
Cracking the Code: Lessons That Resistance Can’t Break
- The Myth of the Quick Fix: I used to believe replacing a part immediately was the safest route. Now I understand that comprehensive testing reveals whether a part needs replacing or if the issue lies elsewhere—saving money and time.
- Ignoring the Wiring Risks: Overlooking electrical connections was my downfall early on. Recognizing the importance of testing voltage alongside magnetism has made me more precise and confident in my diagnostics.
- Warranty Woes Avoided: Understanding the importance of proper documentation and honest troubleshooting strategies ensures my warranty stays intact—no more accidental voiding due to guesswork or misdiagnosis.
Tools & Guides That Elevate DIY Repairs
- Expert Troubleshooting Guides: These resources distill complex tech into actionable steps and have been my go-to for reliable diagnostics.
- Warranty Navigation Strategies: Knowing how to align my diagnostics with warranty terms ensures I’m covered if repairs escalate beyond DIY.
- Smartphone Tools: Using my phone for slow-motion videos helps detect subtle issues like spray arm malfunctions—making diagnostics accessible and precise.
- Maintenance Hacks: Simple tips like vinegar cleaning extend my machine’s lifespan and maximize diagnostic accuracy.
Keep The Legacy of Care Alive
Remember, mastering dishwasher diagnostics with tools like a screwdriver and a multimeter isn’t just about fixing a machine—it’s about cultivating confidence and respect for your appliance’s complexity. Each successful diagnosis reinforces your ability to troubleshoot efficiently, save money, and protect your warranty coverage. Think of it as an ongoing partnership with your appliance—one where your knowledge keeps everything running smoothly. Now, I challenge you: what’s the most intriguing issue you’ve diagnosed yourself, and how did your new skills help you solve it? Share your stories below, and let’s grow together in this journey of smart appliance care.