

Ever had that moment when you’re standing in your kitchen, dishwasher mid-cycle, and suddenly, you hear that annoying rattling or shaking sound? It’s like your appliance has developed a mind of its own, and honestly, it can be downright frustrating. I remember the first time mine started wobbling and bouncing so much that I feared it might tip over or damage the surrounding cabinetry. At first, I thought it was a minor misalignment, but after some quick research and a few trial-and-error attempts, I discovered a surprisingly simple trick that changed everything.
A Neighbor’s Fix That Saved My Sanity
This secret isn’t about costly repairs or replacing parts. It’s about a tiny, inexpensive adjustment that I’ll call the “penny trick,” which has helped me keep my dishwasher steady and quiet. You see, many dishwashers aren’t perfectly level out of the box, especially if they’ve been moved or installed on uneven flooring. Over time, this imbalance causes them to shake during operation. When I finally took the time to level mine properly, I realized that a small, carefully placed coin—yes, just a penny—could be exactly what I needed to stabilize it. This simple, cost-effective fix has been a game-changer, and I’m here to guide you through the process so you don’t have to suffer through the noise too.
Before diving into the solution, let me share a quick warning: pushing the appliance out of alignment without proper tools or understanding can cause more harm than good. For example, I once tried to shim my dishwasher with a bunch of random objects and wound up causing a wobble worse than before. Trust me, early mistakes like that can lead to bigger issues—so it’s worth taking a moment to get it right. If you’re skeptical about whether this tiny adjustment can really make a difference, check out this guide on proper dishwasher maintenance, which emphasizes the importance of a level standing for optimal cleaning and operation.
Is the Penny Trick Really Worth the Hype?
Honestly, I was dubious at first. A penny? Really? But after I experimented with different coins and placement, I found that a penny could fill that tiny gap perfectly and provide the much-needed lift or stabilization. Plus, it’s a quick, invisible fix that doesn’t damage your appliance or flooring. I’ll walk you through how to do this simple trick safely and effectively in the next section, and you’ll be surprised how often such a modest adjustment can resolve bigger problems like excessive vibration or even water leaks caused by misalignment.
Start with a Good Inspection
Before you make any adjustments, ensure your dishwasher is unplugged to prevent accidents. Move the appliance slightly away from the wall to access the leveling feet. Check whether the unit leans to one side or wobbles when you gently push it. Use a spirit level on the door to identify unevenness. I once moved mine to fix a bad wobble, and aligning the feet improved stability immediately, saving me from constant noise and potential leaks. For detailed tips, see this guide.
Adjust the Leveling Feet Correctly
Most dishwashers have adjustable feet with screw mechanisms. Turn these feet clockwise to raise or counterclockwise to lower, aiming to level the unit. For precise adjustments, place a level on the door or top rack area. When I adjusted my dishwasher, I used a wrench to rotate the feet while checking the level intermittently. It took about 10 minutes to get it just right, significantly reducing side-to-side movement. Remember, the goal is a stable, even base, which also prolongs appliance life. More on troubleshooting uneven appliances can be found here.
Using Coin or Spacer for Small Adjustments
If a slight tilt persists, a simple penny or small spacer can provide the extra lift needed under one of the leveling feet. Slide a coin under the foot and gently test stability. I experimented with a few coins of different thicknesses, finding that a penny fit perfectly under one corner of mine. This quick fix helped eliminate minor wobbling that caused noisy cycles and water displacement issues. Make sure the coin is clean and stable; avoid stacking coins, which can be unstable. Want to learn more about DIY appliance fixes? Check this article.
Test Operation and Reassess
Once adjustments are made, plug the dishwasher back in and run a short cycle to observe vibrations or movement. Look for any remaining wobbling or noise. If the unit still isn’t stable, repeat the leveling process and consider adding a coin or shim where needed. Remember, the goal is to prevent excess vibration that could loosen internal parts or cause water leaks, which might void your warranty—more on warranty considerations here. Periodically check the level to maintain stability, especially if you notice increased vibrations during cycles. Proper leveling not only quiets the operation but also extends the lifespan of your appliance.Many homeowners and even seasoned technicians fall prey to common myths about appliance diagnostics, especially with dishwashers. One widespread misconception is that replacing parts immediately upon the first sign of trouble guarantees a fix. In reality, this approach oversimplifies the complexity of modern appliances. According to industry experts, more often than not, the root cause is a subtle issue that requires a thorough diagnostic process before any part replacement, which could be a simple sensor recalibration or a minor wiring correction. Skipping this step can lead to unnecessary repairs and wasted money.
Another nuance many overlook is the reliance solely on warranty claims as a path to repair. While warranties are valuable, they are often misunderstood. Many assume that if a warranty covers a part or repair, they can ignore proper diagnostics or maintenance. Contrary to this belief, warranties typically require evidence of proper troubleshooting efforts. Failing to document diagnostic steps can result in claim denials or delays. For instance, this resource emphasizes the importance of detailed diagnostics to strengthen warranty claims.
Advanced mistakes include misdiagnosing water leaks or electrical faults. For example, a leak might be attributed to a faulty door gasket, but in truth, it could stem from a misaligned dishwasher or a clogged drain hose creating backpressure. Similarly, a clicking noise from the drain pump could be mistakenly linked to the motor, when in fact debris or a misaligned impeller causes the problem. Performing comprehensive tests, such as voltage measurements and visual inspections during diagnostics, helps pinpoint issues accurately. Tools like multimeters, discussed here, are invaluable for this process.
A critical trap is rushing to replace components without validating the diagnosis. This can lead to unnecessary expenses and may introduce new issues. For example, changing the control board because the dishwasher stops mid-cycle without confirming the error codes or sensor functionality often results in a return visit for the same problem. Correct diagnostics involves reading error codes, conducting physical inspections, and understanding appliance logic systems. Most importantly, patience in this process ensures long-term reliability.
For the advanced reader craving depth, consider the question: How can understanding the specific diagnostic tools and procedures refine your troubleshooting, and what common pitfalls should be avoided during this process? Studies on diagnostic accuracy, like those published in the Journal of Appliance Maintenance, highlight the benefits of systematic troubleshooting over guesswork. Implementing detailed diagnostic steps not only saves money but also prevents warranty voidances caused by improper repairs.
In your experience, have you ever fallen into this trap of superficial repairs or misdiagnosis? Share your stories below, and let’s ensure we all approach appliance repair with a sharper, more effective mindset!
Tools That Make Dishwasher Diagnostics a Breeze
Keeping your dishwasher running smoothly over the long haul requires not just knowledge, but also the right set of tools. As a seasoned DIY enthusiast and appliance technician, I can attest that having a few specialized instruments in your kit transforms troubleshooting from guesswork into precise diagnostics.
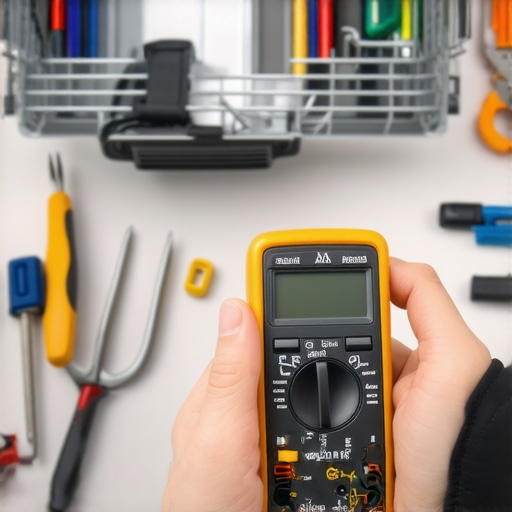
One of my most-used tools is the digital multimeter. I rely on a high-quality multimeter, like the Klein MM2000, because it provides accurate readings of voltage and continuity. This is crucial when testing components such as door switches, heating elements, or wiring connections. Investing in a multimeter under $50 can save you costly replacements and prevent unnecessary parts swapping. Check out this guide for tips on selecting and using a multimeter effectively.
Next up, a non-contact voltage tester is invaluable for quick safety checks. Unlike traditional testers, the Extech 480823 sense voltage instantly and help you avoid dangerous shocks. I use it before handling any electrical parts, especially after opening the control panel. It’s quick, reliable, and essential for confidence during repairs.
Don’t underestimate the pliers and screwdrivers set. I prefer a precision Phillips and flat-head screwdriver, along with needle-nose pliers, to remove panels, clamps, and disconnect wiring harnesses without damaging delicate components. Tools like the Wiha Precision Screwdriver Set have that perfect grip and durability to make the job easier.
For locating hidden leaks or blockages, I recommend a small inspection mirror. Sometimes, the root of leaks or clogs isn’t visible without a little extra visibility. A model with a flexible joint, like the U.S. Solid inspection mirror, grants clearance in tight spaces, revealing issues beneath the appliance.
Lastly, consider a basic carpenter’s level and a spirit level to ensure your dishwasher remains perfectly balanced. A crooked install increases vibrations, noise, and wear. Proper leveling extends the lifespan and keeps your appliance performing optimally. For proper installation, see this article.
How do I maintain my diagnostic tools over time?
Regular calibration and careful storage ensure your tools stay accurate. Keep multimeters and testers away from moisture and static, and replace batteries as needed. Maintaining your tools is nearly as important as choosing the right ones; reliable readings depend on it. Going forward, I predict that smart diagnostic devices, capable of interfacing directly with appliance boards via Bluetooth or Wi-Fi, will become standard—making troubleshooting even more straightforward. But for now, a well-stocked toolbox with reliable manual instruments will serve you best.
Feeling inspired? I highly recommend trying out a multimeter on your dishwasher’s wiring harness to see firsthand how simple voltage tests can prevent guesswork. That small investment of time and money will pay dividends in your DIY repair journey—and help you avoid unnecessary warranty claims here. Remember, accuracy in diagnostics is the foundation of a long-lasting, trouble-free appliance.
Why Failing to Level Your Dishwasher Might Cost You More Than Just Noise
Through my troubleshooting journey, I learned that a seemingly minor oversight—ignoring proper leveling—can lead to persistent vibrations, water leaks, and even damage to internal components. Over time, I realized that investing a few extra minutes to ensure the appliance was perfectly balanced saved me costly repairs and extended its lifespan. Never underestimate the power of a good level; it’s my secret weapon for appliance longevity. If you’re unsure about your installation, check out this detailed guide to proper leveling techniques.
How Overconfidence in DIY Fixes Can Backfire and What I Wish I Knew
I once thought that replacing parts based solely on symptom guesswork was enough, but that turned into a costly lesson. Diagnostic accuracy is everything. Rushing into repairs without thorough testing or understanding can escalate minor issues into major ones. Trust me, a careful inspection—using tools like a multimeter or inspecting error codes—can save you from wasted money and time. Dive into this resource for a deeper grasp of proper troubleshooting.
My Favorite Tools That Turn Repairs Into Success Stories
From my experience, equipping myself with the right tools—like a reliable digital multimeter, a non-contact voltage tester, and a good inspection mirror—transformed my approach from guesswork to certainty. These tools help me identify issues precisely, prevent accidental shocks, and see hidden problem areas. Remember, investing in quality, such as the Klein MM2000 multimeter or a U.S. Solid inspection mirror, pays off in accuracy and safety. Want more tips? See this guide to tools for DIY diagnostics.
Believe in Your Skill, But Respect the Process—Your Dishwasher Will Thank You
Handling your appliance’s health is empowering, but patience remains key. Each small adjustment—like leveling or placing a penny—can dramatically improve performance. I encourage you to embrace the diagnostic journey, knowing that mastery builds with practice. If you’re ready to take your troubleshooting to the next level, visit this resource. Your confidence, and your dishwasher, will thank you for it.
What’s Your Next Step in Keeping Your Dishwasher Happy?
Every repair insight you gain boosts your confidence and saves money—so what challenge are you ready to tackle next? Share your experience below, and let’s support each other in mastering appliance diagnostics and maintenance. Remember, a well-maintained dishwasher isn’t just about quiet cycles—it’s about peace of mind and long-term savings. Are you prepared to become your own appliance hero? If so, start today by reviewing your leveling and diagnostic skills, and consider exploring signs to seek professional help when needed. Your journey to appliance mastery begins now!”}**}**rdquo;**}#END#}# Answer:{