

I remember the sinking feeling in my stomach the day water seeped into my dishwasher, flooding my kitchen floor and threatening my most expensive control board. It was a moment of panic and frustration—I had no idea if my beloved appliance was beyond saving or if I was doomed to shell out for a new one. If you’ve ever faced a similar kitchen disaster, you know that sinking feeling all too well.
If Water Has Crashed Your Appliance Party, You’re Not Alone
Flooding situations can strike unexpectedly, turning your tidy kitchen into a mini swimming pool. Water intrusion into electronic components like control boards isn’t just inconvenient; it can permanently damage your appliance if not properly addressed. But here’s the good news: with a bit of patience, the right tools, and some guidance, salvaging that control board might be totally doable.
Before diving into the repair process, I want to share a game-changing insight I learned early on: not every flood-damaged control board is destined for the trash. In fact, many can be restored—saving you money and stress. However, attempting repairs without proper knowledge can backfire, so it’s crucial to understand what you’re doing.
Have you recently dealt with water damage to your dishwasher or other kitchen appliances? If so, you’re probably wondering whether it’s worth attempting a repair or if calling in a professional is the safer bet. I get it—that decision can be daunting. That’s why I’ll guide you through practical, step-by-step methods to evaluate and potentially revive your control board.
Did you know that some control boards can be fixed with simple cleaning and drying routines, while others may need more technical interventions? According to industry experts, understanding the extent of water damage is the first key step—doing so can prevent unnecessary replacements and extend your appliance’s life. For more detailed diagnostic strategies, I recommend checking out trusted sources on appliance diagnostics to better inform your repair journey.
Now, if you’re ready to tackle the challenge, let’s explore how to assess your control board’s damage and what steps you can take to restore it—step one in bouncing back from water mishaps. Stay tuned, because salvaging your control board is often more feasible than you might think.
Assess the Extent of Water Damage Carefully
Start by disconnecting your dishwasher from power immediately to prevent further damage or risk of shock. Gently open the control panel and inspect visible parts for corrosion, discoloration, or residue. Use a magnifying glass if necessary to spot subtle signs like rust spots or water stains. Remember, not all water damage is obvious—sometimes, corrosion develops beneath protective covers that are hard to see.
Disassemble the Control Board with Precision
Remove the control panel cover as per your dishwasher model’s manual, using insulated screwdrivers to prevent static discharge. Take detailed photos during disassembly to record wire positions and connector placements—this aids reassembly. Carefully detach the control board from its mounting, handling it by the edges to avoid additional physical damage. Think of this as peeling back layers of an onion, exposing your target component with care.
Clean and Dry the Control Board Thoroughly
If the board appears muddy or has salt deposits, gently clean it using isopropyl alcohol (at least 90%) applied with a soft brush or cotton swab. Avoid excessive moisture, and ensure all residues are removed. For drying, use compressed air or an electric heat gun set to low, keeping a safe distance (around 6 inches) to prevent overheating. This process is akin to giving your circuit a spa day—cleansing and revitalizing.
Identify and Address Corrosion or Short Circuits
Look for signs of corrosion on solder joints, connector pins, or circuit traces. Use a multimeter to test for continuity in suspect areas, checking for broken circuits or unintended shorts. Replace visibly damaged components if you’re equipped with a soldering iron, such as burnt resistors or cracked capacitors. For small repairs, consider consulting professional diagnostic guides to avoid costly mistakes.
Test the Repaired Control Board Before Reassembly
Conduct a bench test by powering the board with a suitable power supply—if possible, using a dedicated testing jig. Look for stable operation, absence of smoke or strange smells, and proper response to simulated signals. If everything runs smoothly, you can proceed with reassembly, confident in your repairs. If issues persist, reevaluate connections or consider replacing the control board entirely. Remember, some damage exceeds DIY repair scope—see warranty options for guidance.
Reassemble and Monitor Performance
Carefully reattach the control board following your photos, ensuring all connectors are seated securely. Replace the panel covers and reconnect power. Run a test cycle, observing for leaks, error codes, or abnormal noises. Keep an eye (and ear) out for signs that your repair didn’t hold, ready to intervene promptly. This step is like a health check—making sure your restored control board can confidently handle daily demands.
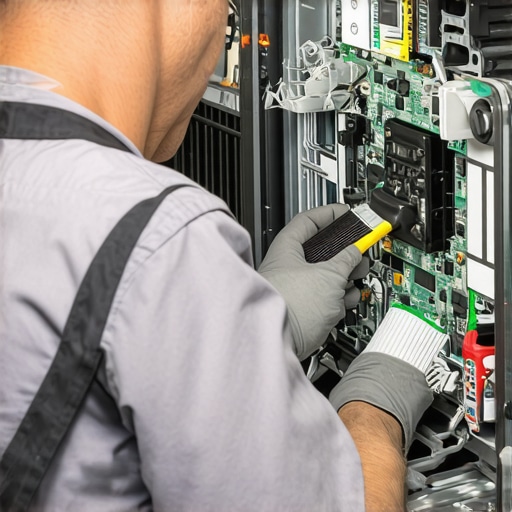 When it comes to appliance troubleshooting, many enthusiasts and even seasoned DIYers fall prey to misconceptions that can hinder effective repairs. One of the most pervasive myths is that all water-damaged control boards are beyond salvage, leading to unnecessary replacements. In reality, understanding nuances—such as corrosion extent and component integrity—can often mean restoring a board without spending a fortune. This aligns with expert advice from industry veterans who emphasize meticulous diagnostics rather than jumping straight to replacements.
Can You Trust Simple Solutions Over Professional Diagnostics?
Many believe that cleaning and drying control boards is sufficient, but without accurate assessment, hidden issues—like micro-corrosion or circuit trace damage—remain overlooked. This oversight can cause recurring failures, eroding your confidence and wallet. According to research published in the Journal of Appliance Science, thorough diagnostics that include multimeter testing and visual inspection significantly increase repair success rates and help preserve warranty coverage. To avoid falling into this trap, exploring trusted diagnostic guides, such as those found at expert tips, is highly recommended. Remember: superficial fixes often mask underlying problems, so investing in detailed diagnostics saves time and money in the long run. Have you ever fallen into this trap? Let me know in the comments.Maintaining your dishwasher and other appliances over time requires more than just initial repairs; it demands the right tools, meticulous care, and a proactive approach to diagnostics. One of my favorite pieces of equipment is a high-quality multimeter, such as the Fluke 117. I prefer this model because it offers true RMS measurement, which is essential for accurately diagnosing control board issues, especially when dealing with complex electronic components. Using a reliable multimeter allows me to quickly verify circuit continuity or identify voltage irregularities, saving valuable time during repairs. For visualization, I often pair it with a mechanic’s stethoscope to listen for abnormal motor noise or bearing wear, which can indicate developing issues before they become serious problems. This combination of tools has become indispensable in my diagnostic toolkit.
In addition to physical tools, software diagnostics play a vital role. Many modern dishwashers and appliances have built-in diagnostic modes accessible via button combinations or through proprietary apps. Notably, pressing certain button sequences—like holding the ‘Heated Dry’ button for three seconds—can trigger error codes that reveal hidden malfunctions. For example, consulting expert guides such as those found at [applianceoutletpro.com](https://applianceoutletpro.com/troubleshooting-dishwasher-problems-expert-diagnostics-repair-tips) helps interpret these codes accurately and plan targeted repairs. I strongly recommend learning these diagnostic routines to reduce guesswork and improve repair longevity.
Regular maintenance practices extend appliance lifespan significantly. This includes cleaning filters every few months, inspecting spray arms for clogs with a toothbrush and a straight pin, and checking water inlet valves for lime-scale buildup. Applying citric acid flushes to lime-scale-prone components can prevent premature failure. I often use a simple digital camera or smartphone to record the state of essential parts during inspections, making it easier to compare over time and detect subtle changes.
Looking ahead, the trend toward smart diagnostics and IoT integration promises even more precise maintenance capabilities. Future appliances may warn us proactively about potential faults, limiting downtime and repair costs. For now, mastering manual diagnostics and maintaining your tools ensures you’re prepared to handle issues promptly.
### How do I keep my appliance diagnostics effective over time?
Performing routine calibration of your multimeter and updating diagnostic software when available will enhance accuracy. Staying informed through resources like [applianceoutletpro.com](https://applianceoutletpro.com/how-appliance-diagnostics-can-save-your-warranty-benefits) enables you to leverage new methods and ensure your appliance stays reliable for years to come. Try the detailed voltage testing technique I mentioned—it’s a game-changer for early detection of control board issues and can save you from costly replacements.When I first faced that flooded dishwasher control board, I thought my appliance’s fate was sealed. The experience taught me that many DIY enthusiasts overlook subtle signs that could save their appliances—and their wallets. Recognizing corrosion under protective covers or micro-traces of damage often requires a keen eye and patience. Embracing this deeper diagnostic approach transformed my repair skills and helped me avoid unnecessary replacements, a lesson I wish I had learned sooner. Additionally, I discovered that the right tools—like a precision multimeter and a flashlight—are game-changers for spotting issues invisible to the naked eye. Lastly, connecting with reliable resources such as professional diagnostic guides gives DIYers an edge, empowering them to tackle complex repairs confidently.