

Ever been in the middle of a dishwashing marathon, only to watch in frustration as your dishwasher’s spray arm sputters instead of swivels, leaving your glasses streaked and dishware still grimy? That lightbulb moment when you realize it’s not just a random snag but something as simple — and common — as a clog? I’ve been there, and let me tell you, nothing’s more annoying than a dishwasher that refuses to do its job because of a tiny stuck nozzle.
Why a Small Tool Can Save Your Day
I’ve learned that often, the culprit behind poor cleaning is a clog in the spray nozzles, those little holes that spray water with the force of a miniature firehose. When they get blocked — usually by mineral deposits, food particles, or soap scum — your dishwasher’s efficiency drops. The fix? Surprisingly simple: a paper clip. Yes, just a humble paper clip can be your best friend in this scenario. And the best part? You don’t need fancy tools or a costly repair technician.
Is This DIY Fix Really Effective?
I used to worry that poking around with a paper clip might damage my expensive appliances. Turns out, that was a mistake. Early on, I didn’t realize that a gentle, well-placed poke could dislodge years’ worth of buildup. The key is to be cautious and thorough. Think of it as giving your spray nozzles a mini cleaning session — quick, easy, and cost-free. Plus, it prevents minor issues from escalating into costly repairs, saving your warranty benefits. Learn more about how proper diagnostics can extend your appliance’s lifespan by visiting this helpful guide.
Now, if you’re tired of waiting on service calls or just want to keep your dishwasher humming smoothly, read on. I’ll walk you through how a simple paper clip can become your go-to tool for keeping spray nozzles clear and your dishes sparkling.
Time to Clear Your Spray Nozzles
Locate the Nozzle Areas
Start by opening your dishwasher and removing the lower spray arm. Usually, it twists or pops off easily. Inspect the spray nozzles on the arm; they are tiny holes that spray water to clean your dishes. If these nozzles are clogged, water flow drops, and your dishes won’t get thoroughly cleaned. Remember, a blocked nozzle is like a clogged straw — water can’t pass through effectively.
Check for Visible Clogs
Examine the nozzles for visible debris, mineral buildup, or food particles. Use a flashlight for better visibility. If you see any blockages, try flushing them with warm water to loosen dirt. Sometimes, mineral deposits from hard water turn nozzles into mini rock formations, blocking the water flow entirely. To prevent this, consider using a water softener or descaling your dishwasher periodically.
Unclog with a Paper Clip
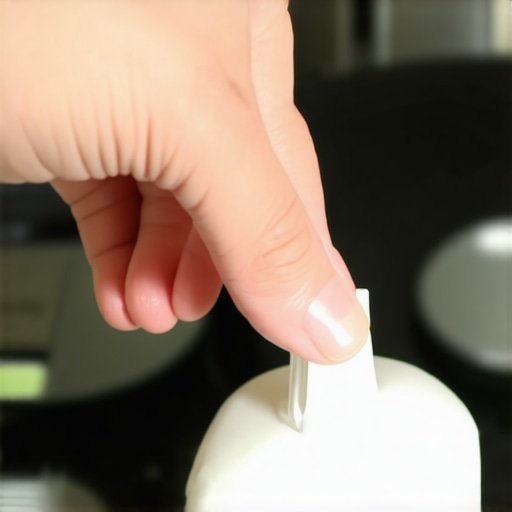
Take a standard paper clip and straighten it out. Gently insert the tip into each nozzle hole, applying light pressure to dislodge any buildup. Think of this as using a tiny corkscrew to clear a blocked pipe. Be cautious not to damage the nozzle or bend the spray arm. This method is akin to cleaning a clogged ear canal with a cotton swab — gentle persistence works best.
Pro Tip: Use Light Twists
Instead of force, employ gentle twisting motions to dislodge stubborn debris. If the clog resists, soak the nozzle area in vinegar or descaling solution for about 30 minutes, then retry. Regular maintenance prevents these clogs from forming, keeping your dishwasher running smoothly. For more detailed diagnostics that can prevent costly repairs, check out this guide.
Test Your Nozzles After Cleaning
Reassemble the spray arm and run a quick cycle with an empty dishwasher. Observe if the spray pattern is even and forceful. Use your smartphone’s slow-motion feature to see the spray arm in action if needed. If nozzles are still weak or uneven, repeat the unclogging process. Remember, persistent issues might indicate a faulty water inlet valve or worn spray arm, which may require professional diagnostics — learn about signs to watch for.
when to Seek Professional Help
If cleaning nozzles doesn’t fix the issue, or if you find internal damage, it might be time to call in an expert. Diagnostics can identify hidden problems — like a clogged drain or faulty pump — that simple cleaning can’t resolve. Protect your warranty and avoid unnecessary costs by understanding when to trust a warranty.
 Many homeowners believe that appliance warranties and diagnostic processes are straightforward, but in reality, they are often misunderstood in nuanced ways. One frequent misconception is that running a simple reset or cleaning cycle always resolves issues, yet advanced problems like faulty sensors or worn-out thermostats require professional diagnostics. Relying solely on DIY fixes without proper knowledge can lead to overlooking underlying faults that might void warranty coverage or cause further damage. For instance, some assume that replacing parts based on error codes guarantees success, but interpreting those codes accurately demands expert understanding. Moreover, the idea that warranty claims are automatically approved can be misleading; many warranties have specific exclusions, especially if proper diagnostics aren’t performed prior to repairs. These nuances emphasize the importance of knowing when to seek professional diagnostics, which can not only prevent unnecessary expenses but also protect your warranty rights. For deep insights on how understanding precise diagnostics can enhance your warranty benefits, visit this guide. Be cautious of the ‘one-size-fits-all’ approach to repairs—every appliance and issue is different. For example, a dishwasher leaking might seem simple to fix, but internal component failures like a cracked pump require specific testing and diagnosis. Blindly replacing parts based on assumptions can lead to more issues or warranty disputes. A common trap is misinterpreting error codes; manufacturers encode specific faults, and misdiagnosis can result in wasted dollars or voided warranties. Advanced diagnostics involve testing sensors, valves, and control boards with precise tools, something that DIY methods cannot match. Challenge the myth that all repairs are equally DIY-friendly—certain issues demand expert analysis and proper testing to ensure long-term reliability. Always consider professional diagnostics, especially when your warranty is active, to maximize benefits and safeguard your appliance investments. For more on identifying signs that warrant professional help, check this article. Have you ever fallen into this trap? Let me know in the comments.
Equip Yourself with Reliable Tools for Long-Term Maintenance
Maintaining your dishwasher’s performance over time requires not just knowledge but the right equipment. One essential tool I rely on is a high-quality multimeter, specifically the Fluke 117. Its accurate readings help me diagnose electrical issues such as faulty thermostats or control boards—problems that often escape standard visual inspections. Additionally, a digital endoscope camera like the Depstech USB Camera allows me to inspect internal components safely, especially in hard-to-reach areas, without disassembling the entire appliance. These tools empower homeowners to perform thorough diagnostics, often identifying issues early and preventing costly repairs.
Why I Recommend Specific Equipment
I use the Fluke 117 because of its dependable performance and simplicity, critical for checking voltage at water inlet valves or testing sensors. The USB endoscope has proven invaluable in spotting hidden corrosion or scale buildup behind panels, saving time and unnecessary part replacements. Incorporating these tools into your maintenance routine enables you to monitor appliance health actively and address minor issues before they escalate. As technology advances, I’d predict the trend will move toward smart diagnostic devices that sync with smartphone apps, providing real-time insights and reducing the need for guesswork in troubleshooting.
How do I maintain appliance diagnostics over time?
Consistent diagnostics hinge on periodic checks and employing the right diagnostic methods. Regularly measuring electrical components with a multimeter ensures sensors, switches, and control modules function correctly. Cleaning and inspecting water inlet valves and filters prevent mineral deposits from hindering operation, which you can do with simple tools like a toothbrush and descaling solutions. Documenting issues as they arise helps track patterns, making future troubleshooting faster and more accurate. For complex problems, professional diagnostics—such as testing control boards with specialized software—may be necessary. Learn more about effective diagnostics at this resource.
Tools I recommend for ongoing appliance health
Beyond multimeters and endoscopes, I advise investing in a thermal imaging camera like the FLIR ONE Pro. It helps detect uneven heating or cold spots in dishwasher components, pointing to potential faults early. Also, a good set of small screwdrivers and plastic pry tools makes disassembly safer and less damaging. Remember, proper calibration and regular testing are your best defenses against unexpected breakdowns.
Make Yourself Visible: Stay Ahead of Appliance Failures
By adopting these diagnostic tools and maintenance routines, you better position yourself to catch problems early, extend your warranty benefits, and avoid costly repairs. For example, regularly testing your thermostat with a multimeter can prevent issues that might otherwise lead to water temperature failures or energy inefficiencies, which you can verify through this analysis. Try implementing a monthly diagnostic check of key electrical components—it might just save you from an inconvenient breakdown during your busy week.
The Unseen Challenges That Teach Us Most About Diagnostics
One of the toughest lessons I learned about diagnostics, warranty, dishwasher, and appliance repair was realizing how often overlooked clues lead to the real problem. A small leak beneath the dishwasher wasn’t just a minor inconvenience; it showed me the importance of inspecting hidden components like drain traps and seals, which can silently cause bigger issues down the line. I’ve also discovered that a quick test with a multimeter not only saves time but also prevents costly misdiagnoses, especially when troubleshooting control boards or sensors. The biggest lightbulb moment? Recognizing that patience and meticulous inspection far outweigh rushing into part replacements. These insights make all the difference when trying to maximize your warranty benefits and avoid unnecessary expenses.
Tools That Turn Home Repairs Into Confidence Boosts
Over time, I’ve curated a set of tools that have transformed my DIY approach into a reliable repair routine. A high-quality multimeter like the Fluke 117 provides precise electrical readings that identify issues beyond what visual inspections can uncover. Pairing that with a USB endoscope camera enables me to peer into hard-to-reach areas, revealing hidden scale buildup or corrosion. These tools give me peace of mind, knowing I can diagnose issues early and on my schedule. I trust these because they’ve consistently delivered accurate results, helping me extend my appliance’s lifespan and protect my warranty coverage. Investing in reliable diagnostic equipment has truly been a game changer in my maintenance approach.
Believe in Your Power to Prevent Unexpected Failures
Taking charge of your appliance health isn’t just about fixing problems when they arise—it’s about proactively preventing surprises that can disrupt your day. By incorporating regular diagnostics, such as testing the water inlet valve or inspecting spray nozzles, you can spot early signs of trouble. Imagine catching a fault before it causes a complete breakdown or voids your warranty; that’s the advantage of staying engaged with your appliances’ health. Remember, small, consistent steps—like cleaning filters or verifying sensor responses—pay off big in the long run. So, why not make diagnostics a monthly habit? Your future self and your appliances will thank you for it. Want more insights? Check out our comprehensive guide on how diagnostics can save your warranty benefits.