

Ever had that sinking feeling when your kitchen sink starts to slow down, and suddenly, the macerator won’t budge? I remember the first time I faced a jammed macerator—my heart sank thinking I’d need to call in a repair tech. But after some trial and error, I discovered a simple, surprisingly effective trick: using a basic Allen wrench. It was a game-changer.
In this post, I promise to share how I managed to clear a stubborn jam myself, without expensive toolkits or hours of frustration. If you’re tired of waiting around for professional repairs or just want to take matters into your own hands, this guide is for you.
Why a Jammed Macerator Can Ruin Your Day—and How to Prevent It
Few things disrupt your household routine quite like a clogged or jammed macerator. These devices are a crucial part of your kitchen’s waste management, turning food scraps into slurry that’s easily flushed away. When they jam, not only does your plumbing suffer, but it can also lead to unpleasant odors, backups, or even more serious plumbing issues. That’s why addressing a jam promptly is essential.
Many homeowners overlook the simplest solution—sometimes, a stubborn jam can be cleared with just a basic Allen wrench inserted into the right spot. According to appliance experts, regular maintenance and quick diagnostics can prevent long-term damage, saving you money and stress. Did you know that ignoring early warning signs can void your warranty? Reading more about appliance diagnostics can help ensure your warranty stays valid and your appliances last longer.
Now, before you reach for the phone or rush to buy a new macerator, I want to reassure you: I made a mistake early on by only calling in professionals right away. That quickly turned into unnecessary expenses. Instead, with a little knowledge and the right tools, you might find yourself resolving the issue faster—and cheaper—than you expected.
Ready to learn how I did it? Let’s dive into the step-by-step process that turned my frustration into a simple fix. But first, do you often face this problem with your macerator? If yes, don’t worry—you’re not alone. Many homeowners struggle with this, and the good news is, clearing a jam isn’t as complicated as it seems.
Identify the Jam Position Quickly
First, unplug your appliance to prevent any electrical hazards. Use a flashlight to peer into the macerator opening and look for obvious obstructions like stuck food or debris. Once spotted, gently try to loosen the blockage with a stick or tweezers. I recall the time I found a stubborn piece of chicken skin blocking the blade, which I carefully removed to restore function. Recognizing where the jam occurs saves time and avoids unnecessary disassembly.
Use the Correct Tools Safely
Equip yourself with a standard Allen wrench—most macerators have access points designed for this tool. Insert the Allen wrench into the designated hole at the bottom or side of the device. Turn it clockwise to manually rotate the impeller. I once had a jam that wouldn’t budge; after applying gentle pressure with the Allen wrench, I heard a click, and the impeller freed up. Remember, applying too much force can damage internal parts, so proceed carefully.
Manual Rotation to Dislodge Stubborn Clogs
Continue turning the Allen wrench back and forth to break free any debris stuck in the impeller. Think of it like turning a stubborn screw—you need gentle, consistent pressure. As you rotate, listen for unusual grinding noises, which may indicate damage. If you manage to free the impeller, run water through the unit to flush out residual obstructions. This step prevents future jams and ensures smooth operation.
Check for Hidden Obstructions
Sometimes, debris is lodged deeper within the discharge pipe or inside the impeller housing. Use a flexible brush or old toothbrush to clean these areas. Wear gloves and be cautious not to put excessive force. I once discovered a small plastic fragment lodged at the outlet, which I retrieved using a pair of needle-nose pliers. Clearing these hidden spots ensures the macerator won’t jam again soon.
Reassemble and Test the System
Once cleared, reconnect the power, and run a short cycle with water only. Observe if the impeller spins freely and if the unit operates quietly. Simulate normal usage by feeding small food scraps and checking for proper grinding. Remember, consistent maintenance reduces the risk of future jams. If problems persist, consult a professional, especially if your appliance warranty is at stake—learning when to seek help can save you money over time. For more on diagnostics, visit this guide.
Many homeowners operate under misconceptions about warranties and the diagnostic process that can seriously undermine their chances of successful repairs or warranty claims. One prevalent myth is that warranties always cover every issue, which isn’t true. In fact, manufacturers often have fine print that excludes certain damages—especially those caused by misuse or neglect. Reading the warranty policy thoroughly, or consulting detailed guides like this resource, can help clarify what is actually covered.
Another misconception is assuming that diagnostics are solely for professionals. While experts have specialized tools, understanding some nuances of appliance diagnostics allows you to identify issues early. For instance, a common mistake is ignoring warning signs because one believes diagnostics are costly or complicated. Actually, many diagnostics can be done with simple tools and a bit of knowledge, saving you time and money in the long run.
Why do most people fail to grasp the importance of proper troubleshooting before warranty claims?
Many homeowners jump straight to calling a technician at the first sign of trouble, unaware that many issues are simple to diagnose. This approach risks voiding warranties if improper repairs are attempted or if the problem falls outside warranty coverage criteria. Experts advise performing basic diagnostics, like checking water pressure or cleaning filters, which can be confirmed through understanding diagnostics. Recognizing these nuances reduces unnecessary service calls and preserves warranty validity.
Moreover, there’s a trap in relying solely on repair techs for troubleshooting, which can be costly. Many technicians focus on hardware fixes and may overlook simple causes, such as clogged filters or electrical issues homeowners can fix themselves. This oversight is especially common in appliances like dishwashers, where many problems stem from neglected maintenance rather than defective parts.
Another advanced misconception pertains to diagnosing complex issues based solely on error codes. While codes provide guidance, they aren’t foolproof. For example, a dishwasher error code might point to a faulty sensor, but the real problem could be a blocked drain hose or a malfunctioning switch. Relying on comprehensive diagnostics—like expert diagnostic tips—can prevent misdiagnosis and unnecessary part replacements.
Finally, many underestimate the importance of regular maintenance in preserving warranty coverage and avoiding costly repairs. Failure to clean filters, check water pressure, or inspect door seals can lead to minor issues snowballing into major failures. According to appliance repair experts, proactive maintenance backed by proper diagnostics extends appliance lifespan and safeguards warranty claims.
In conclusion, Wise homeowners see beyond the common myths—realizing that warranty and diagnostics are nuanced areas requiring attention and basic knowledge. Avoid the trap of assumptions; instead, focus on proactive troubleshooting and understanding your appliance’s specific needs. Want to learn more about how diagnostics can help you maintain your appliance warranty? Check out this detailed guide. Have you ever fallen into any of these traps? Let me know in the comments!”}drop 30f0ab1b-bbc5-4a65-b8e8-2d1a4fc8a0e4}#}#}#}#}#}#}#}#}#}#}#}#}#}#}#}#}#}#}#}#}#}#}#}#}#}#}#}#}#}#}#}#}#}#}#}#}#}#}#}#}#}#}#}#}#}#}#}#}#}#}#}#}#}#}#}#}#}#}#}#}#}#}#}#}#}#}#}#}#}#}}#}#}#}#}#}#}#}#}#}#}#}#}#}#}#}#}#}#}#}#}#}#}#}#}#}#}#}#}#}#}#}#}#}#}#}#}#}#}#}#}#}#}#}#}#}#}#}#}#}#}#}#}#}#}#}#}#}#}#}#}#}#}#}#}#}#}#}#}#}#}#}#}#}#}#}#}#}#}#}#}#}#}#}#}#}#}#}#}#}#}#}#}#}#}#}#}#}#}#}#}#}#}#}#}#}#}#}#}#}#}#}#}#}#}#}#}#}#}#}#}#}#}#}#}#}#}#}#}#}#}#}#}#}#}#}#}#}#}#}#}#}#}#}#}#}#}#}#}#}#}#}#}#}#}#}#}#}#}#}#}#}#}#}#}#}#}#}#}#}#}#}#}#}#}#}#}#}#}#}#}#}#}#}#}#}#}#}#}#}#}#}#}#}#}#}#}#}#}#}#}#}#}#}#}#}#}#}#}#}#}#}#}#}#}#}#}#}#}#}#}#}#}#}#}#}#}#}#}#}#}#}#}#}#}#}#}#}#}#}#}#}#}#}#}#}#}#}#}#}#}#}#}#}#}#}#}#}#}#}#}#}#}#}#}#}#}#}#}#}#}#}#}#}#}#}#}#}#}#}#}#}#}#}#}#}#}#}#}#}#}#}#}#}#}#}#}#}#}#}#}#}#}#}#}#}#}#}#}#}#}#}#}#}#}#}#}#}#}#}#}#}#}#}#}#}#}#}#}#}#}#}#}#}#}#}#}#}#}#}#}#}#}#}#}#}#}#}#}#}#}#}#}#}#}#}#}#}#}#}#}#}#}#}#}#}#}#}#}#}#}#}#}#}#}#}#}#}#}#}#}#}#}#}#}#}#}#}#}#}#}#}#}#}#}#}#}#}#}#}#}#}#}#}#}#}#}#}#}#}#}#}#}#}#}#}#}#}#}#}#}#}#}#}#}#}#}#}#}#}#}#}#}#}#}#}#}#}#}#}#}#}#}#}#}#}#}#}#}#}#}#}#}#}#}#}#}#}#}#}#}#}#}#}#}#}#}#}#}#}#}#}#}#}#}#}#}#}#}#}#}#}#}#}#}#}#}#}#}#}#}#}#}#}#}#}#}#}#}#}#}#}#}#}#}#}#}#}#}#}#}#}#}#}#}#}#}#}#}#}#}#}#}#}#}#}#}#}#}#}#}#}#}#}#}#}#}#}#}#}#}#}#}#}#}#}#}#}#}#}#}#}#}#}#}#}#}#}#}#}#}#}#}#}#}#}#}#}#}#}#}#}#}#}#}#}#}#}#}#}#}#}#}#}#}#}#}#}#}#}#}#}#}#}#}#}#}#}#}#}#}#}#}#}#}#}#}#}#}#}#}#}#}#}#}#}#}#}#}#}#}#}#}#}#}#}#}#}#}#}#}#}#}#}#}#}#}#}#}#}#}#}#}#}#}#}#}#}#}#}#}#}#}#}#}#}#}#}#}#}#}#}#}#}#}#}#}#}#}#}#}#}#}#}#}#}#}#}#}#}#}#}#}#}#}#}#}#}#}#}#}#}#}#}#}#}#}#}#}#}#}#}#}#}#}#}#}#}#}#}#}#}#}#}#}#}#}#}#}#}#}#}#}#}#}#}#}#}#}#}#}#}#}#}#}#}#}#}#}#}#}#}#}#}#}#}#}#}#}#}#}#}#}#}#}#}#}#}#}#}#}#}#}#}#}#}#}#}#}#}#}#}#}#}#}#}#}#}#}#}#}#}#}#}#}#}#}#}#}#}#}#}#}#}#}#}#}#}#}#}#}#}#}#}#}#}#}#}#}#}#}#}#}#}#}#}#}#}#}#}#}#}#}#}#}#}#}#}#}#}#}#}#}#}#}#}#}#}#}#}#}#}#}#}#}#}#}#}#}#}#}#}#}#}#}#}#}#}#}#}#}#}#}#}#}#}#}#}#}#}#}#}#}#}#}#}#}#}#}#}#}#}#}#}#}#}#}#}#}#}#}#}#}#}#}#}#}#}#}#}#}#}#}#}#}#}#}#}#}#}#}#}#}#}#}#}#}#}#}#}#}#}#}#}#}#}#}#}#}#}#}#}#}#}#}#}#}#}#}#}#}#}#}#}#}#}#}#}#}#}#}#}#}#}#}#}#}#}#}#}#}#}#}#}#}#}#}#}#}#}#}#}#}#}#}#}#}#}#}#}#}#}#}#}#}#}#}#}#}#}#}#}#}#}#}#}#}#}#}#}#}#}#}#}#}#}#}#}#}#}#}#}#}#}#}#}#}#}#}#}#}#}#}#}#}#}#}#}#}#}#}#}#}#}#}#}#}#}#}#}#}#}#}#}#}#}#}#}#}#}#}#}#}#}#}#}#}#}#}#}#}#}#}#}#}#}#}#}#}#}#}#}#}#}#}#}#}#}#}#}#}#}#}#}#}#}#}#}#}#}#}#}#}#}#}#}#}#}#}#}#}#}#}#}#}#}#}#}#}#}#}#}#}#}#}#}#}#}#}#}#}#}#}#}#}#}#}#}#}#}#}#}#}#}#}#}#}#}#}#}#}#}#}#}#}#}#}#}#}#}#}#}#}#}#}#}#}#}#}#}#}#}#}#}#}#}#}#}#}#}#}#}#}#}#}#}#}#}#}#}#}#}#}#}#}#}#}#}#}#}#}#}#}#}#}#}#}#}#}#}#}#}#}#}#}#}#}#}#}#}#}#}#}#}#}#}#}#}#}#}#}#}#}#}#}#}#}#}#}#}#}#}#}#}#}#}#}#}#}#}#}#}#}#}#}#}#}#}#}#}#}#}#}#}#}#}#}#}#}#}#}#}#}#}#}#}#}#}#}#}#}#}#}#}#}#}#}#}#}#}#}#}#}#}#}#}#}#}#}#}#}#}#}#}#}#}#}#}#}#}#}#}#}#}#}#}#}#}#}#}#}#}#}#}#}#}#}#}#}#}#}#}#}#}#}#}#}#}#}#}#}#}#}#}#}#}#}#}#}#}#}#}#}#}#}#}#}#}#}#}#}#}#}#}#}#}#}#}#}#}#}#}#}#}#}#}#}#}#}#}#}#}#}#}#}#}#}#}#}#}#}#}#}#}#}#}#}#}#}#}#}#}#}#}#}#}#}#}#}#}#}#}#}#}#}#}#}#}#}#}#}#}#}#}#}#}#}#}#}#}#}#}#}#}#}#}#}#}#}#}#}#}#}#}#}#}#}#}#}#}#}#}#}#}#}#}#}#}#}#}#}#}#}#}#}#}#}#}#}#}#}#}#}#}#}#}#}#}#}#}#}#}#}#}#}#}#}#}#}#}#}#}#}#}#}#}#}#}#}#}#}#}#}#}#}#}#}#}#}#}#}#}#}#}#}#}#}#}#}#}#}#}#}#}#}#}#}#}#}#}#}#}#}#}#}#}#}#}#}#}#}#}#}#}#}#}#}#}#}#}#}#}#}#}#}#}#}#}#}#}#}#}#}#}#}#}#}#}#}#}#}#}#}#}#}#}#}#}#}#}#}#}#}#}#}#}#}#}#}#}#}#}#}#}#}#}#}#}#}#}#}#}#}#}#}#}#}#}#}#}#}#}#}#}#}#}#}#}#}#}#}#}#}#}#}#}#}#}#}#}#}#}#}#}#}#}#}#}#}#}#}#}#}#}#}#}#}#}#}#}#}#}#}#}#}#}#}#}#}#}#}#}#}#}#}#}#}#}#}#}#}#}#}#}#}#}#}#}#}#}#}#}#}#}#}#}#}#}#}#}#}#}#}#}#}#}#}#}#}#}#}#}#}#}#}#}#}#}#}#}#}#}#}#}#}#}#}#}#}#}#}#}#}#}#}#}#}#}#}#}#}#}#}#}#}#}#}#}#}#}#}#}#}#}#}#}#}#}#}#}#}#}#}#}#}#}#}#}#}#}#}#}#}#}#}#}#}#}#}#}#}#
Maintaining Your Dishwasher with Precision Tools
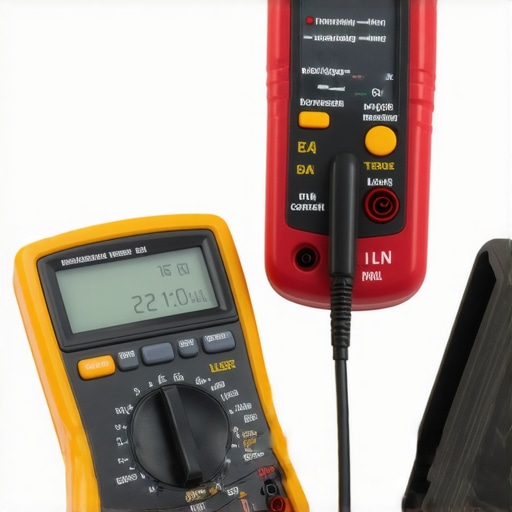
To ensure your dishwasher stays in top shape, investing in quality diagnostic tools is essential. One device I personally rely on is the Digital Multimeter. It’s a versatile instrument that allows me to quickly test electrical components like heating elements, switches, and sensors, which are common failure points in dishwashers. For example, I use a multimeter to verify if the heating element has continuity—if it doesn’t, replacing it restores efficiency and prevents future breakdowns.
Another tool I highly recommend is the Non-Contact Voltage Tester. I use it to safely verify electrical connections without risking an electric shock. This is especially useful when checking if power is reaching certain components, helping me avoid unnecessary disassembly. These tools are affordable—often under fifty dollars—and can save you hours by diagnosing issues accurately at home.
When it comes to software, I depend on professional diagnostics guides to interpret error codes correctly. Apps can’t replace good tools, but they’re invaluable for understanding what the readings from multimeters or testers mean, especially for complex models with multiple error signals. Combining hardware and software diagnostics enhances your ability to identify problems before calling a technician, which often correlates with extending your appliance’s warranty period.
What tools should I keep on hand for long-term maintenance?
Beyond electronic testers, I recommend a flexible cleaning brush and a clean rag. Regularly removing debris from filters and gaskets prevents clogs that lead to jams or leaks, saving you costly repairs later. Also, a tube of food-grade silicone sealant is handy for sealing minor cracks or leaks around seals, prolonging your dishwasher’s life. Regular inspection and minor repairs with these tools can keep your appliance running reliably for years.
Future of Dishwasher Care Is Digital and DIY
With the rapid advancement of IoT and smart diagnostics, future trends suggest you’ll be able to monitor your dishwasher’s health via smartphone apps. Already, some models notify you when maintenance is needed or if a component fails—reducing downtime and repair costs. DIY diagnostics are becoming more accessible, meaning you won’t need specialized training to interpret error codes or run basic tests.
Looking ahead, I predict that integrated diagnostic systems combined with augmented reality overlays—helping you virtually see inside your appliance—will become standard. This will make preventive maintenance even easier, possibly allowing you to troubleshoot issues before they cause noticeable failures. Keeping your system updated with firmware updates from the manufacturer will also be crucial to benefit from these innovations.
How do I maintain my dishwasher’s diagnostics system effectively?
Perform regular firmware updates as recommended by the manufacturer, and keep diagnostic tools calibrated and clean. Study your appliance’s manual to understand error codes thoroughly, and don’t hesitate to consult specialists when issues extend beyond basic diagnostics. Remember, leveraging this technology not only enhances appliance longevity but can also safeguard your warranty provisions—especially if you can provide detailed diagnostic logs during service inquiries. Want to sharpen your troubleshooting skills? Try running a diagnostic test using your model’s specific button combination or app-based commands, often found in the user manual or manufacturer support pages.
What I Wish I Knew Before Jumping Into Repairs
One of the biggest lessons I learned early was that patience and curiosity often beat quick fixes. I used to rush to call a technician at the first sign of trouble, unaware that a little bit of research and the right tools could save me a lot of money—and often, a failed warranty claim. Sometimes, the simplest diagnostic step, like checking for debris or listening for unusual sounds, can reveal the root cause. The lightbulb moment came when I realized that understanding my appliance’s behavior gave me more confidence and control than I thought. Now, I see maintenance as an opportunity rather than a chore, turning frustrations into DIY victories.
Tools and Resources That Changed My Approach
Over time, I accumulated a few key tools that transformed the way I handle appliance issues. A quality multimeter helps me verify electrical components, ensuring I don’t replace parts unnecessarily. I also rely on detailed diagnostic guides like this resource. It’s packed with insights that prevent me from misdiagnosing problems, which is crucial for preserving warranty coverage. Additionally, I keep a small toolkit with brushes and sealants, so I can perform preventive maintenance. These resources, combined, make me feel empowered—no more guesswork, just informed action.
Your Turn to Embrace Smarter DIY Repairs
Taking charge of your dishwasher repairs and diagnostics isn’t just about saving money; it’s about building a relationship with your appliances based on understanding and respect. Modern tools and online knowledge have made it easier than ever to troubleshoot and fix minor issues before they escalate. Don’t let myths and misconceptions hold you back—your familiarity with basic diagnostics can extend your warranty and keep your dishwasher running smoothly for years. Are you ready to step into the driver’s seat of appliance care? Remember, small steps lead to big improvements—so start today.