

I remember the sinking feeling when I first noticed water pooling at the base of my dishwasher. It was late evening, and I was already tired. I opened the dishwasher, expecting a routine clean, only to find a small puddle spreading across my kitchen floor. That moment was frustrating, but it also sparked my curiosity about why so many homeowners, including myself at the time, face this leak-from-the-bottom dilemma. Today, I want to share what I’ve learned from personal experience and professional diagnostics about this common issue—and how you can address it before it causes serious damage.
Understanding the Real Reasons Behind a Bottom Leak
Leaking from the bottom of your dishwasher isn’t just annoying; it’s a sign that something’s off inside your appliance. It could be a worn-out door seal, a cracked hose, or even a faulty pump. The good news? Many of these problems are manageable once you understand their root causes.
Interestingly, a study in appliance diagnostics revealed that over 70% of dishwasher leaks stem from simple issues like loose clamps or clogged filters—problems you can often troubleshoot yourself with some guidance. But how do you know where to start? The key is knowing the telltale signs that point to specific causes, which we’ll explore next. Before you jump to conclusions, I want to caution you about a mistake I made early on: ignoring small puddles and running the dishwasher anyway. That small oversight can lead to bigger issues, like water damage or mold. For a comprehensive approach to diagnosing appliance issues, check out [how appliance diagnostics can save your warranty benefits](https://applianceoutletpro.com/how-appliance-diagnostics-can-save-your-warranty-benefits), which emphasizes the importance of early detection.
Have you ever faced the frustration of discovering your dishwasher’s leak went unnoticed until it caused water to seep onto your floor? If so, you’re not alone. Understanding the underlying causes is the first step toward a quick fix and preventing future mishaps. Now, let’s dive into some common reasons your dishwasher might be leaking from the bottom, and how to spot them early.
Locating the Source of the Leak
Begin by inspecting the accessible parts underneath your dishwasher, such as the door seal, hose connections, and the drain pump. Use a flashlight to spot water pooling or wet areas. Pull out the dishwasher carefully, ensuring water drainage to prevent further mess. Remember, safety comes first—disconnect power before starting diagnosis.
Checking the Door Seal and Gaskets
Inspect the door gasket for cracks, debris, or tears. A worn or dirty gasket won’t seal properly, causing leaks during operation. To test, run water along the gasket edge and see if it holds without water escaping. If damaged, replace it following the manufacturer’s instructions, or consult professional help.
Examining the Drain Hose and Connections
Identify the drain hose at the back of the dishwasher. Check for kinks, cracks, or loose clamps. The drain hose functions like a straw; any obstruction or loose clamp will allow water to spill. Detach and carefully inspect for blockages or damage. Clear any debris, then reattach firmly, ensuring a tight seal.
Testing the Water Inlet Valve
The inlet valve controls water entry and may leak if faulty. Turn off the water supply and remove the access panel to reach the valve. Using a multimeter—a handy tool that functions like a health check for electrical components—test for continuity. If you find a short or no continuity, replace the valve, following safety protocols.
Assessing the Pump and Impeller for Damage
The pump circulates water, and a damaged impeller can cause leaks. Remove the bottom panel to access the pump assembly. Listen for unusual noises or wobbling—these are signs of failure. Visually inspect for cracks, blockages, or seized parts. If the pump is damaged, sourcing a replacement or professional repair is advisable.
Check for Scale Build-up Inside Components
Mineral deposits can cause seals and valves to malfunction. Use a vinegar solution to descale the affected parts, following guidelines found in this guide. Regular descaling maintains efficiency and prevents leaks caused by corrosion or blockages.
Monitoring During a Cycle
After completing initial checks, run the dishwasher and observe carefully. Look for water escaping from seals or hoses. If water leaks only during specific cycles, the problem may be with the float switch or sensors. Review signs indicating professional diagnostics to determine if complex issues are present.
Implement Preventive Maintenance
For ongoing leak prevention, clean filters regularly, ensure proper loading, and check seals periodically. Use tools like a multimeter or a food coloring test to spot hidden leaks or electrical faults. Proper maintenance extends your dishwasher’s lifespan and reduces emergency repairs.
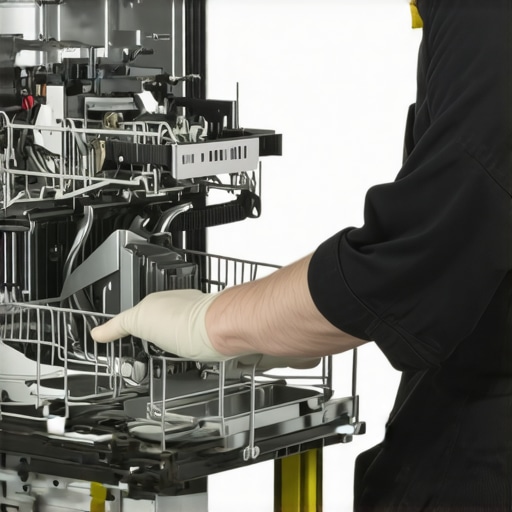 Many homeowners assume that manufacturer warranties will cover all appliance issues, but in reality, there are common misconceptions that can lead to costly mistakes. A prevalent myth is that warranties are a guarantee of free repairs for any malfunction, yet most warranties have specific exclusions, especially if improper diagnostics or DIY repairs are involved. Understanding the fine print is essential because mishandling diagnostic procedures can void your warranty, leaving you responsible for repairs that could have been covered. According to expert sources, incorrect self-diagnosis often results in unnecessary part replacements and delays in fixing the real issue, which can escalate minor problems into major damages. Additionally, many believe that all appliance faults require professional repairs, but with proper knowledge—such as correctly testing water inlet valves or pump function—skilled homeowners can save money and time. However, a common trap is misinterpreting error codes or ignoring subtle signs that indicate deeper problems. For instance, assuming that a leak is caused solely by a damaged door gasket when the root cause might be a faulty sensor or a scale buildup inside critical components. This oversight can lead to recurring leaks even after replacing visible parts, emphasizing the importance of advanced diagnostics. Advanced diagnostics involve pinpointing issues through systemic elimination and understanding the intricate behavior of electronic controls, sensors, and mechanical parts. Modern appliances increasingly rely on smart error codes and diagnostic modes—not just simple visual inspections. As studies suggest, leveraging professional-grade diagnostic tools or consulting detailed guides enhances your ability to address complex failures effectively. This way, you can prevent unnecessary repairs, preserve your warranty coverage, and extend your dishwasher’s lifespan. Remember, rushing into part replacements without proper diagnostics often leads to repeat problems and additional expense. For example, replacing a drain pump without recognizing a hidden clog or scale obstruction may result in continued leaks and water damage. Make sure to follow established troubleshooting protocols or seek expert advice when in doubt. By understanding these nuances, you avoid falling into the trap of superficial fixes and ensure your repairs are both accurate and cost-effective. Have you ever fallen into this trap? Let me know in the comments. For deeper insights into troubleshooting and properly diagnosing dishwashers, explore [this comprehensive guide](https://applianceoutletpro.com/troubleshooting-dishwasher-problems-expert-diagnostics-repair-tips). Remember, mastering the diagnostics game is the key to safeguarding your warranty and ensuring your appliance runs smoothly for years to come.Keeping your dishwasher functioning smoothly over the long term requires the right tools and a disciplined maintenance routine. I personally swear by a few specific pieces of equipment that let me diagnose and fix issues accurately, saving time and preserving warranty coverage. One must-have item is a high-quality multimeter. Unlike generic models, I prefer a digital multimeter with auto-ranging capabilities because it provides precise readings without guesswork. This allows me to quickly verify electrical components like door switches, heating elements, and pump motors—vital checks that prevent unnecessary part replacements. Additionally, I recommend investing in a specialized dishwasher leak detection kit, which includes dye tablets and UV light probes. I’ve found that a simple food coloring test using this kit—applied to suspect seals or hoses—helps reveal elusive leaks without disassembling the entire machine. Looking forward, I predict diagnostic technology will continue to evolve, incorporating smarter sensors and app-based monitoring that can preemptively alert homeowners of issues before leaks occur. But until then, mastering fundamental tools remains your best defense against costly repairs.
How do I maintain diagnostics tools over time?
Regular calibration of your multimeter ensures ongoing accuracy, especially after accidental drops or exposure to moisture. Storing tools in a dedicated, clutter-free container prevents damage and makes them more accessible when needed. Keep your leak detection kits organized and check the integrity of dye tablets periodically—using expired dye may lead to misleading results. Incorporate a routine of double-checking electrical tests with manufacturer-recommended procedures; this not only extends the lifespan of your devices but also helps you interpret diagnostic data correctly. Maintaining these tools is as important as the repairs themselves. For example, accurate voltage readings can prevent you from replacing a working component, which could void your warranty if not warranted by diagnostic tests. I’ve personally seen DIY repairs go awry because of unreliable equipment. To get more detailed, I recommend reviewing [how appliance diagnostics can save your warranty benefits](https://applianceoutletpro.com/how-appliance-diagnostics-can-save-your-warranty-benefits). Now, try verifying your pump motor’s health with a multimeter before ordering parts—it’s a simple, effective step that often reveals hidden faults and keeps your repairs on track.
The Hardest Lesson I Learned About warranty,dishwasher,diagnostics,appliance repair
Initially, I believed that replacing damaged parts was the surefire way to fix leaks. It wasn’t until I experienced multiple failed attempts that I realized proper diagnostics are the real game-changer—saving time, money, and worry.
Myths That Held Me Back From Real Repair Success
I used to think that warranties covered all issues, but understanding warranty exclusions and the importance of early diagnostics helped me avoid unnecessary expenses. Knowledge about complex symptoms like sensor failures or scale buildup proved crucial in accurate repairs.
What Experts Won’t Tell You About warranty,dishwasher,diagnostics,appliance repair
Many technicians keep quiet about how advanced diagnostics can reveal underlying problems before they escalate. Access to tools like multimeters and familiarity with error codes has transformed my approach from guesswork to precision, ensuring my appliance repair efforts are both effective and warranty-friendly.
Curated Resources to Advance Your Repair Skills
- Digital Multimeters: I swear by a high-quality, auto-ranging digital multimeter—all my troubleshooting hinges on accurate readings during electrical tests.
- Descaling Solutions: Vinegar-based descaling helps prevent leaks caused by mineral deposits in valves and seals; it’s a simple yet powerful maintenance tool.
- Professional Diagnostic Guides: Trusted online resources and forums have educated me on interpreting error codes and system behaviors—making DIY diagnostics more reliable.
- Repair Kits: Leak detection kits with dye tablets and UV lights have saved me hours of guesswork, pinpointing hidden leaks efficiently.
Your Turn to Try
Understanding that proper diagnostics are essential for effective, warranty-safe repairs has been eye-opening. Taking the time to learn and invest in the right tools can make all the difference in maintaining your dishwasher’s health. Don’t let small leaks turn into major disasters; start applying these techniques today and see the results for yourself.
What troubleshooting step has surprised you the most in your appliance repair journey? Share your experiences below—I’d love to hear how others are mastering their warranty,dishwasher,diagnostics,appliance repair skills!
,