

It was a stressful Saturday afternoon when my dishwasher refused to start, and I knew I was in for a puzzle. Instead of calling a repair technician immediately, I decided to troubleshoot the issue myself. That’s when I realized the importance of a non-contact voltage tester — a device that, honestly, felt like a magic wand at first. But I soon discovered that mastering its use wasn’t just about pushing buttons; it was about understanding what’s really happening inside those tangled wires and circuits.
Why a Non-Contact Voltage Tester Became My Best Friend in Appliance Troubleshooting
I used to think diagnosing electrical issues was best left to the pros. But one frustrating incident changed my mind. When my dishwasher stopped mid-cycle, I wondered if it was just a glitch or something more serious. I reached for my trusty voltage tester, and that moment was a game changer. The device helped me pinpoint whether a circuit was live, giving me immediate clues about where the problem lay. No more guessing or random parts swapping — just clear, visual confirmation.
What’s more, the convenience of a non-contact tester means I can quickly identify voltage presence without risking shocks or damaging sensitive parts. This added safety makes DIY diagnostics more accessible and less intimidating. Plus, I found that understanding how to detect a short circuit not only saves money but also gives me peace of mind knowing I can better communicate with professionals when needed.
Early on, I made the mistake of relying solely on visual clues, ignoring that some wires could be live without obvious signs. That’s a common error I want to help you avoid. To truly get the hang of it, you need to understand how a simple device can reveal a lot about the intricate electrical dance happening inside your appliances. If you’re tired of uncertain diagnoses and long waits for repairs, I promise that by the end of this post, you’ll be ready to confidently identify short circuits yourself.
Before diving into the practical steps, let’s address some of the skepticism. You might wonder, ‘Is a non-contact voltage tester really reliable enough for appliance diagnostics?’ Well, I’ll tell you — with the right technique, it definitely can be. And I’ll share tips based on my experience to ensure you get accurate readings every time. It’s a skill worth developing, especially when it can help you avoid unnecessary repairs and prevent potential hazards.
Now, if you’ve ever faced that panic of a faulty dishwasher, or any appliance acting up unexpectedly, you’re in the right place. Let’s explore how you can confidently spot a short circuit using this handy tool and keep your home safe. After all, a little knowledge goes a long way in maintaining your appliances and safeguarding your family’s comfort.
Prepare Your Workspace and Gather Tools
Before you begin, unplug your dishwasher from the power source to ensure safety. Then, locate your non-contact voltage tester and have it ready. Think of this device as a magic wand that reveals hidden electrical secrets—like a detective’s flashlight illuminating dark alleys. I remember my first real test when I was troubleshooting a dishwasher that wouldn’t start. I laid out my tools on a dry towel, prepared to delve into the web of wires without risking a nasty shock. Ensuring a dry workspace is as critical as having the right tool in hand.
Identify the Suspect Circuit
Consult your dishwasher’s manual or internal schematics to find the power supply wires—these typically connect to the control panel or main power cord. In my case, I knew the motor and control board were vital areas. Gently remove access panels to expose these wires, taking care not to damage any components. Imagine you’re opening the hood of a car; you want a clear view without unnecessary disturbance. Remember, some wires might look intact but still carry voltage—an illusion safety measures can help you verify.
Use the Tester to Check for Live Wires
Hold the tester close to each wire or terminal without making direct contact, similar to feeling the warmth of a pipe beneath insulation. Turn on the dishwasher’s power briefly if needed, but only after verifying your tester is functioning properly—test it on a known live source first. When the tester’s light or beep activates near a wire, it confirms the presence of voltage. I once tested a suspect wire that appeared dull and inert; the tester suddenly flashed, revealing a hidden live circuit beneath a layer of dust, saving me from a potential shock and guiding my next step.
Diagnose the Short Circuit Condition
If the tester shows voltage where it shouldn’t—such as across a component that should be de-energized—this indicates a possible short circuit. For example, if wires touching each other or a damaged insulator are detected as live, there’s your culprit. Think of it as a leak in a water hose; pressure drops where it shouldn’t. Use your multimeter to further confirm continuity between suspected points. Keep track of these findings, perhaps marking problematic areas with tape for clarity, much like a mechanic tagging faulty parts.
Isolate the Fault and Confirm
Disengage power from the appliance again and disconnect the suspected components—like detaching a faulty fuse or unplugging a damaged wire—then re-test. If the voltage disappears upon disconnection, you’ve found your short. I recall replacing a frayed wire that was sparking under the control panel, which cured the issue and prevented further damage. This step-by-step isolation mimics troubleshooting a circuit in a DIY electronics kit—disabling sections until the faulty part is revealed.
Take Appropriate Action and Record Findings
Replace damaged wires, insulating materials, or faulty components as necessary. Make sure all connections are secure—think of it as rehearsing a performance where every note must hit perfectly. Document your repairs and any observations—they can be useful if your appliance is under warranty or if you need to consult a professional later. Visiting sites like how appliance diagnostics can save your warranty benefits can help you understand the value of thorough troubleshooting.
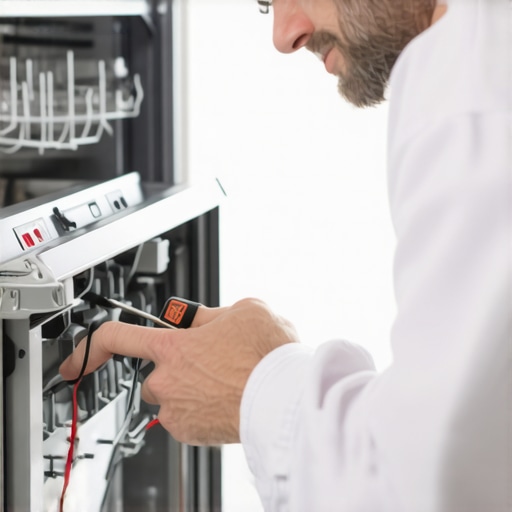
Image showing a homeowner carefully testing wires with a non-contact voltage tester inside a dishwasher’s access panel.
Many homeowners believe that running a few basic tests or replacing simple parts will resolve their dishwasher issues without fuss, but this oversimplification often leads to costly mistakes. One common myth is that if a dishwasher is not draining, it instantly requires a full replacement or a call to the technician. However, in my experience, thorough diagnostics can reveal overlooked culprits like clogged filters or faulty sensors that are inexpensive to fix and might not affect your warranty if diagnosed properly. Relying solely on general assumptions can make you overlook critical clues.
A typical mistake many make involves assuming that warranty coverage will cover all repairs, regardless of the cause. While warranties are designed to protect against manufacturing defects, incorrect diagnostics or neglecting maintenance can void coverage. Understanding the finer points of your warranty, including what exclusions apply, involves careful reading—something many skip. Visiting how appliance diagnostics can save your warranty benefits can clarify these nuances.
The belief that a quick fix or superficial inspection suffices is another trap. For example, some suggest simply resetting the control board when errors occur, but this may only mask underlying issues like faulty thermistors or clogged drainage hoses. An in-depth diagnosis, including using multimeters and sensory checks, often prevents recurring problems. Advanced technicians know that superficial solutions are merely band-aids; genuine repair requires diligent root cause analysis.
An intriguing question arises when considering warranty claims: How can homeowners ensure they’re not bypassing manufacturer protocols during diagnostics? This is where **
What advanced diagnostic steps prevent warranty voidance while fixing complex issues?**
** comes into play. Ensuring use of authorized tools and following prescribed troubleshooting guides help maintain warranty validity. Experts recommend documenting all diagnostic procedures, including photos and readings, which can serve as proof of proper troubleshooting if disputes arise.
Lastly, many underestimate the importance of understanding appliance error codes. Misreading or ignoring these signals can lead to improper repairs or unnecessary replacements. Educating oneself on what specific error codes mean, and consulting credible sources or professional advice, dramatically enhances diagnostic accuracy. For instance, recognizing that certain error codes point to sensor failures rather than motor issues can save you hundreds in repair costs.
The key takeaway here is that effective diagnostics hinge on nuanced understanding—beyond basic troubleshooting. Relying on superficial assessments or misconceptions risks invalidating warranties and perpetuating ineffective repairs. Instead, invest in learning the intricacies involved in appliance diagnostics; it’s a skill that saves money and ensures long-term appliance health.
Have you ever fallen into this trap? Let me know in the comments. For deeper insights on protecting your warranty while repairing appliances, check out this resource.Regular maintenance is key to extending your dishwasher’s lifespan and ensuring it performs efficiently. One of my go-to tools is a high-quality digital multimeter, which I use not only for diagnosing electrical issues but also for monitoring the condition of heating elements and sensors over time. Investing in a reliable multimeter like the Fluke 117 provides precise readings, making it easier to identify component degradation before failures occur. Additionally, a small, flexible inspection camera can be invaluable for checking inaccessible areas, such as the water inlet valve or drain pump, without dismantling the entire unit. This approach saves time and reduces the risk of damaging delicate parts.
Beyond hardware, leveraging specialized software can simplify diagnostics. Programs like Appliance Diagnostics Pro offer detailed troubleshooting flows based on error codes and user-reported issues, guiding even DIY enthusiasts through complex repairs. For instance, connecting your multimeter to test continuity while simultaneously referencing such software can streamline identifying faulty wiring or compromised components.
Looking ahead, I predict that integrating smart diagnostics via IoT devices will become commonplace, allowing homeowners to receive real-time alerts about appliance health, thereby preventing costly breakdowns. In the meantime, maintaining a routine—such as cleaning filters, inspecting hoses, and monitoring electrical components—remains essential.
## How do I maintain my dishwasher’s electrical and mechanical systems effectively?
The secret to reliable performance is consistent, proactive care. Regularly check and clean the water inlet filter and spray arms to prevent clogs, and inspect electrical connections using your multimeter to catch early signs of wear. Remember, addressing small issues promptly can avoid major repairs later, especially under warranty. For instance, understanding how to test your heating element with a multimeter can reveal problems before your dishwasher displays error codes or stops altogether (learn more about testing heating elements with a simple ten-dollar tool). As appliances evolve, staying updated with new diagnostic methods ensures your home remains efficient and safe. Give one of these advanced tips a try—like testing your dishwasher’s sensor with a multimeter—and see how it can prevent inconvenient breakdowns.
What I Wish I’d Known About Appliance Diagnostics Early On
One of the most striking lessons I learned was that patience and methodical troubleshooting trump quick fixes. Jumping straight to replacing parts without thorough testing not only risks voiding warranties but also leads to unnecessary expenses. Embracing a systematic approach allowed me to identify small, repairable issues rather than overlooking them in frustration.
Another revelation was the significance of understanding how each component interacts within the appliance’s electrical system. Recognizing the signals from your multimeter or non-contact voltage tester can reveal the root of a problem—like a tiny crack in a wire or a failed sensor—that might seem insignificant but causes major headaches if left unchecked.
Finally, I learned that maintaining detailed records of diagnostics and repairs aids in future troubleshooting and warranty claims. Keeping notes about what tests you’ve performed and what parts have been replaced ensures you don’t repeat errors and provides valuable evidence if disputes arise over warranty coverage or service costs.
My Favorite Resources for Mastering Dishwasher Repairs
- High-Quality Digital Multimeters — Devices like the Fluke 117 give precise readings, making complex diagnostics straightforward. Trustworthy, durable, and essential for anyone serious about DIY repairs.
- Authorized Appliance Repair Guides — Websites such as how appliance diagnostics can save your warranty benefits offer step-by-step instructions tailored to specific models, reducing guesswork and ensuring safe handling.
- Industry Forums and Communities — Engaging with experienced DIYers and professionals on platforms like Reddit’s appliance repair subreddit provides real-world tips and troubleshooting hacks that are hard to find elsewhere.
- Manufacturer Manuals and Schematics — Having original diagrams on hand speeds up identifying wiring layouts and diagnosing faults accurately, reinforcing your confidence in repairs.
Embrace the Challenge and Keep Moving Forward
Don’t let the fear of electrical troubleshooting hold you back from taking control of your appliance repairs. Every issue you solve strengthens your understanding and builds your confidence. As you become more familiar with diagnosing and fixing dishwasher problems, you’ll find that you can maintain your appliances more effectively, save money, and even extend their lifespan. Remember, each small victory is a step toward mastering appliance repair—so gear up, stay curious, and take pride in becoming your own handyman.