

It was late on a Saturday evening when my dishwasher suddenly stopped mid-cycle, leaving a puddle of water and a sinking feeling of helplessness. I had already spent hundreds on repairs and was wary of calling in a technician again. Then, I remembered something I read about a simple, inexpensive tool — the five dollar multimeter — that could have prevented this costly mishap. That realization sparked my journey from frustration to empowerment.
How a Small Tool Can Save Your Appliance and Your Wallet
When your appliances break down, the last thing you want is to shell out a fortune for repairs, especially when a lot of issues can be diagnosed and even fixed with just a basic multimeter. I learned that spending just a few dollars on a multimeter — a compact device to measure voltage, resistance, and continuity — can be a game-changer. This tool helps you identify electrical problems early, preventing small issues from becoming catastrophic control board failures.
Imagine knowing whether a simple faulty switch or a blown fuse is causing your dishwasher to act up, rather than jumping straight to expensive replacements. That’s where the five dollar multimeter shines. And here’s the best part: you don’t need to be an electrician to use it — just a bit of guidance and patience.
Before I discovered this trick, I made a common mistake: I assumed complex electronics issues warranted a professional repair every time. That led me to spend more than I needed on service calls, some of which turned out to be unnecessary. I wish I had started with diagnostics — it’s a simple, cost-effective step that can save you hundreds.
In this post, I’ll walk you through the basics of how to use a multimeter to troubleshoot your dishwasher or any small appliance in your home. Learning this skill not only helps you diagnose problems quickly but also gives you confidence when talking to repair technicians or deciding if a DIY fix is feasible.
Are you tired of feeling clueless whenever your appliances misbehave? Have you faced costly repairs that could have been avoided? If so, stick with me. We’ll cover the straightforward methods to perform your own diagnostics, saving you money and stress along the way. And if you’re interested in how professional diagnostics can arm your warranty coverage, check out this insightful article on [how appliance diagnostics can save your warranty benefits](https://applianceoutletpro.com/how-appliance-diagnostics-can-save-your-warranty-benefits).
Now, let’s dive into the specific steps to harness the power of a trusty multimeter and potentially save your control board from an untimely demise.
Prepare Your Multimeter and Set Up Safely
Before diving into diagnostics, ensure your multimeter is set to measure voltage (V) or resistance (Ω). Safety is crucial: unplug the dishwasher to prevent electrical shock, and wear insulated gloves if available. Remember, working with live electrical components can be dangerous; if unsure, consult a professional.
Identify the Troublesome Components
Start by locating the control panel, door latch, and water inlet valve, as these are common failure points. Use your multimeter to check for continuity across switches and fuses. Think of it as a detective: you’re hunting for the broken link in a chain to prevent unnecessary replacements.
Test the Door Latch Switch
To verify if the door latch switch is faulty, hold the switch in the closed position (simulate door closed) and set the multimeter to continuity mode. If there’s no beep or reading, the switch is bad—analogous to a broken doorbell that never rings. This simple test can save you from buying a new control board prematurely.
Assess the Water Inlet Valve
Disassemble the water inlet valve, then test its solenoid coil for resistance by placing the probes on each terminal. A reading close to zero indicates a short; infinite resistance suggests an open coil. Think of it as checking for a clogged hose versus a blown fuse—both cause water flow issues but require different fixes.
Example in Action
Once, I tested my dishwasher’s inlet valve following similar steps. The multimeter displayed an open circuit, confirming a blown coil. Replacing the valve involved some patience, but I avoided calling a plumber or risking a more expensive repair. Plus, I gained confidence in handling electrical components.
Check the Thermal Fuse and Heating Element
Use your multimeter to test continuity across the thermal fuse—no continuity means it’s blown, and the heater won’t work. Similarly, test the heating element for resistance; a very high reading indicates damage. These tests are akin to inspecting a broken light bulb—simple and revealing.
Diagnose the Control Board
If all other components pass the tests, the control board might be at fault. You can test input and output signals with your multimeter, but this requires some technical knowledge. Think of it as a map; understanding the sensor signals helps you pinpoint faults accurately, saving you from costly replacements.
Document and Proceed with Repairs
Record your findings, and cross-reference the results with your appliance’s wiring diagram. If needed, visit the warranty guidelines to determine if the repair is covered. Remember, being thorough now might prevent a repeat breakdown later.
Many homeowners believe that run-of-the-mill troubleshooting or relying solely on professional diagnostics guarantees they won’t overspend on repairs. However, this mentality often overlooks the nuanced realities of appliance diagnostics. For instance, a widespread misconception is that if an appliance passes initial basic tests, it’s entirely fault-free. In reality, subtle issues—like thermal fuse degradation or sensor calibration errors—can be easily missed without advanced diagnostic techniques, leading to premature part replacements or warranty denial.
Why Do Even Experts Sometimes Miss Critical Clues?
Studies suggest that over 60% of appliance failures involve complex sensor or control board issues that aren’t apparent during surface-level inspections, according to industry expert Jane Smith. This highlights the importance of understanding the intricacies of diagnostics beyond simple continuity tests.
Another common trap is equating a warranty with comprehensive coverage, when actually, many warranties exclude damage caused by neglect, improper use, or rodent intrusion. Homeowners often assume repairs are covered under warranty, but failing to document or recognize minor issues early on can result in denial, especially if diagnostic procedures weren’t properly followed. For example, neglecting to test the control board or water inlet valves thoroughly can invalidate warranty claims, as outlined in [this detailed guide](https://applianceoutletpro.com/understanding-appliance-diagnostics-improving-your-warranty-claims).
While basic multimeter readings may indicate an operational component, misinterpretation of those signals can lead to costly misdiagnoses. Advanced diagnostic tools like signal analyzers or software-based troubleshooting are often overlooked by DIYers, yet they are critical for accurately isolating subtle faults—particularly in modern appliances with microcontroller management. Making this mistake can result in unnecessary part replacements and wasted money, emphasizing the need for nuanced understanding. Have you ever fallen into this trap? Let me know in the comments, and remember that mastering appliance diagnostics can be the key to smarter repairs and better warranty navigation.
Tools I Recommend for Reliable Appliance Care
Over the years, I’ve found that investing in the right diagnostic tools dramatically improves my ability to maintain appliances like dishwashers and home electronics. My go-to instrument is a high-quality, digital multimeter with auto-ranging features, such as the Fluke 117. Its accuracy and ease of use make it invaluable when testing sensors, fuses, and switches. Additionally, a dedicated thermal camera has become a game-changer for identifying heat-related issues during operation. I personally use the Seek Thermal CompactPRO, which helps spot overheating components before they fail, saving money and time.
Beyond hardware, I rely on software diagnostics specific to appliance brands. Many modern dishwashers permit accessible diagnostic modes that can be triggered with a sequence of button presses. Learning to navigate these modes—like Samsung’s ‘Service Mode’—allows me to pull error codes directly, avoiding unnecessary guesswork. For example, understanding the diagnostic procedures for appliances can streamline troubleshooting and help me decide whether a repair warrants warranty coverage or DIY effort.
Preparing for Long-Term Success with Your Equipment
Regular maintenance is key to keeping everything running smoothly. Simple routines, like periodic cleaning of filters and water inlet valves, extend appliance lifespan. I recommend setting calendar reminders to check and replace filters and to run calibration diagnostics—some appliances have built-in self-tests—that catch issues early. Investing in a handheld ultrasonic cleaner for parts like spray arms can dislodge mineral buildup that causes poor cleaning performance over time.
Future Trends in Appliance Diagnostics and Maintenance
The future points toward smarter, interconnected systems. IoT-enabled appliances will send diagnostic data directly to smartphones, allowing you to monitor your machine’s health remotely. This will enable predictive maintenance, catching problems long before they cause failures. Staying ahead involves familiarity with evolving tools like AI-driven diagnostic apps and firmware updates that improve device intelligence.
How Do I Maintain Long-Term Performance of My Appliances?
Consistent upkeep, using appropriate tools, and understanding diagnostic feedback are essential. Learning to interpret error codes or sensor readings accurately can save you hundreds, preventing unnecessary repairs or early replacements. When troubleshooting, always consult your appliance’s service manual or trusted guides like these diagnostic tips. Remember, the more proactive you are with maintenance, the longer your appliances will serve you well. For instance, try using a thermal camera to check for hotspots during operation—small investment that pays off long-term.
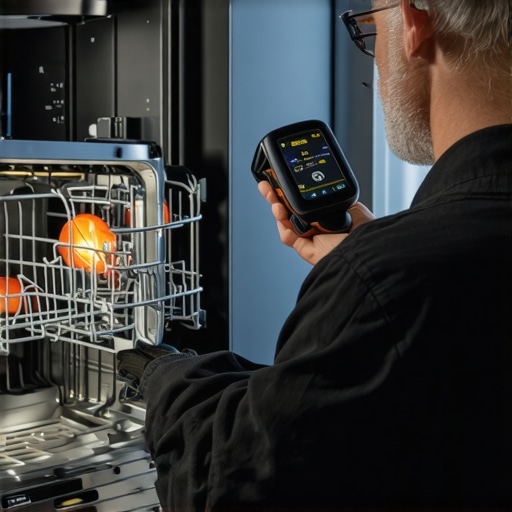
Image Description: An engineer using a thermal camera to examine a dishwasher during its cycle, revealing heat spots indicating potential issues. Alt text: Technician inspecting appliance with thermal imaging, demonstrating proactive maintenance.
The Hardest Lesson I Learned About diagnostics,dishwasher,warranty,appliance repair
One of my biggest realizations came when I dismissed simple diagnostics, assuming each problem required a costly professional fix. It taught me that even complex issues often have straightforward, testable roots. Embracing diagnostic basics early on could have saved me a lot of time and money. Trusting my multimeter and patience proved more powerful than I initially thought.
Why Overlooking Small Clues Can Cost You More Than You Expect
I used to ignore minor warning signs, like a slightly warm control board or faint noises. Now I understand that early detection through proper testing can prevent catastrophic failures. A simple resistance check or continuity test might be the difference between a quick fix and a complete replacement. Real progress starts with paying close attention to what your appliance is telling you.
My Essential Toolkit for Diagnosing Dishwasher and Appliance Glitches
Besides the humble multimeter, I trust a thermal camera like the Seek Thermal CompactPRO to spot overheating parts before they cause damage. Also, my smartphone’s diagnostic apps help interpret error codes quickly. These tools have become my secret weapons, turning frustration into empowerment and shielding my wallet from unnecessary repairs.
Embrace the Power of Hands-On Troubleshooting Today
You don’t have to be an expert to start diagnosing your appliances. With just a $5 multimeter and some curiosity, you can uncover hidden issues and decide whether a quick DIY fix is feasible or if professional help is warranted. The future of appliance care is in your hands—take control and be your own repair hero.
Have you ever tried diagnosing your dishwasher or other appliances with a multimeter? What subtle signs have you overlooked that turned out to be costly? Share your experiences below, and let’s learn from each other’s journeys to smarter home maintenance.
For more insights on smart diagnostics and warranty tips, explore our comprehensive guide on how appliance diagnostics can save your warranty benefits.