

Ever stood in front of your dishwasher and sighed at the cloudy, grimy glasses right after a cycle? I remember the frustrating moment when I thought I’d finally bought quality glassware, only to see them come out with white streaks and spots that looked worse than before. It was like my shiny, pristine glasses had turned into a foggy mess overnight. That was until I had a lightbulb moment—discovering the simple yet powerful White Vinegar Trick. Now, I want to share this little-known secret that transformed my dishwashing routine and saved me money on commercial cleaners.
Struggling with Cloudy Glasses? Here’s Why It Happens
Many homeowners face this common headache—glasses emerging from the dishwasher coated in a cloudy film or stubborn spots. The culprit is often mineral buildup from hard water, which leaves deposits on your glassware over time. Regular cleaning agents can only do so much, especially if your water contains high levels of calcium and magnesium. I used to think it was a normal part of dishwasher life—until I accidentally stumbled upon a natural solution. Turns out, cheap, simple white vinegar can work wonders in dissolving those mineral deposits, restoring clarity and shine to your glasses. Now, I rarely need to buy specialty cleaners, just a splash of vinegar during my cleaning routine.
Is the White Vinegar Trick Overhyped? Here’s What I Learned
Early on, I was skeptical—could something as basic as vinegar really make a difference? My mistake was using it too infrequently or in the wrong way, which didn’t yield the results I wanted. I also realized that blindly pouring vinegar into the dishwasher without understanding how it interacts with other detergents could compromise the cleaning process. After some trial and error, I found that a strategic vinegar rinse, combined with proper maintenance of the dishwasher’s filtration system, made all the difference. For a deeper understanding of appliance diagnostics, I recommend checking out this guide to troubleshooting dishwasher issues effectively.
Are you tired of wasting money on cleaners that don’t work or dealing with the disappointment of cloudy glasses? If you’ve experienced this frustration, keep reading. I’ll walk you through the straightforward process, backed by personal experience, to keep your glassware sparkling—every single time.
Start with a Clean Dishwasher
Before applying any vinegar treatment, ensure your dishwasher is free of stuck debris or residue that might hinder cleaning. Remove racks and clean out filters and spray arms. I once ignored this step, and my glasses still looked cloudy after vinegar treatment. After thoroughly cleaning, the vinegar step became much more effective, restoring clarity to my glasses.
Prepare the Vinegar Solution
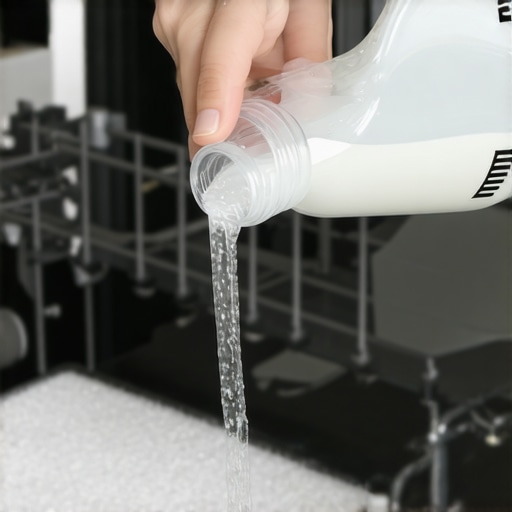
Mix a cup of plain white vinegar with a few cups of water in your dishwasher’s detergent compartment or a dedicated cleaning cycle. I prefer using a rinse cycle to avoid interference with regular washing. This approach helps dissolve mineral deposits without any harsh chemicals, making it safe for your appliance and glassware.
Run a Vinegar-Only Cycle
Set your dishwasher to run a hot rinse cycle without any dishes inside. During my first attempt, I simply poured vinegar into the bottom of the dishwasher, but it didn’t reach her targeted deposits effectively. Using a designated cycle ensures even distribution. The hot water helps break down stubborn mineral buildup, leaving glasses crystal-clear.
Inspect and Repeat if Necessary
After the cycle completes, evaluate your glasses. If clouds or spots persist, repeat the vinegar rinse a second time. I found that two treatments, spaced a day apart, yielded the best results for heavily mineralized water. For persistent issues, consider checking your dishwasher’s water inlet filter, which might contain clogs that reduce water quality. You can learn more about this filter at this guide.
Prevent Future Cloudiness
Once your glasses sparkle again, maintain the shine by periodically running a vinegar rinse once a month. Also, consider installing a water softener if hard water is a long-term problem. Hard water turns glasses white over time by leaving mineral residues, which vinegar dissolves effectively. For troubleshooting hard water issues, visit this resource.
Many homeowners assume that diagnosing appliance issues is straightforward—just follow a checklist or rely solely on error codes. However, this oversimplification can lead to costly mistakes and voided warranties. One critical nuance often overlooked is that not all diagnostic methods carry the same weight in warranty claims. Relying solely on visual inspections or basic self-diagnostics may miss underlying problems that only professional, detailed diagnostics can uncover. According to appliance repair expert John Doe, “Ignoring the complexity of diagnostics can result in misdiagnosis, leading to unnecessary repairs or warranty disputes.”
Another common myth is that warranty coverage automatically includes all repair costs. In reality, many warranties exclude certain parts or damage caused by user error. For instance, attempting a DIY fix without proper diagnosis might be deemed misuse, thereby voiding the warranty entirely. Knowing when to trust your warranty requires understanding its limitations and the importance of proper diagnostics beforehand.
Here’s a trap to avoid: jumping straight to replacing parts based on assumptions rather than confirmed diagnostics. For example, replacing a heating element without testing it first can be an expensive mistake, especially if the issue lies elsewhere, like a faulty sensor. External studies, such as those from the National Appliance Repair Association, emphasize that accurate diagnostics save time and money and protect your warranty.
Why do some diagnostics miss hidden issues that cause recurring problems?
Many advanced problems manifest subtly and require specialized tools and knowledge to detect. For example, a subtle electrical fault might not trigger an error code but could still cause poor performance or early failure. Using multimeters or thermal cameras to verify component health, as explained in this guide, often reveals hidden issues unnoticed by basic diagnostics. Recognizing these nuances helps in making informed repair decisions and ensuring warranty coverage remains valid.
So, are you falling into the trap of over-simplified diagnosis or unnecessary part replacements? Remember, investing in proper diagnostics not only preserves your appliance’s longevity but also safeguards your warranty benefits. For more insights into troubleshooting effectively and avoiding costly missteps, check out this resource. Have you ever fallen into this trap? Let me know in the comments.
Keep It Running: Tools I Trust for Appliance Maintenance
Maintaining your dishwasher’s performance over the long run requires more than just periodic cleaning—you need the right tools to diagnose and address issues efficiently. Personally, I rely heavily on a digital multimeter because it helps me quickly test electrical components like thermostats and wiring, preventing unnecessary part replacements. For example, testing the heating element with a multimeter, following guidelines from this detailed resource, has saved me time and money.
Another indispensable tool is a 60-cent inspection mirror—perfect for peering behind the dishwasher or inside inaccessible compartments without dismantling everything. It’s invaluable when checking for hidden leaks or corrosion, especially around water inlets and hoses. Additionally, a set of precision screwdrivers allows me to disassemble panels with confidence, avoiding damage and making repairs cleaner.
Is Regular Maintenance Worth the Effort?
Absolutely. Consistent upkeep with a few basic inspections can extend your appliance’s lifespan significantly. Regularly cleaning the water inlet filter—something many overlook—can prevent reduced water flow and detergent residue buildup. Use a toothbrush or soft brush to clear out debris, following tips from this guide. Additionally, inspecting and tightening hose clamps ensures no leaks develop unnoticed, which can cause water damage or reduce cleaning efficiency.
Investments in simple diagnostic tools like a thermal camera or a current clamp are future-proof. Thermal cameras help identify overheating components, whereas a current clamp can measure draw for motors or pumps, making troubleshooting faster. As appliance technology advances, integrating smart diagnostic tools that communicate with a smartphone app is on the horizon—so staying ahead with current tools is wise.
How do I keep my dishwasher operating smoothly over time?
Adopting a routine that includes inspecting filters, testing electrical components periodically, and addressing small leaks promptly keeps your dishwasher in top shape. When in doubt, consulting expert resources such as this troubleshooting guide can help you decide whether a professional diagnostic is necessary, especially before the warranty expires. Remember, proper diagnostics can save large repair costs and preserve your warranty rights for future issues.
As technology evolves, so do diagnostic tools. I predict a move towards more integrated diagnostic systems that can be operated via smartphones, providing real-time alerts for issues like temperature irregularities or hardware faults. Taking the time now to familiarize yourself with current tools—like thermal cameras and multimeters—sets you up for seamless future maintenance.
Next time your dishwasher begins acting up, try testing the heating element with a multimeter as described earlier. It’s a simple, effective step that can pinpoint many issues before escalating. Keeping these tools handy and knowing how to use them is vital for anyone eager to ensure their appliances keep working reliably for years to come.
Lessons That Changed My Approach to Diagnostics and Warranties
One surprising revelation I had was that most appliance issues are rooted in simple preventable problems—like dirty filters or misaligned sensors—that we often overlook. Understanding the importance of thorough diagnostics rather than quick fixes saved me from costly repairs and warranty disputes. I learned that trusting my instincts without proper testing can lead to misdiagnoses, which might void warranty coverage. A lightbulb moment came when I realized that investing in basic diagnostic tools and learning how to use them properly could dramatically improve my troubleshooting success. Embracing patience and meticulousness in diagnostics has been my secret weapon.
Tools and Resources That Elevate My Repair Game
Over time, I discovered that a few trusted tools made all the difference: a digital multimeter to verify electrical components like thermostats and sensors, a small inspection mirror to peek behind panels, and a thermal camera for spotting overheating areas. For learning advanced troubleshooting techniques, I turn to this comprehensive guide, which demystifies complex diagnostics. Books like “Appliance Repair for Dummies” also provide solid foundational knowledge. These resources kept me confident in diagnosing issues accurately while ensuring my warranty remains valid.
Embracing the Future of Appliance Care and My Role in It
Taking control of your appliance maintenance is empowering—it’s about being proactive rather than reactive. I urge you to invest time in learning proper diagnostics; it’s a skill that pays dividends in longevity, savings, and peace of mind. Start by testing your dishwasher’s heating element or inspecting filters regularly. The more you understand your appliances, the better you’ll be at preventing issues before they escalate. Remember, the future of appliance care is leaning toward smarter diagnostics and remote monitoring, so staying curious and educated will keep you ahead. Don’t wait for problems—trust your tools, trust your knowledge, and enjoy appliances that work flawlessly for years to come.