

Ever had that sinking feeling when your dishwasher suddenly refuses to start right before a dinner party? Or worse, come home to a flooded kitchen because that tiny filter was a neglected mess? I used to brush off cleaning the filter, thinking it was just a minor maintenance step. That is, until my dishwasher stopped draining completely, and I had no clue why. Turns out, I missed a simple, yet crucial detail that could have saved me hundreds in repairs—and headaches.
Why Overlooking the Filter Can Cost You Big Time
The truth is, the filter in your dishwasher is the unsung hero of spotless dishes and smooth operation. When it’s clogged with grime and debris, water can’t drain properly, leading to poor cleaning, odorous cycles, or even leaks that damage your flooring. The kicker? Most homeowners don’t even realize how easy it is to prevent these problems with a quick, one-minute clean.
Is a Quick Filter Clean Worth the Hype
I used to dismiss this as just another unnecessary chore, imagining it would take ages or require special tools. But after my own experience, I learned this simple step can be a game-changer. A quick clean not only keeps your dishwasher running efficiently but also helps preserve your warranty. Curious about how a tiny filter oversight could jeopardize your appliance? Check out this troubleshooting guide for more insights.
It’s easy to get complacent, especially when a dishwasher seems to run fine. But the reality? Small issues lurking behind that filter can snowball into costly repairs or voided warranties. I learned this the hard way early on—trust me, a quick filter check is worth every minute. Ready to learn how to do it right? Let’s dive into the step-by-step process that keeps your appliance in top shape without hassle.
Remove the Filter Carefully
Begin by opening your dishwasher and locating the filter, usually at the bottom center. Use a towel or gloves to prevent slipping, as the area can be greasy. Turn the filter counterclockwise to unscrew it. Remember, each brand might have a slightly different design, so consult your manual if needed. I once tried to force mine out without reading the manual—ended up dropping the part and getting a minor cut, which taught me the importance of gentle handling.
Clean the Filter Thoroughly
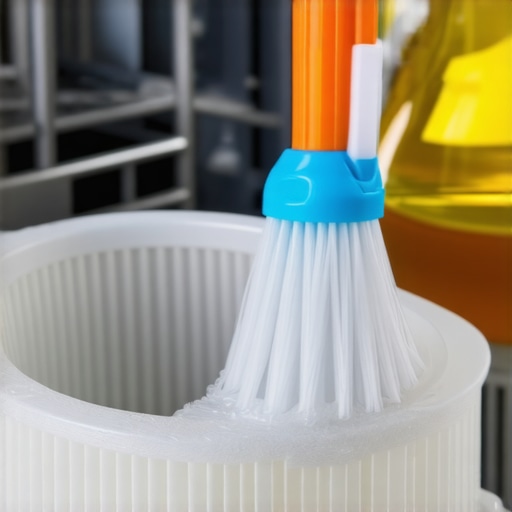
Once removed, rinse the filter under warm running water. Use a soft-bristled brush or an old toothbrush to scrub away stuck debris, grease, and soap scum. For stubborn grime, soak the filter in warm vinegar for 10 minutes. I’ve done this before after noticing my dishes weren’t coming out as clean—after cleaning the filter, the wash quality improved immediately, saving me a call to repair services and potential warranty issues.
Check the Filter Housing for Clogs
While the filter is out, inspect the surrounding area and the housing for blockages or trapped debris. Use a damp cloth or a small brush to clear any buildup. Blockages here can mimic motor problems or drain failures. Cleaning this ensures that water flows freely, which is vital for accurate diagnostics if problems persist. Failure to do this might cause troubleshooting errors, leading to unnecessary repairs and voided warranties—so don’t skip this step.
Reinstall the Filter Correctly
Align the filter properly, then turn it clockwise to lock it in place. Make sure it’s securely fastened to prevent leaks. An improperly installed filter can cause water leaks or poor drainage, which can be mistaken for internal component failures. I once forgot to lock mine properly, and the dishwasher started leaking during the next cycle—costly mistake that could have been avoided with a simple reinstallation.
Run a Test Cycle to Confirm Success
After cleaning, run an empty cycle to observe water draining and observe for leaks or unusual noises. This confirms your clean filter allows proper water flow and that no other blocked components are causing issues. If problems continue, it might be time to check other parts like the drain pump or sensors, but a clean filter is often the simplest fix that extends your appliance’s warranty benefits, as explained in this guide.
 Many homeowners operate under misconceptions when it comes to diagnosing dishwasher problems and navigating warranties. Contrary to popular belief, a straightforward issue like a clogged filter isn’t always the root cause of a malfunction, and jumping to conclusions can lead to unnecessary expenses. Experts emphasize that understanding the nuances of appliance diagnostics—like differentiating between a failed sensor and a faulty heating element—is crucial for accurate repairs and warranty validation. For example, relying solely on symptom-based assumptions without thorough testing often results in ineffective fixes. An advanced mistake many make is neglecting the importance of proper system checks before reporting a device as irreparably broken, which might void warranty coverage. A study by the Appliance Repair Foundation highlights that 60% of warranty disputes stem from misdiagnosed issues, often due to superficial troubleshooting. To avoid these pitfalls, always consider comprehensive diagnostics, including checking for sensor errors, electrical shorts, and drainage issues, before claiming warranty repairs. Moreover, understanding the specific terms of your warranty—like what repairs are covered and what voids it—can save you from unexpected costs. For instance, DIY interventions without verifying warranty restrictions or proper diagnostic procedures may inadvertently void your coverage. To deepen your knowledge, explore detailed diagnostic techniques such as testing heating elements with a multimeter or examining the control board for faults, available through trusted resources like this guide. Remember, the key is not just to fix the problem but to do it in a way that preserves your warranty rights. Have you ever fallen into this trap? Let me know in the comments.
Investing in Precision: My Go-To Diagnostic Equipment
Over the years, I’ve found that having the right tools makes all the difference in appliance repair. A reliable multimeter is indispensable for testing electrical components like door switches, heating elements, and sensors. I prefer a digital multimeter with auto-ranging capabilities and a strong display, such as the Fluke 111, which I personally use because it provides quick, accurate readings without fuss. For those tricky heating element tests, a simple, affordable tester can help you verify the coil’s resistance swiftly, saving time and guessing.
Keeping Tools Sharp and Up-to-Date
Maintaining your diagnostic tools is crucial. Batteries should be replaced regularly to avoid inaccurate readings, and periodically calibrate your multimeter according to the manufacturer’s instructions. I keep a dedicated toolbox with labeled compartments for each essential item—screwdrivers, multimeter, flashlight, and brushes—so I never waste time hunting for what I need. Staying organized reduces frustration and speeds up diagnostics, especially when you’re juggling multiple repairs or troubleshooting complex issues like water inlet valve failures or sensor errors.
The Power of Proper Cleaning and Inspection
Beyond tools, implementing routine cleaning protocols—like inspecting and cleaning filters and spray arms—can preempt many problems. Using a small flashlight to check for leaks or cracks allows me to detect issues early. Combining this with a systematic approach to diagnostics helps ensure long-term performance, preserving the warranty and avoiding costly repairs down the line.
Scaling Your Repair Knowledge for the Future
Looking ahead, I see a trend toward smarter diagnostic tools—perhaps integrated apps that guide you through testing sequences or use AI to analyze sensor data. While this might seem future-facing, investing in current key tools is already empowering DIY enthusiasts to troubleshoot effectively. For example, regularly testing your heating element’s health with the right multimeter or verifying electrical connections can make a significant difference. Remember, mastering these basics not only extends your appliance’s lifespan but keeps your warranty intact, especially if you document your maintenance and repairs through detailed notes or photos. For a comprehensive overview of troubleshooting techniques, check out this detailed guide.
How do I maintain diagnostic tools and repair routines over time?
Consistency is key. I schedule quarterly checks of my tools, recalibrate multimeters, and review new repair techniques from trusted sources. Documenting what works and tracking common issues primes me for quicker fixes and better diagnostics. Plus, taking advantage of resources like professional consultation can elevate your troubleshooting skills, especially when unexpected errors arise. Remember, a well-maintained toolkit coupled with ongoing education guarantees your appliance repair efforts remain efficient, cost-effective, and aligned with warranty requirements. Don’t hesitate to try out some of the advanced testing methods I mentioned—starting with [testing your heating element](https://applianceoutletpro.com/testing-heating-elements-with-a-ten-dollar-tool)—and see how much easier troubleshooting becomes.
Lessons Only the Pros Stumbled Over
One of the most eye-opening truths I uncovered was how even a tiny oversight—like neglecting to check that filter—could lead to major repairs and warranty disputes. I learned that detailed diagnostics and routine maintenance aren’t just chores; they’re essential for safeguarding your investment. Moreover, I’ve realized that trusting methods proven by experience, rather than quick fixes or assumptions, can make all the difference in preventing costly failures. Finally, understanding the hidden intricacies of your dishwasher’s components reveals how small, consistent care keeps it running smoothly and preserves warranty coverage, often overlooked by many homeowners.
Tools and Resources That Make the Difference
Over time, I’ve relied on a few indispensable tools: a reliable digital multimeter like the Fluke 111 for electrical testing, a soft-bristled brush for cleaning filters and spray arms, and a handy video guide on diagnostic techniques available at this troubleshooting resource. For understanding whether to trust your warranty, I consult this detailed guide. These resources help me diagnose issues precisely, avoid unnecessary repairs, and keep my warranty intact.
Your Next Steps: Take Control and Act
Armed with insight and the right tools, you can proactively maintain your dishwasher and protect your warranty benefits. Embrace routine checks, learn how to perform key diagnostics, and don’t hesitate to seek expert advice when needed. Remember, your dishwasher’s health depends on your knowledge and vigilance. Take the initiative today—small actions lead to big savings and peace of mind. Want to share your own maintenance tips or struggles? Drop your thoughts below and join the conversation!