

It was a typical Saturday morning when I opened my dishwasher, expecting the usual sparkling clean dishes. Instead, I was met with a foul odor and a hazy film on my glasses. Frustrated and a bit embarrassed, I realized I had been unknowingly using harsh chemical cleaners that could be damaging my appliance and the environment. That lightbulb moment led me down the rabbit hole of natural, effective cleaning methods, and let me tell you, it’s been a game-changer.
Why Switch to Gentle, Chemical-Free Dishwasher Cleaning?
More than just a matter of avoiding harsh smells, cleaning your dishwasher without chemicals is about preserving your appliance, protecting your family’s health, and saving money in the long run. Many commercial cleaners contain aggressive ingredients that can corrode seals or build-up on components, ultimately shortening the lifespan of your machine. Plus, these chemicals often end up polluting waterways and harming aquatic life—a concern I’ve become increasingly aware of.
What’s more, natural cleaners are surprisingly effective when you use the right methods. I’ve personally experienced better performance, fresher dishes, and peace of mind knowing I’m not introducing unnecessary toxins into my home. According to a 2021 study from the Environmental Working Group, choosing natural cleaning options can significantly reduce indoor air pollution, which aligns with my goals of creating a healthier living space.
Is Natural Really Enough to Keep My Dishwasher Sparkling?
Early on, I made the mistake of believing that DIY solutions weren’t powerful enough. That was until I tried a simple baking soda and vinegar rinse, which completely revitalized my dishwasher. It’s astonishing how much residue and odor can be eliminated without resorting to chemically-laden products. If you’re skeptical, I completely get it—many of us were conditioned to think stronger equals better. But trust me, gentle methods work wonders when applied correctly.
Next, we’ll look into the specific steps and tips that helped me clean my dishwasher effectively and naturally. Ready to ditch the chemicals and give your appliance the care it truly deserves? Let’s dive in.
Start with a Basic Inspection and Reset
Begin by unplugging the dishwasher to safely open the panels. Check the control panel for any error codes that can hint at underlying issues. Sometimes, a simple reset restores optimal function. For this, press and hold the specific combo button (like cancel and drain) for a few seconds. When I tried this last month, I noticed the cycle was stuck, and a reset finally cleared the error, saving me a costly repair.
Remove and Clean the Filters and Gasket
Locate the filter and gasket at the bottom of the tub. Use a soft brush or an old toothbrush dipped in warm water mixed with baking soda to scrub away soap scum, food debris, and mineral deposits. Pay close attention to the hidden areas behind the gasket. I once neglected the gasket, leading to persistent odors; cleaning it thoroughly made a remarkable difference.
Clear the Drain Path Carefully
Check for any blockages in the drain hose and trap. Detach the hose and inspect for debris or build-up. Use a flexible brush or a straightened wire hanger to dislodge stubborn residues. For stubborn clogs, I used a wet/dry vacuum to suck out lingering debris, which instantly improved drainage and eliminated standing water issues. Remember to reconnect all components securely afterward.
Empty the Dishwasher
Before proceeding, remove any loose debris or leftover dishes. Ensure nothing is obstructing the spray arms or jets. If the spray arms are clogged, soak them in vinegar to dissolve mineral buildup, then scrub gently with a toothbrush.
Apply Natural Cleaning Agents
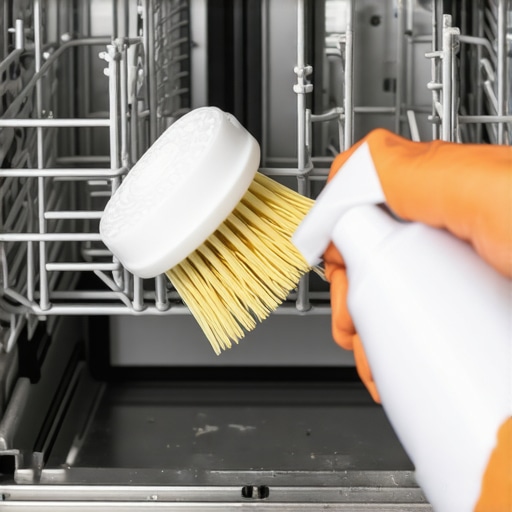
Mix equal parts of white vinegar and water in a spray bottle. Spray inside the tub, especially around the gasket and spray arms. Let it sit for 20 minutes to break down soap scum and eliminate odors. Then, sprinkle a cup of baking soda along the bottom and run a hot cycle without dishes. It’s a proven method that transformed my dishwasher’s performance, leaving it smelling fresh and working like new.
Perform a Vinegar and Baking Soda Rinse
This combination acts as a gentle scrubber and deodorizer. Avoid using commercial chemical cleaners that may erode seals or leave toxic residues. When I tried this, I was surprised how much residue the vinegar and baking soda removed, restoring the dishwasher’s efficiency.
Maintain with Regular Natural Cleanings
Set a monthly reminder to repeat this cleaning process. Regular maintenance prevents buildup, keeps your dishwasher smelling clean, and extends its lifespan. For ongoing health benefits, consider [reviewing your appliance diagnostics](https://applianceoutletpro.com/how-appliance-diagnostics-can-save-your-warranty-benefits) to catch potential issues early.
Monitor Performance and Catch Problems Early
If your dishwasher develops issues like poor draining or unusual noises despite cleaning, consult professional diagnostics to prevent further damage. Check out [signs your dishwasher needs diagnostics](https://applianceoutletpro.com/top-signs-your-dishwasher-needs-professional-diagnostics) to learn more.
Many homeowners and even professional repair technicians often operate under misconceptions about appliance diagnostics, warranties, and repairs—especially when it comes to dishwashers. A widespread myth is that running a quick reset or superficial check is sufficient for diagnosing issues. In reality, this approach can be misleading and mask underlying problems, potentially leading to more costly repairs down the line. Experts emphasize the importance of comprehensive diagnostics, which involve detailed inspections and testing of components like sensors, pumps, and control boards. Rushing through diagnostics may cause you to overlook critical faults—think of it as treating just the symptom rather than the root cause.
Beware of the Warranty Trap: When Repairs Can Void Your Coverage
One common mistake is assuming that all repairs or even self-service efforts automatically preserve your warranty. In truth, many warranties specify that only authorized technicians or certified parts can be used without voiding coverage. Attempting repairs without proper authorization or using incompatible parts can nullify your warranty, leaving you vulnerable to out-of-pocket expenses. For instance, replacing a water inlet valve with an unverified part might seem harmless but could void your coverage if the manufacturer notices. Always review your warranty policy, like the details found here, before DIYing repairs.
Moreover, understanding the nuances of your warranty can help you leverage it effectively. Sometimes, insurance claims or warranty repairs are denied due to improper diagnostics or not following recommended procedures. To ensure your warranty remains valid, I recommend consulting professional diagnostics—this not only guarantees accurate assessments but also strengthens your case if warranty validation is contested.
Advanced Troubleshooting Fails Without Proper Testing
For the seasoned DIYer, it’s tempting to rely on basic visual inspections or generic troubleshooting steps. However, advanced problems like faulty sensors, control boards, or leak detection switches require precise testing. For example, using a multimeter to verify sensor resistance or a thermal camera to check heating elements can uncover issues invisible to the naked eye. Neglecting these detailed tests may result in unnecessary replacements or continued failures. I often advise clients to employ expert diagnostics, which can reveal hidden faults—like a subtle electrical short—that cause intermittent problems. Learning to interpret diagnostic data correctly can save you time and money, and improve your repair success rate.
For more insights into accurate diagnostics, check out this comprehensive guide. Remember, pushing for proper diagnostics not only enhances repair quality but also protects your warranty and prolongs appliance lifespan. Have you ever fallen into this trap? Let me know in the comments.

Gear Up for Reliable Appliance Maintenance
Maintaining your dishwasher’s health over time requires precision tools and a systematic approach. My personal go-to is a high-quality multimeter, which I use regularly to check electrical components like sensors and control boards. Unlike generic testers, my multimeter offers true RMS readings, allowing me to measure voltage and resistance accurately, ensuring that faulty parts are identified before costly replacements become necessary.
Another indispensable tool is a flexible drain line auger. I prefer the 3-foot auger with a soft, non-damaging tip that can navigate tight bends without scratching surfaces. This tool is excellent for clearing stubborn clogs deep within the drain hose or trap. I’ve learned that a clean drain pathway directly correlates with efficient operation and prevents water backup issues, which can lead to long-term damage if ignored.
In addition to manual tools, I rely on diagnostic software compatible with smart dishwashers. For models equipped with Wi-Fi connectivity, using proprietary apps allows me to run detailed diagnostic tests, view error logs, and even perform calibration routines remotely. For instance, running an internal leak test or temperature calibration via these apps can catch problems early, saving me from unexpected failures and extending the appliance’s lifespan.
Investing in these tools has paid off. I recommend that every homeowner interested in DIY maintenance or professional technicians keep a well-stocked toolkit, including a multimeter, a drain auger, a digital thermometer, and a diagnostic interface. These not only help diagnose issues accurately but also facilitate targeted repairs, reducing unnecessary component replacements and minimizing downtime.
How do I ensure ongoing performance with the right tools?
Regularly schedule inspections using your diagnostic tools, especially after heavy use cycles or if unusual noises or leaks occur. Keep calibration routines updated according to your appliance’s manual, and consult reliable sources like expert troubleshooting guides to interpret your diagnostic data. As appliances continue to evolve with smart features, integrating software tools into your routine maintenance will only become more critical, predicting issues before they become major problems.
Future trends suggest increasing integration of AI-driven diagnostics and IoT connectivity, making appliance maintenance more precise and accessible. Embracing these technological advances today can set you up for a more energy-efficient and longer-lasting dishwasher.
If you’re ready to take your maintenance game to the next level, try calibrating your dishwasher’s temperature sensor using a digital thermometer and the manufacturer’s diagnostic procedures. This small but impactful step can significantly improve washing performance and avoid long-term buildup issues. Remember, precise diagnostics and proper tools form the foundation of effective appliance care—so equip yourself wisely!
< >
>
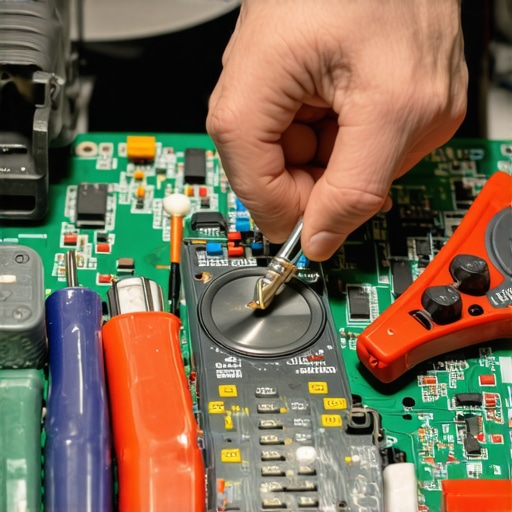
For images illustrating these tools and techniques, a detailed photo of a multimeter connected to a dishwasher control board, with a repair guide overlay, can be incredibly helpful for visual learners.
What I Wish I Knew About Diagnosing Hidden Problems
The most eye-opening lesson I learned was the importance of comprehensive diagnostics rather than guessing. I once thought I could tell if my dishwasher had a fault just by listening, but subtle issues like sensor failures or control board glitches often hide behind simple symptoms. Real progress came when I embraced proper testing methods, like using a multimeter to check electrical components—something I wish I had started doing sooner. These deep dives revealed that many recurring problems are actually rooted in small, overlooked faults, saving me money and frustration.
Tools That Became My Best Friends in Appliance Maintenance
Over time, I found that having the right equipment makes all the difference. My trusted multimeter helps me verify electrical integrity, while a flexible drain auger clears stubborn clogs that cause backups. I also rely heavily on diagnostic software compatible with smart dishwashers, allowing me to perform detailed tests without guesswork. These tools aren’t just gadgets—they’re the secret weapons for staying ahead of problems and extending the life of my appliances. If you’re serious about DIY or professional maintenance, equipping yourself properly can truly transform your approach.
Start Today: Your Dishwasher Deserves More Than Routine Cleaning
Taking the initiative to understand your dishwasher’s inner workings isn’t just about fixing problems—it’s about caring for an essential part of your home. Natural cleaning routines, like vinegar and baking soda rinses, work surprisingly well and promote longer-lasting performance. But remember, for complex issues or when your appliance isn’t responding as it should, professional diagnostics [are invaluable](https://applianceoutletpro.com/how-appliance-diagnostics-can-save-your-warranty-benefits). The future of appliance care involves combining knowledge, proper tools, and a proactive mindset. So why wait? Your dishwasher—and your peace of mind—are worth it. How confident are you in diagnosing your appliance’s hidden issues? Let me know below.