

Have you ever been stuck in the middle of a wash cycle, only to realize your dishwasher is glitching, and you’re left wondering if there’s a quick fix? I remember the lightbulb moment when I faced a stubborn touch-control panel that refused to respond. My first instinct was to call a technician, but after a bit of digging, I discovered I could force the machine into diagnostic mode myself, saving time and money. That revelation transformed how I approached appliance problems, turning frustration into empowerment.
Why Forcing a Diagnostic Mode Can Save You Time and Money
Many homeowners overlook the power of diagnostic modes in modern appliances. These modes are like secret codes that reveal what’s really wrong without unnecessary repairs. With a simple process, you can identify issues early, often without needing a repair service. Plus, understanding these diagnostic procedures helps you advocate for your warranty claims more effectively. I learned that many faults can be pinpointed with a few button presses, which is especially helpful when a warranty is still active. For more insights on this, check out how diagnostics can protect your warranty.
Is It Really Worth Attempting These Tests?
At first, I was skeptical. I worried I might accidentally spoil the appliance further or void my warranty. My early mistake was not reading the manual carefully and rushing into experiments. I thought, “It can’t be that simple, right?” Turns out, many diagnostic modes are designed for user-friendly access, provided you follow the right steps. The key is to proceed cautiously and educate yourself beforehand. A quick tip: always review your manufacturer’s guidelines or trusted resources before diving in. You might also want to review a comprehensive guide on appliance diagnostics.
Now that I know how to activate diagnostic modes myself, I feel far more confident tackling smaller issues, and I can even communicate more effectively with technicians when a call is necessary. Ready to learn the steps? Let’s dive into how you can manually force your touch-control dishwasher into diagnostic mode and start diagnosing like a pro.
Locating the Correct Buttons for Diagnostic Entry
Begin by identifying your dishwasher model’s specific control panel layout—think of it as finding the right keys to unlock a secret code. Usually, the manual or manufacturer website provides a chart of button combinations. In my case, I pressed and held the “Start” button while simultaneously pressing “Cancel” for three seconds, which is a common entry method. Remember, each brand may have a unique sequence, so look up your model’s instructions; this is crucial to avoid unintended resets or errors. To ensure you’re on the right track, check professional troubleshooting tips.
Executing the Diagnostic Mode Activation
Once you’ve identified the correct button combination, press and hold those buttons as per instructions—typically for 3-5 seconds. This action acts like turning a key in a lock. If successful, your control panel lights may flash, or the display might show a code indicating you’re in diagnostic mode—think of it as the appliance’s way of saying, “I hear you, let’s do some self-checks.” For my dishwasher, holding “Heated Dry” and “Delay Start” simultaneously for five seconds initiated the mode. Keep in mind, if nothing happens, double-check the manual or try a different combination; persistence is key. This step is similar to booting up a device into safe mode, allowing you to run tests without interference.
Running Diagnostic Tests Through the Panel
With the machine in diagnostic mode, you can now run specific tests. Usually, pressing a certain button scrolls through test options, such as draining, filling, or cycling. For example, pressing “Start” on my unit began a diagnostic cycle that tested each component sequentially—like a health check-up. Observe any error codes or abnormal sounds; these are clues indicating issues. Keep a record of what the machine reports, as it will help identify faulty parts later. Remember, this process is analogous to running a system diagnostic on a computer to reveal hidden issues, saving you from unnecessary repairs.
Applying this Technique to Your Model
Each dishwasher brand has its quirks. Therefore, the next step is to consult your specific user manual or trusted online resources. Manufacturers like Whirlpool, Bosch, and Samsung often have unique button sequences, so verifying these details prevents missteps and potential warranty issues. If you’re unsure, consider seeking help through professional diagnostics, which can be more efficient. For detailed ways to verify your model’s diagnostic entry, visit warranty considerations, or contact a local expert for guidance.
Document Your Findings for Future Reference
As you run tests, keep a detailed log of error codes and behaviors. This documentation is invaluable, especially if you need to escalate the issue to customer service or replacement parts. Think of it as your appliance’s health report, clearly communicating what’s wrong without ambiguity. When you have comprehensive information, you’re better equipped to advocate for repairs under warranty or decide if professional intervention is necessary. Remember, mastering this process turns frustration into empowerment—saving time, money, and peace of mind.
Many homeowners hold the misconception that following the basic troubleshooting steps always guarantees a successful repair or warranty claim. However, in my experience, there are subtle nuances and common myths that can sabotage your efforts if not understood properly. For example, popular belief suggests that activating diagnostic modes or resetting appliances frequently voids warranties—this is misleading. Experts, like those from the National Appliance Repair Association, emphasize that understanding the specifics of your manufacturer’s warranty policy is essential, as many cover diagnostic procedures if performed correctly, which you can learn more about here. Another misconception revolves around the belief that all appliance problems are hardware failures; often, the real issue is a simple user error or a minor fault easily fixed through advanced diagnostic techniques. Myth-busting reveals that diagnosing properly requires more than just following a generic guide—it’s about knowing which tests to run and interpreting their results correctly. A common trap many fall into is rushing to replace parts without confirming the fault through proper diagnostics, which can lead to unnecessary expenses. To avoid this, consult professional troubleshooting guides and leverage expert advice to improve your accuracy.
An advanced tip for seasoned DIYers involves understanding the significance of subtle error codes that appear during diagnostic tests. These codes can reveal issues like sensor misalignments or control board faults—problems that a beginner might overlook. For example, a 3-beep pattern during diagnostic mode in some dishwashers indicates a specific component failure, which can be pinpointed with detailed testing. Recognizing and interpreting these cues is crucial, especially when seeking to maximize your appliance’s lifespan or to make effective warranty claims.
Also, beware of the ‘Oops’ factor—small mistakes during diagnostics can lead to bigger problems or false diagnoses. For instance, misapplying troubleshooting procedures or ignoring manufacturer’s instructions may not only void the warranty but also exacerbate the fault. Always double-check instructions before performing tests, and when in doubt, reach out to professionals through trusted resources like contact channels.
In conclusion, the key to successful appliance repairs and warranty claims lies in mastering the nuances of diagnostics, understanding policy details, and avoiding common traps. Remember, comprehensive knowledge combined with cautious execution can save you time and money. Have you ever fallen into this trap? Let me know in the comments, and share your own experiences with appliance diagnostics or warranty battles.
How do I maintain my appliance diagnostics over time?
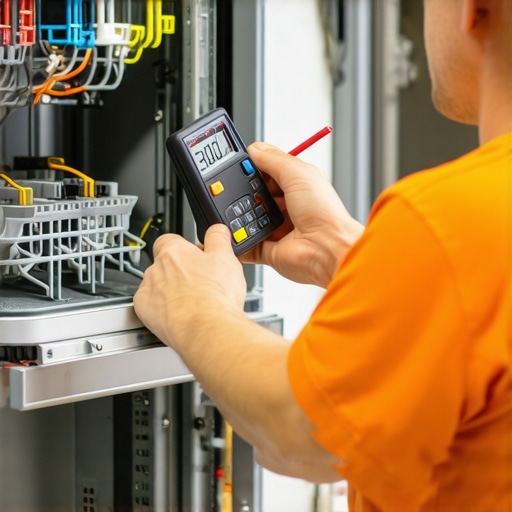
Proper maintenance of your diagnostic tools and repair methods is essential to ensure long-term reliability and performance of your dishwasher. One of my go-to tools is the digital multimeter. I personally rely on a high-quality multimeter like the Fluke 117 because of its precise readings and durable build. It allows me to accurately test components such as heating elements and door switches, preventing unnecessary replacements.
Another vital instrument I recommend is a small inspection camera with a flexible cable. I use it to visually inspect hoses and inaccessible interior parts without disassembling everything. This saves time and reduces the risk of accidental damage. Regular use of these tools enables me to catch issues early, maintaining appliance health and avoiding costly repairs.
Additionally, keeping your diagnostics procedures updated and documenting your findings improves your troubleshooting skills over time. As technology advances, new diagnostic software and apps emerge—some models even communicate wirelessly with apps, making diagnostics more accessible and efficient.
Looking ahead, I predict that AI-powered diagnostic tools and IoT (Internet of Things) integrations will become standard, allowing real-time monitoring and predictive maintenance—minimizing downtime and extending appliance lifespan.
What steps can I take to keep my dishwasher working flawlessly over the years?
Routine cleaning and inspection are your best friends here. Use a mixture of vinegar and baking soda monthly to clear mineral buildup and keep sensors clear. I also recommend inspecting the water inlet valve and drain hose annually for clogs or leaks, using a combination of visual checks and simple diagnostic tests like the multimeter resistance check. These small steps help you maintain peak performance.
Regularly updating your repair knowledge—from troubleshooting techniques to understanding new warranty policies—ensures you stay ahead of potential issues, saving money and prolonging your appliance’s life. For example, understanding when diagnostics are needed and how to interpret error codes can prevent premature part replacements or warranty denials. You might want to brush up on tips from professional troubleshooting.
My personal advice: integrate these tools into your maintenance routine, and don’t hesitate to perform basic diagnostics regularly—think of it as a health check-up for your dishwasher. Trying out the pressure switch port cleaning with a straw or testing door switches with a multimeter can be surprisingly effective and simple to do at home.
In summary, maintaining your appliance diagnostics over time involves using the right tools, staying informed about technological advances, and adopting a proactive attitude toward routine inspections. This approach not only ensures your dishwasher functions optimally but also empowers you to handle minor issues before they become major headaches. Remember, the key is consistency and education—so pick a tool or method, and start implementing it today!
What I Wish I Knew Before Diving Into Diagnostics
One of the hardest lessons I learned was that rushing into repairs without a clear plan often leads to unnecessary expenses and frustration. I once attempted to reset my dishwasher multiple times, thinking it would resolve all issues—only to realize I was missing crucial error codes that could have pointed me directly to the problem. The key insight? Patience and detailed record-keeping saved me from making costly mistakes.
Another lightbulb moment was discovering how critical it is to interpret subtle signs during diagnostics. For instance, a faint clicking sound or inconsistent flashing lights can reveal underlying issues that aren’t immediately obvious. Recognizing these signals helped me avoid premature part replacements and empowered me to communicate effectively with specialists.
Finally, I learned that understanding your manufacturer’s warranty policies is a game-changer. By knowing what repairs and diagnostics are covered, I could confidently perform certain tests myself, saving time and avoiding warranty pitfalls. This knowledge shifted my approach from reactive to proactive, making appliance care less daunting.
Tools and Resources That Changed My Approach
My go-to toolkit includes a reliable digital multimeter like the Fluke 117, which provides precise readings essential for diagnosing electrical components. I trust it because of its durability and accuracy, helping me confidently test heating elements and switches.
A flexible inspection camera has been invaluable for visually inspecting hoses and hard-to-reach areas without disassembly. It’s a simple addition that prevents unnecessary damage and helps catch issues early.
For learning and updating my skills, I rely heavily on trusted resources like professional troubleshooting guides and manufacturer-specific manuals. These sources provide step-by-step instructions and insights that elevate my diagnostics from guesswork to precision.
Lastly, staying connected with online communities and forums dedicated to appliance repair offers real-world tips and shared experiences, which are often more practical than generic advice. They remind me that continuous learning is part of the journey, making me more confident with each diagnosis.
Stepping Into the Future of Dishwasher Care
If you’re eager to become more self-reliant and confident in maintaining your dishwasher, start small. Regularly check and clean grime-prone areas like filters and spray arms, and practice basic diagnostics to familiarize yourself with error signals. Over time, these habits will become second nature, transforming frustration into mastery.
Remember, the more you understand your appliance’s inner workings, the better you’ll handle unexpected issues — and perhaps even extend its lifespan. So, embrace the challenge, keep learning, and don’t hesitate to take that first step toward becoming your own repair hero. Curious to see how far you can go? Share your experiences or questions below, and let’s grow together in appliance diagnostics mastery!