

Last week, I was scrambling to load the dishwasher before guests arrived when I heard that dreaded gurgling noise—my dishwasher refused to drain. The water just sat there, pooling at the bottom, and I knew I was in for an unexpected mess. Frustration bubbled up because I’d faced this problem before, but each time, it felt like I was reinventing the wheel, guessing what’s wrong. Sound familiar?
Why a Dishwasher Won’t Drain Can Drive You Crazy
If you’ve ever dealt with a dishwasher that refuses to drain, you know how disruptive it can be to your daily routine. Not only does standing water risk stinking up your kitchen, but it also raises questions about whether your appliance is broken beyond repair. Believe me, I’ve been there. The good news is, many drainage issues are fixable with a bit of detective work and some basic troubleshooting.
Understanding why your dishwasher won’t drain is essential because it can stem from several causes—clogged filters, kinks in the drain hose, or even a faulty pump. Sometimes, a simple reset or cleaning can solve the problem, but other times, it’s a sign of a deeper issue. For example, did you know that improper installation can lead to drainage woes? In fact, improper drain hose placement can cause backflow or siphoning problems, which are surprisingly common among DIY fixes. It’s a good idea to learn what really works and what could be making things worse. You can read more about diagnostic techniques and how they can save your warranty benefits [here](https://applianceoutletpro.com/how-appliance-diagnostics-can-save-your-warranty-benefits).
Before diving into the repair, I’ll share my biggest rookie mistake—ignoring the importance of checking the filter first. Early on, I replaced parts unnecessarily because I skipped the simple step of cleaning out the lint trap and filters, which often is the culprit. Now, I always start with the basics, and I recommend you do too. This approach saves time, money, and your patience.
So, if your dishwasher isn’t draining properly, don’t despair. We’re going to explore straightforward solutions that you can try before calling in the pros. Ready to get your appliance back on track? Let’s dive into the first steps to diagnosing and fixing this pesky problem.
Check the Filter First
Begin your troubleshooting by examining the dishwasher’s filter and sump area. Over time, debris like food particles, grease, or mineral buildup can clog these components, blocking water flow. I once neglected this step and replaced the pump unnecessarily, only to find out the filter was packed with grime. Remove the bottom rack, locate the filter assembly, and carefully clean it with warm water and a soft brush. This simple step often clears the obstruction and restores proper drainage.
Inspect the Drain Hose for Kinks or Clogs
The drain hose acts as the pathway for water to exit your dishwasher. If it’s kinked, crushed, or clogged, drainage will stall. To check this, disconnect the hose from the dishwasher or sink connection. Feel for blockages or use a long brush or pipe cleaner to clear any debris. In my experience, tight bends in the hose, similar to a garden hose left in the sun, can cause flow restrictions. After straightening or replacing the hose, test run the dishwasher. This simple fix often resolves drainage issues without further repairs.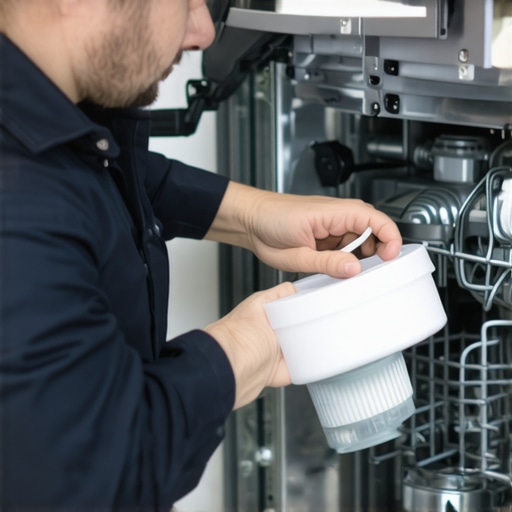
Test the Drain Pump and Impeller
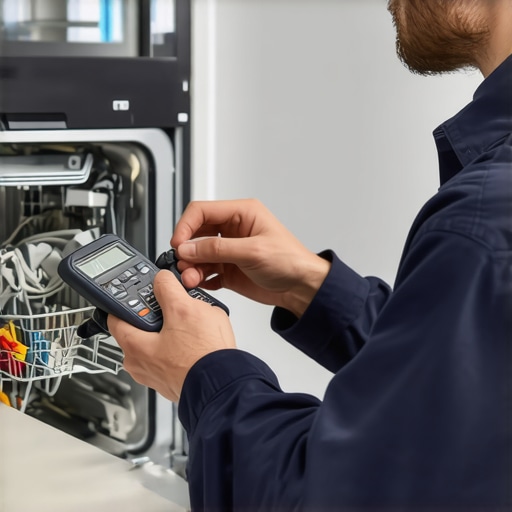
The pump and impeller are responsible for actively moving water out of the dishwasher. If either is faulty or jammed, drainage stops. To diagnose, listen for unusual noises during the drain cycle—grinding or rattling may indicate a problem. I once heard a loud squeal during testing, which signaled a worn-out pump. Use a multimeter to check the pump’s motor for continuity, or remove it to inspect for debris and damage. Clearing obstructions or replacing a failed pump can be your ticket to functional drainage. For a comprehensive guide, visit this troubleshooting resource.
Reset the Dishwasher and Confirm Proper Installation
A simple reset can sometimes resolve electronic glitches. Disconnect power to the dishwasher for 5 minutes, then restore it and run a short cycle. Additionally, ensure the drain hose is installed with a proper high loop and at the correct height—this prevents backflow and siphoning, which can cause drainage issues. My recent setup mistake was installing the hose too low, leading to water pooling at cycle end. Adjustments, including elevating the hose, often fix backflow problems and improve drainage. Learn more about safe installation practices at this guide.
Evaluate Electrical Components and Seek Professional Help
If all physical components seem functional, but the dishwasher still won’t drain, electronic parts like the control board or float switch may be at fault. Symptoms include error codes or cycles stopping prematurely. Diagnosing these requires specialized tools, so if you’re unsure, consider consulting a professional. Remember, attempting repairs beyond your skill level can damage the unit or void your warranty. For more on when to trust professional diagnostics, see this article.
When it comes to appliance repair, many homeowners operate under misconceptions that can hinder effective troubleshooting and warranty claims. One common myth is that running multiple diagnostics repeatedly will always increase your chances of a successful claim. In reality, over-testing or misinterpreting diagnostic results can lead to unnecessary expenses or even void your warranty, especially if your appliance’s documentation specifies limited diagnostic attempts. Expert advice from appliance specialists suggests following manufacturer instructions carefully and documenting all tests thoroughly, as improper diagnostic procedures can be seen as neglect or misuse, jeopardizing your claim.
Another trap is the belief that all electronic components are equally repairable by the average homeowner. While DIY fixes are often praised, advanced electronic parts like control boards and sensors require specialized tools and knowledge. Attempting to repair or replace these without proper expertise may cause further damage, reducing the likelihood of warranty coverage. For example, misdiagnosing a control board failure and replacing it without verifying other issues can turn a simple fix into a costly mistake, as discussed in this detailed guide.
Are You Falling for the ‘More Diagnostics Equal Better Results’ Myth?
This misconception leads many to believe that conducting excessive tests on their dishwasher will guarantee faster warranty approval. However, manufacturers often specify specific diagnostic procedures to follow. Deviating from these can invalidate your warranty or delay resolution, especially if the extra tests cause inadvertent damage or create confusion over the actual issue. Experts stress that targeted, well-documented diagnostics—focusing on the most probable causes—are more effective and less risky than exhaustive testing without guidance. In fact, the manufacturers’ manuals and service bulletins—found in resources like this article—highlight the importance of precision over quantity.
Furthermore, a frequent misunderstanding involves the role of the warranty itself. Many believe warranties cover all repair costs, but they often exclude certain issues like improper installation, user error, or damage caused by neglect. Understanding the fine print and proper diagnostic procedures can make or break your claim. For instance, attempting DIY fixes without prior consultation can void warranty coverage if the manufacturer detects deviation from approved methods. To safeguard your warranty rights, review your policy details and adhere strictly to recommended diagnostic steps, as emphasized here: this resource.
So, next time you’re troubleshooting or considering a warranty claim, remember that more isn’t always better. Focus on accurate diagnostics, follow official guidelines, and understand your warranty’s scope. These nuanced practices can significantly increase your chances of a successful repair without unnecessary costs. Have you ever fallen into this trap? Let me know in the comments.Maintaining your dishwasher’s optimal performance over time requires the right tools and techniques. I rely heavily on a high-quality multimeter, such as the Fluke 115, for precise electrical diagnostics, including checking control boards and motor windings. A digital thermocouple thermometer is essential for verifying heating element functionality; I prefer the IRT Ceramic Thermometer because its fast readings help identify uneven heating issues. For cleaning and clearing stubborn clogs, a flexible pipe brush and a small aquarium siphon are invaluable—they allow me to reach tight spots in drain hoses and filters without damage. Additionally, a multichannel ultrasonic cleaner can be a game-changer for removing mineral buildup from spray jets and impellers, extending the lifespan of parts. As appliance diagnostics become more sophisticated, software tools like Appliance Debugging Apps can assist in interpreting error codes and firmware data, making troubleshooting more efficient. Moving forward, I predict diagnostic technology will incorporate AI-driven analysis, making repairs even more accessible for DIY enthusiasts.
To keep everything working smoothly, I recommend creating a maintenance schedule that includes regular filter cleanings, inspecting hoses for kinks or leaks, and running calibration cycles every few months. These proactive steps save frustration and prevent costly repairs. Remember, proper diagnostics and maintenance not only extend the life of your dishwasher but also protect your warranty benefits—consult detailed guides like this resource for more insights.
One advanced tip I suggest trying is the use of an infrared thermocouple to verify the heating element’s temperature consistency during operation. This small investment can reveal uneven heating that normal cycle checks might miss, ensuring your dishwasher heats efficiently and prevents issues like mineral buildup or cycle failures. Give it a shot on your next troubleshooting session and experience how precise diagnostics can dramatically improve appliance longevity.
What No One Tells You About Pinpointing Drainage Woes
One crucial lesson I learned is that patience and attention to detail often outweigh rushing to replace parts. Early on, I believed faulty pumps or clogged filters were always the culprits, but through experience, I discovered that simple oversight—like an improperly placed hose or dirty filters—can cause the same problems. Recognizing that many drainage issues stem from overlooked basics saved me time and money and transformed my troubleshooting approach.
Another insight is the importance of understanding your dishwasher’s anatomy. Knowing exactly where the filter, drain hose, and pump are located allows you to methodically check each component. This knowledge, combined with meticulous documentation of your diagnostics, not only expedites repairs but also strengthens your position if warranty claims become necessary. Remember, the devil’s in the details, and sometimes, the smallest fix—like straightening a kinked hose—can make all the difference.
Lastly, I realized that embracing technology—like multimeters, infrared thermometers, and ultrasonic cleaners—enhances diagnostic precision. These tools, which I trust deeply due to their reliability, uncover hidden issues that simple visual inspections might miss. Integrating these advanced tools into my repair routine has been a game-changer, enabling me to address problems confidently and efficiently without unnecessary guesswork.
Tools and Resources That Changed My Approach
Over time, I’ve curated a toolkit that’s proven invaluable, starting with a quality multimeter such as the Fluke 115. This device helps me quickly isolate electrical issues like bad control boards or faulty wiring. For thermal assessments, I rely on an infrared thermocouple like the IR Thermometer, which detects uneven heating that a visual check would never reveal.
Cleaning stubborn buildup is made easier with a flexible pipe brush and ultrasonic cleaner, both of which I recommend for maintaining spray arms and impellers—extending their lifespan while ensuring optimal performance. Additionally, resources like expert diagnostic guides have been instrumental in refining my troubleshooting techniques, saving me from unnecessary part replacements.
Most importantly, I trust reputable online resources that keep me updated on best practices in appliance diagnostics and warranty management. Regularly reviewing these guides helps me stay aligned with manufacturer recommendations and industry standards, ensuring my DIY repairs are both effective and warranty-friendly. Have a look at this comprehensive article for insight into smart diagnostics that preserve your warranty rights.
Your Next Step Toward Confidence and Independence
Embarking on your own diagnostics journey for dishwasher drainage issues may seem daunting at first, but with patience, the right tools, and a focus on fundamentals, you’re capable of significant improvements. Don’t let fear or misconceptions hold you back—each repair builds your confidence and deepens your understanding of your appliance. Remember, the future of appliance repair is in your hands, and continuous learning will make you more skilled every day.
Are you ready to take control of your dishwasher maintenance and diagnosis? Share your experiences or questions below—I’d love to hear about your journey to mastering appliance repairs!