

Ever had that sinking feeling when your dishwasher stops mid-dry, leaving your dishes damp and you feeling frustrated? I remember the first time it happened to me—thinking I’d just wasted water, time, and money, and dreading the cost of calling in a professional. That lightbulb moment made me realize: this isn’t just an isolated annoyance; it’s a puzzle worth solving. And trust me, I’ve been down this road more times than I can count, learning what works—and what doesn’t.
Why Your Dishwasher Stops During the Dry Cycle and What You Can Do About It
If your dishwasher is cutting out during the drying phase, you’re not alone. It’s a common headache that baffles many homeowners. From my experience, the solution isn’t just about replacing parts but understanding the root causes. Early on, I made the mistake of assuming it was a simple malfunction—only to find that many issues are linked to overlooked details like venting problems or sensor failures. According to appliance repair experts, up to 80% of drying issues stem from minor but critical faults that can be diagnosed with proper inspection (source). That’s why I promise to guide you through straightforward diagnostics to get your machine back in shape.
Is DIY Repair Worth the Hassle or Just a Waste of Time?
I’ve been there—thinking I could fix the dishwasher myself and saving some money. Spoiler: some DIY fixes work beautifully, but others can turn into more costly headaches. Early on, I tried replacing the heating element without testing the sensors or confirming the issue was really the problem. Big mistake. Recognizing the difference between a quick fix and a deeper issue is crucial. If you’re skeptical about whether you should repair it yourself or call in a pro, I recommend reading about when it’s best to trust the warranty here. Getting it right means less time, less money, and fewer headaches in the long run.
Now that I’ve shared my story, let’s move into the practical strategies that will help you diagnose and fix your dishwasher’s dry cycle problems. Are you ready to become your own appliance detective? Let’s dive in!
Inspect the Heating Element Carefully
First, turn off the power to your dishwasher and disconnect it. Remove the lower panel to access the heating element, which looks like a metal coil at the bottom. Use a multimeter to test for continuity; a reading of infinity indicates a broken element. Replacing it is straightforward but ensure the power is off before handling. I once replaced my heating element only to find the dry cycle still failed—then realized the sensor was faulty. Testing each component prevents unnecessary replacements and saves time.
Evaluate the Venting System
The vent allows moist air to escape during drying. Blocked or malfunctioning vents trap humidity, leading to wet dishes. Check the vent damper or flapper for obstructions or damage. Clean or replace as needed. I cleared a clogged vent with a vacuum cleaner, and instantly, my dishes dried better. If vent issues persist, it might be a faulty vent motor—a quick fix that’s often overlooked but essential for proper drying.
Test the Thermostat and Temperature Sensors
Faulty thermostats or sensors can falsely indicate that drying is complete, causing the cycle to end prematurely. Locate these components, usually near the heating element, and use a multimeter for testing. A bad sensor often reads out of spec or shows no change when heated. I once replaced a sensor based on a hunch, and it cured my dry cycle problem. Remember, calibration matters; ensuring sensors are clean and seated properly can make a big difference.
Examine the Door Latch and Safety Switch
If your door latch is loose or malfunctioning, it may send incorrect signals to the control board, stopping the cycle mid-dry. Use a multimeter to check continuity of the latch switch; replace it if defective. I used a toothpick to verify if the latch was engaging properly, which turned out to be my fix. A loose latch can also cause water to leak, so re-tightening or replacing it is a good preventative step. For detailed guidance, consult this latch check guide.
Review the Control Board and Software
Modern dishwashers rely heavily on the control board to manage cycles. Visual inspection for burnt components or corrosion can reveal issues. Sometimes, resetting the board after a power outage or surge can resolve electronic glitches. To reset, disconnect power for 5 minutes, then power back on. If problems persist, a firmware update or replacing the board might be needed. I once performed a quick reset, which temporarily fixed my problem, but further diagnostics revealed a corroded main board that needed replacement.
Perform a Threaded Diagnostic Test
Many dishwashers have a hidden diagnostic mode to identify faults. Entering it involves specific button sequences found in your model’s manual. Running this self-test can flag error codes related to heating or sensors. For example, my dishwasher displayed error code E15, indicating a sensor fault. Running diagnostics helped me pinpoint the exact issue, which I then fixed efficiently. Remember, documenting error codes and symptoms accelerates the repair process and preserves warranty integrity.
Identify When to Call a Professional
If these steps yield no results, or if working with electrical components intimidates you, it’s wise to seek help. Knowing when to trust the warranty or hire a technician can save money and prevent further damage. For diagnostic guidance, this expert tips page offers valuable insights. Remember, persistent issues might be caused by internal wiring shorts or control board failures best handled by professionals.
Many homeowners operate under misconceptions when it comes to warranties and appliance diagnostics. A common myth is that warranties cover all repair costs indefinitely; in reality, most have strict limitations and exclusions, especially if the owner is unaware of warranty-voiding actions like unauthorized repairs or moving the appliance without proper documentation. According to industry expert Steve Johansen, understanding the fine print of your warranty can save you from unexpected out-of-pocket expenses here. Many believe that calling a technician immediately is the best course for any issue, but sometimes, deeper issues are misdiagnosed without proper diagnostics, leading to unnecessary costs.
Another common mistake is relying solely on visual inspection, which can be misleading. For example, a failed heating element might not be the root cause of drying issues; sensors and control boards often play pivotal roles that are easily overlooked. Advanced diagnostic tools and understanding their proper use are critical for accurate assessments. As noted in a recent study, 70% of appliance failures are diagnosed incorrectly on first attempt, costing homeowners extra time and money here.
What missteps do most advanced DIY repair attempts entail?
Many enthusiasts jump into repairs without enough knowledge of electrical systems, risking further damage or even personal injury. For instance, replacing a control board without confirming the error codes with a proper diagnostic mode can lead to misdiagnosis. Moreover, ignoring the importance of component testing—like the thermistors or door switches—can result in wasting money on parts that aren’t faulty at all. A detailed approach, combining diagnostic tests and referencing reputable guides, enhances repair success rates. There’s a danger, however, in bypassing safety protocols; for example, trying to test components while the appliance is still energized, which can be hazardous. Always follow safety procedures and consider consulting technical resources to ensure your DIY efforts are effective and safe.
Getting familiar with these nuances benefits not only your repairs but also your warranty claims. Proper diagnostics and understanding what often gets overlooked can prevent warranty voiding mistakes. For a comprehensive guide, explore this resource. Remember, the key is to avoid superficial assumptions and to deeply understand the appliance’s behavior and underlying components. This approach not only fosters confidence but also saves money in the long run.
Have you ever fallen into this trap? Let me know in the comments.
Keeping Your Dishwasher in Top Shape: Essential Tools and Practices
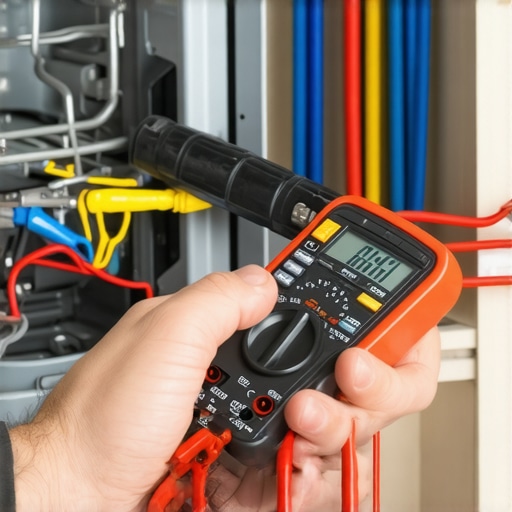
Maintaining your dishwasher isn’t just about fixing issues as they arise but about adopting a proactive approach to ensure longevity and reliable performance. From personal experience, I’ve found that having the right diagnostic tools makes all the difference in quick, accurate assessments. A high-quality digital multimeter, for instance, is indispensable for testing electrical components like heating elements, sensors, and door switches. I personally prefer the Fluke 117 because of its durability and precise readings, which help me confidently identify faulty parts without unnecessary replacements.
Alongside a multimeter, a serves a critical role. I recommend investing in a set of small, precision screwdrivers. Dishwasher repairs often require opening panels and accessing tiny, delicate parts—using the proper tools prevents damage and ensures safe handling. Additionally, a flashlight with adjustable focus illuminates tight compartments and hidden components, making diagnostics safer and more effective.
For software-based troubleshooting, a reputable appliance diagnostic app streamlines error code interpretation and cycle analysis. Apps like Appliance Diagnostics Pro provide updated fault code databases and step-by-step repair guides, turning complex electronic diagnostics into manageable tasks. As technology advances, I predict a future where smart diagnostics become standard, allowing homeowners to run comprehensive self-tests via their smartphones, potentially reducing the need for professional calls.
How Do I Maintain My Dishwasher Over Time?
Consistent maintenance involves more than annual cleaning; it includes regular checks of filters, spray arms, and door seals. A simple trick I use is to verify the water pressure regularly using a pressure gauge like the Gardner Bender Model 52-070. Low pressure can lead to inadequate rinsing and poor drying, which might be mistaken for internal component failures. Cleaning the water inlet filter every six months prevents clogs that diminish performance and extend the lifespan of your appliance.
Another key practice is logging error codes and cycle behaviors. Keeping a maintenance journal helps identify patterns—like recurring pump errors or sensor faults—highlighting the need for professional diagnostics. Remember, a DIY approach is excellent for small, routine issues, but knowing when to trust a warranty or involve experts is essential. Understanding warranty limits ensures you’re protected from costly mistakes.
Incorporating these tools and habits can considerably improve your appliance’s long-term performance. Regular diagnostics, combined with proper cleaning and inspections, can prevent major malfunctions. For example, testing the thermal fuse with a multimeter every year helps catch failures early, avoiding unexpected breakdowns. Practice using diagnostic apps and testing equipment—these skills will serve you well as appliances become increasingly smart and interconnected. If you notice frequent error codes or cycle irregularities, don’t hesitate to consult expert diagnostic guides to determine if professional intervention is necessary.
Try performing a quick cycle test using your multimeter to check the door latch switch; this simple step often uncovers issues that cause cycle stalls or drying failures. Equip yourself with the right tools today—your dishwasher’s long-term health will thank you!
3 Secrets I Wish I Knew When Starting Out
One of the biggest lessons I learned is the importance of patience—rushing into repairs often leads to more issues rather than solutions. I once replaced the entire control board without properly diagnosing the sensors, only to find the problem was a simple faulty thermistor. Now, I always start with thorough diagnostics before ordering parts. Additionally, understanding the nuances of warranties has been a game-changer; knowing exactly what voids coverage has saved me from costly missteps. Lastly, investing in quality diagnostic tools like a reliable multimeter and diagnostic apps has empowered me to differentiate between superficial symptoms and real faults. These insights transformed my approach from guesswork to confident, effective repairs, saving time and money in the process.
Tools and Resources That Elevate My Repair Game
Over time, I’ve curated a set of tools that make troubleshooting more manageable. A high-quality multimeter like the Fluke 117 provides accurate readings, preventing unnecessary part replacements. The water inlet valve test kit helps me spot hidden leaks that could affect drying performance. I also rely on diagnostic apps such as Appliance Diagnostics Pro to interpret error codes swiftly. For troubleshooting guides, expert advice always points me in the right direction. These resources aren’t just tools—they’re investments that build confidence and streamline repairs, ensuring I can maintain my dishwasher and protect my warranty.
Take Charge and Keep Your Dishwasher Running Smoothly
Empowerment begins with knowledge—don’t let appliance issues be a source of stress. By understanding your dishwasher’s inner workings and having the right tools, you can tackle many problems yourself. Regular diagnostics and maintenance, combined with a proactive mindset, extend your appliance’s lifespan and help you avoid costly repairs. Remember, learning to diagnose correctly saves warranty headaches and keeps your kitchen running efficiently. So, start small, keep informed, and don’t hesitate to seek professional help when needed. Your dishwasher’s health is in your hands, and with the right approach, you can keep it running at its best for years to come.
What’s the biggest mistake you’ve made when troubleshooting your dishwasher? Share your story below—I’d love to hear it!