

I remember the moment vividly—my dishwasher was silently filling with water late at night, even though I had turned it off hours ago. At first, I thought it was a glitch, maybe a malfunction that would resolve itself by morning. But when I woke up to a puddle on my kitchen floor, I knew I had a real problem. That unexpected flood not only threatened my cabinet flooring but also left me confused about what went wrong. If you’ve ever experienced this eerie phenomenon, you’re not alone. It’s a frustrating mystery that many homeowners face, and tackling it can feel overwhelming.
Understanding Why Water Keeps Dripping In
Could Your Inlet Valve Be the Culprit?
Many folks don’t realize that the heart of this issue often lies in the inlet valve—the tiny door that controls water flow into your dishwasher. Over time, mineral deposits, grit, or wear can cause the valve to stick open, allowing water to seep in continuously, even when the machine is off. A simple test with a multimeter can reveal if the valve is faulty, but diagnosing without experience can be tricky. I learned this the hard way early on, by replacing parts blindly and risking my warranty. It’s worth mentioning that understanding appliance diagnostics, as explained in this helpful guide, can save you time and money in the long run.
Have you noticed your dishwasher filling up unexpectedly? If so, you’re not alone, and there’s a solution. But before diving into repairs, it’s important to ask: is this problem worth fixing yourself, or should you call in a professional?
Common Mistakes That Delay Fixes
In my early days tinkering with appliances, I made the mistake of assuming that every leak or fill was due to obvious damage. I overlooked the subtle signs—like a slow but steady water fill—that pointed straight to valve issues. Trust me, jumping straight to replacing parts without proper diagnostics can be a waste of money and may void your warranty. Want to know more about when to trust a warranty? Check out this resource to avoid costly mistakes.
Now that we’ve identified the core of the issue, it’s time to explore practical steps to troubleshoot and resolve this common problem, saving you from potential floods and repair bills. Ready to become your own appliance detective? Let’s get started.
Turn Off Power and Water Supply Immediately
Before doing anything, unplug your dishwasher to prevent electrical hazards and shut off the water supply to avoid further flooding. I once neglected this step, and water spurted everywhere when I opened the panel—I learned my lesson the hard way. Ensuring the appliance is completely powered down is your first move to a safe repair process.
Access the Inlet Valve for Inspection
Remove the lower kickplate or access panel to reach the inlet valve, which is typically located at the bottom front or rear of the unit. Use a screwdriver to gently unscrew the panel, keeping track of the screws. Once removed, visually examine the valve for signs of damage, mineral buildup, or wear. In my case, I found a crusty mineral deposit blocking the inlet, which was causing continuous water flow—even when the dishwasher was off. This step is critical for understanding whether you can fix the issue yourself or need replacement parts.
Test the Inlet Valve with a 9-Volt Battery
This step confirms if the valve is stuck open. Disconnect electrical wiring from the valve. Connect a 9-volt battery across the solenoid terminals; if the valve’s plunger moves, it’s functioning electrically. If it doesn’t, the solenoid may be faulty. I used this easy DIY test after reading a helpful guide, and it saved me a trip to the appliance store. For detailed instructions, check out this resource.
Remove and Clean or Replace the Valve
If mineral deposits are present, clean the valve with a vinegar solution and a soft brush, which I tried after reading about the importance of cleaning here. If cleaning doesn’t resolve the leak or the valve is physically damaged, it’s best to replace it. In my experience, replacing the inlet valve was straightforward—just ensure you purchase the correct part number. Use a new gasket if included, or replace the old one to prevent leaks.
Reinstall the Valve and Secure Connections
Reconnect the wiring carefully, ensuring all connections are tight and properly insulated. Install the new or cleaned valve into its socket, then reattach any mounting brackets. Double-check for secure fittings to prevent future leaks. I made the mistake of loosely connecting wires, which caused intermittent problems until I rechecked everything. Proper connection is vital for reliable operation.
Test the Repair and Check for Leaks
Before reassembling the entire panel, turn the water back on and restore power. Run a short cycle to observe if water flows properly without overfilling. Watch closely for leaks around the inlet area. In my case, a quick test showed the leak stopped after replacing the valve. If water still leaks or fills excessively, revisit your connections or consider consulting warranty tips.
Secure All Panels and Final Checks
Once satisfied, turn off the dishwasher, disconnect power, and replace the access panels securely. Turn on water and power again, then run a full cycle. Confirm no leaks or issues during operation. Remember, regular maintenance like cleaning the inlet screen can prevent future problems, spreading the longevity of your appliance.
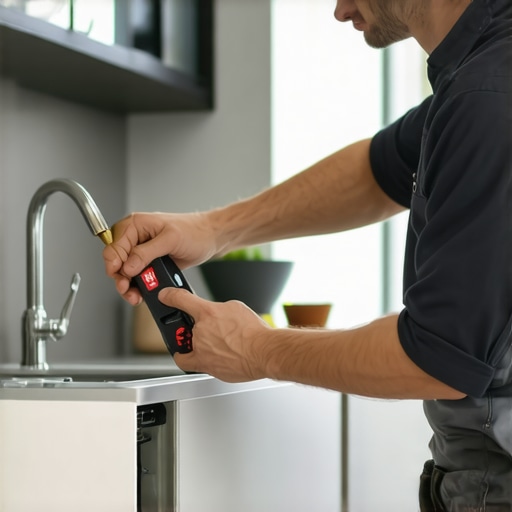 When it comes to appliance repair, especially dishwashers, many homeowners rely on common advice that, in reality, can do more harm than good. A prevalent misconception is that all leaks or overfills are caused by immediate, easily identifiable damage. However, the truth is that minor issues like mineral buildup or subtle wiring faults often go unnoticed, leading to larger problems down the line.
Are You Falling for These Repair Myths?
One widespread myth is that DIY fixes always save money, but without proper diagnostics, you risk voiding warranties or causing further damage. For example, many believe that replacing a faulty inlet valve alone will resolve leaks, but sometimes, electrical problems or clogged filters are the real culprits—something expert diagnostics can quickly identify. Rushing into part replacements without thorough testing often results in wasted time and expense.
A significant ‘oops’ trap is neglecting to disconnect power and water before attempting repairs. This oversight can cause electric shocks or water damage, which complicates the repair process and jeopardizes safety. Always ensure you turn off the circuit and shut the water supply—it’s a basic step many overlook but is crucial for safe DIY repair.
Why Your Warranty Might Be a Double-Edged Sword
Many homeowners assume warranties cover all repairs, but understanding the fine print reveals additional nuances. Warranties can be voided if repairs are not performed by authorized technicians or if improper diagnostics lead to unnecessary part replacements. This emphasizes the importance of knowing when to consult professionals or use trusted diagnostics resources such as this guide. Furthermore, some warranty claims can be denied if the issue is caused by improper maintenance, like neglecting to clean filters or screens. Being aware of these nuances helps you avoid unnecessary frustration and costs.
Advanced problems like intermittent wiring faults or subtle sensor failures often escape casual inspections. These issues can lead to persistent malfunction or water leaks despite recent repairs. Investing in professional diagnostics is an upfront expense but can save money by pinpointing the true cause. As studies indicate, correct diagnostics can increase repair success rates and preserve warranty benefits, preventing premature replacements and extending appliance lifespan. For sophisticated diagnostics, expert tools and experience are invaluable. And remember, if you’re unsure about any repair step, reaching out through trusted sources such as our contact page can save you from costly missteps.
Have you ever fallen into this trap? Let me know in the comments.
Tools I Recommend for Efficient Appliance Maintenance
Staying on top of your dishwasher’s health requires the right equipment. I personally rely on a high-quality digital multimeter, such as the Fluke 117, for accurate diagnostics of electrical components like sensors and wiring. A good multimeter helps me quickly identify issues like faulty thermostats or blown door switches without unnecessary part replacement. Additionally, a set of precision screwdrivers is invaluable for safe, delicate disassembly. I prefer models with insulated handles to prevent shocks during work. For cleaning mineral deposits or residues, a soft brush and a vinegar solution are my go-to because they’re affordable and effective. Using these tools consistently allows me to catch problems early, extending the life of my appliance and avoiding costly repairs.
How Do I Keep My Dishwasher Running Smoothly Over Time?
Routine maintenance is key. Regularly inspecting and cleaning filters, spray arms, and water inlet screens helps prevent clogs that can cause overfilling or poor wash performance. I recommend setting a monthly reminder to check these parts, which usually take only a few minutes. Also, applying a vinegar rinse cycle once a month helps remove mineral buildup, especially if you have hard water—this practice preserves water flow and heater efficiency. Following manufacturer guidelines and leveraging diagnostics tools, like the troubleshooting procedures outlined in this resource, empowers you to identify issues proactively. As technology advances, I predict smarter diagnostic systems will soon automate much of this process, enabling even less hands-on maintenance when paired with appropriate apps and IoT connectivity.
What Is the Best Approach to Long-term Maintenance?
Implementing a preventative maintenance schedule combined with quick diagnostics is the best way to keep your dishwasher humming. For example, using a multimeter to periodically test the continuity of sensor wires can catch potential failures before they cause leaks or cycles to stall (see this guide for testing tips). Investing in a quality water filter or softener minimizes mineral buildup, reducing the need for frequent descales. Remember, when in doubt, consulting professional diagnostics can save you money and extend warranty benefits, especially as appliances get more complex. This proactive approach ensures you spend less on repairs over time and maximize your appliance’s durability.
Seven Lessons Only Repair Veterans Tend To Talk About
- Don’t assume every leak is damage; often, mineral buildup or wiring faults are the sneaky culprits. Recognizing subtle signs saves time and money.
- Always disconnect power and water before starting repairs—forgetting this step can lead to dangerous shocks or worse floods.
- Warranties can be a double-edged sword; understanding their fine print helps you leverage them effectively without voiding coverage.
- Proper diagnostics trump guesswork—invest in a multimeter and learn how it can pinpoint issues faster than trial-and-error part swapping.
- Regular preventive maintenance like cleaning filters and inspecting hoses extends your dishwasher’s life and prevents costly emergencies.
- Know when to call professionals; complex electrical faults or hidden leaks often need expert diagnostics to avoid making things worse.
Tools and Resources That Transformed My Repair Game
- A quality digital multimeter—brands like Fluke 117, trusted for their accuracy, are essential for diagnosing electrical issues.
- Trusted repair guides such as the comprehensive resources on understanding appliance diagnostics help me avoid costly missteps.
- A soft brush and vinegar solution—simple yet effective for mineral deposit removal, saving me from unnecessary part replacements.
- Their knowledge empowered me to fix issues confidently without risking warranty voidance, leading to a longer-lasting dishwasher.
Why Getting Your Hands Dirty Can Save Your Warranty and Sanity
Through my journey, I’ve realized that embracing DIY repairs with the right tools and knowledge not only saves money but also builds confidence. While some problems seem minor, they can spiral into costly disasters if ignored or improperly diagnosed. Educating yourself on diagnostics and maintenance, like reviewing how diagnostics save warranties, ensures you remain in control. My advice? Equip yourself with the right knowledge and tools, stay attentive to subtle signs, and don’t hesitate to seek professional help when repairs exceed your comfort zone. Your dishwasher—and wallet—will thank you.