

I vividly remember the day I overloaded my dishwasher, thinking more detergent and longer cycles would give me sparkling dishes in a jiffy. Instead, I ended up with a stubborn film on my glasses and a skyrocketing water bill. That moment made me realize: I was wasting water and energy, all for marginal cleaning results. Have you ever felt the same frustration, like your efforts to save water are backfiring?
Why Saving Water in Dishwashing Matters More Than Ever
It’s not just about saving a few bucks each month; it’s about making a real difference for our planet. Did you know that residential dishwashers use an average of 4-6 gallons of water per cycle? That might seem small, but multiply that by millions of households and you get a significant environmental impact. Plus, with water prices climbing, smart water-saving habits can cut your utility bills substantially. But here’s the catch — cutting water shouldn’t mean sacrificing the cleaning power we rely on.
Is Water Conservation Really Worth the Hype?
At first, I thought reducing water was a matter of just using less detergent or skipping rinsing. Big mistake. Early on, I learned that some low-water methods can actually harm your appliance or leave dishes dirtier than before. One common mistake is not understanding how water flow affects cleaning performance. For instance, low water levels can hinder the spray arms’ ability to reach all dishes effectively, leading to rewashed items or added cycles.
To get this right, I started paying attention to small details. Simple adjustments, like ensuring the dishwasher is level or cleaning spray arms regularly, made a massive difference. If you’re worried about making those adjustments, check out this guide on how to check your dishwasher’s level. It’s surprisingly easy to do and can boost cleaning power while conserving water.
Early in my journey, I also ignored the importance of diagnostic checks — a mistake that cost me time and money. Knowing how to identify if your dishwasher needs repairs can prevent unnecessary water waste and ensure optimal performance. For example, if your appliance isn’t filling properly due to a clogged inlet valve, it might seem like a water-saving measure but is actually a problem in disguise. Reading up on signs that your dishwasher needs diagnostics can save you from costly repairs down the line.
So, next, I’ll share practical tips that helped me reduce water consumption without compromising cleaning power, ensuring every wash is eco-friendly and effective — stay tuned!
Check Your Dishwasher’s Level for Optimal Performance
First, ensure your dishwasher is perfectly level. An uneven unit can cause poor water distribution, leading to inefficient cleaning and water wastage. I once forgot to check this, and dishes came out spotless on one side but dirty on the other. Using the penny trick described here takes just a minute—place a penny on each corner of the door when closed; if they stay put, your machine is level, boosting cleaning and conserving water.
Adjust Spray Arms for Better Coverage
Clogged or misaligned spray arms reduce water reach, forcing extra cycles. Remove and inspect them monthly, cleaning out debris from nozzles with a toothpick or small brush. I had a stubborn blockage with popcorn kernels, but a quick cleaning restored full spray action after I used a toothpick to clear each hole. Remember, clear spray arms mean fewer rinse cycles and less water used overall. For detailed cleaning tips, see this guide.
Reduce Pre-Rinsing and Load Smartly
Pre-rinsing might seem eco-friendly but often causes more harm than good, especially if dishes are not heavily soiled. I started skipping this step, saving water without compromising cleanliness, and noticed a significant drop in water bills. Load dishes properly—avoid nesting or overstuffing—to ensure water and detergent reach all surfaces efficiently. Think of it like packing a suitcase: strategic placement saves space and resources. Check out this article for optimal loading tips.
Maintain Water Pressure and Filter Cleanliness
Low water pressure results in weak spray cycles. If your dishes aren’t spotless despite proper loading, test your water pressure with a gauge or listen for weak spray sounds. Additionally, a clogged sediment filter will choke flow. I once ignored this, and my dishwasher struggled to clean heavily stained glasses. Regularly cleaning the inlet filter and verifying household water pressure ensures full spray coverage, reducing the need for extra cycles. For troubleshooting, see this resource.
Perform Simple Diagnostics to Catch Problems Early
Knowing when your dishwasher needs professional diagnostics can prevent water waste and repair costs. If you notice uneven cleaning, recurrent leaks, or error messages, it’s time for a check. Using diagnostic tools and procedures helps identify issues before they escalate. I once caught a failing circulation pump early because I listened for irregular noises and ran a decibel test with my phone, saving me hours of water-wasting cycles.
Consistency is Key for Water-Efficient Washing
Finally, stick to a routine of cleaning spray arms, checking levels, and verifying filters monthly. Small, consistent actions compound over time, turning into substantial savings and cleaner dishes. Every tweak—like adjusting water levels or cleaning nozzles—contributes to smarter, eco-friendlier dishwashing. Remember, efficient water use isn’t just about saving bills; it’s about doing your part for the environment, one cycle at a time.
,When it comes to appliance warranties and repairs, many homeowners operate under common misconceptions that can cost them time and money. Contrary to popular belief, not all warranties are as comprehensive as they seem, and understanding their nuances is crucial for effective troubleshooting and claiming processes. One pervasive myth is that warranties cover all repair costs; however, many exclude specific parts or damages caused by user error. According to appliance diagnostics experts, the fine print often limits coverage, requiring consumers to read between the lines to avoid unexpected expenses. Moreover, a critical mistake homeowners make is assuming that a quick repair service implies a thorough diagnosis. In reality, technicians might skip detailed diagnostics, leading to recurring issues that could have been prevented with a comprehensive check. This oversight not only prolongs appliance downtime but also increases the total repair cost over time.
Why do most people overlook the importance of proper diagnostics before repairs?
Experts emphasize that accurate diagnostics are the backbone of effective appliance repair. A proper diagnosis ensures the exact issue is addressed, reducing unnecessary parts replacement and preventing future failures. Skipping this step, or relying solely on symptom-based fixes, can lead to the so-called ‘band-aid’ solutions—temporary fixes that often mask underlying problems. Additionally, many consumers fail to recognize the signs indicating a need for professional diagnostics—like intermittent operation or unusual noises—which could save them from costly repairs or warranty claim denials. For instance, improperly diagnosing an issue might void the warranty if the mistake is attributed to misuse or neglect, as discussed in detail here. The key is to understand that investing in a thorough diagnostic upfront can significantly enhance warranty benefits and prolong appliance lifespan. Be cautious of DIY fixes that seem simple but might interfere with warranty terms or damage delicate components. Always consult professional advice when in doubt, ensuring your repairs are valid and covered.
Most homeowners also misunderstand the scope of warranty coverage concerning parts like water inlet valves or control boards. Some assume that replacing a faulty part automatically qualifies for warranty reimbursement, but the reality is more complex. Proper documentation and proof that repairs align with manufacturer guidelines are essential to substantiate warranty claims. This is why keeping detailed records of repair attempts and parts used can make a significant difference when submitting claims. Remember, warranties are designed to protect your investment, but only if claims are approached correctly. For detailed insights, check out signs your dishwasher needs diagnostics or how diagnostics can save your warranty. By mastering these nuances, you can avoid common pitfalls and make your appliance warranty truly work for you.
Fine-Tuning Your Dishwasher for Long-Term Success
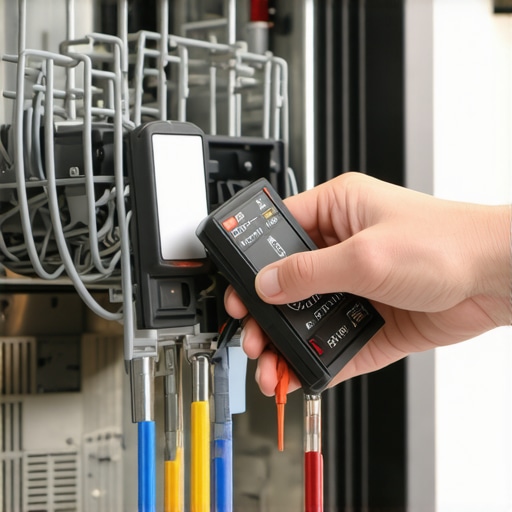
Maintaining optimal performance of your dishwasher requires more than just occasional cleaning; it demands the right equipment, consistent routines, and an understanding of the subtle cues indicating issues. I personally recommend investing in a high-quality digital multimeter, such as the Fluke 117, which provides precise readings essential for diagnosing electrical components like the heating element and control board. Additionally, a borescope camera can be invaluable for inspecting hard-to-reach areas inside your appliance without extensive disassembly, saving you time and preventing unnecessary repairs.
Routine maintenance tools like a small brush or toothpick help keep spray arms and filters clear of debris, which I do every few months. Regularly testing your water pressure with a reliable gauge — like the Watts LF800 — ensures that water flow remains within optimal ranges, preventing weak spray cycles and inefficient washes. These tools empower you to spot potential issues early, reducing the likelihood of costly repairs and extending your dishwasher’s lifespan.
How do I maintain my dishwasher over time?
Adopting a proactive maintenance schedule is key. Start by cleaning your filter and spray arms once a month, ensuring nothing obstructs water flow. Periodic checks of water inlet valves for debris can prevent low-pressure issues; do this by inspecting and flushing the inlet screen using a simple toothbrush and filtered water. Keeping an eye on error codes and performing regular diagnostics, as described here, can alert you to hidden problems before they escalate.
Investing in diagnostic tools allows you to verify component functionality and avoid unnecessary replacements. For example, testing the resistance of your heating element with a multimeter can confirm its health—if it’s open or shows inconsistent readings, replacing it proactively can save lots of water and energy in the long run.
Looking ahead, as smart appliances become more prevalent, integrating diagnostic apps and IoT sensors will simplify maintenance. These advancements will likely provide real-time alerts for anomalies, making routine upkeep even more straightforward and accessible for homeowners. Embracing these technologies now will prepare you for a future where appliance care seamlessly blends manual tools with digital insights.
Try out a digital multimeter today to check your dishwasher’s electrical performance—it’s an advanced step that offers immediate insights and can prevent inconvenient breakdowns. Remember, consistent small actions are your best defense against major repair costs and ensure your dishwasher remains a dependable kitchen helper for years to come.
The Hard-Won Lessons No One Tells You About Appliance Warranties
One of the most profound insights I’ve gained is that not all warranties are created equal; reading the fine print can save you headaches later. I once assumed a repair was covered until I discovered exclusions for user-inflicted damage, leading to unexpected bills. This taught me to meticulously document every repair and keep receipts, making warranty claims smoother. Additionally, trusting a technician’s quick fix without proper diagnostics often led to recurring issues and wasted resources—investing in thorough diagnostics upfront truly pays off. Lastly, I learned that proactive maintenance, even when appliances seem fine, helps prevent costly breakdowns and keeps warranties intact. These lessons have transformed my approach from reactive repairs to strategic upkeep, saving me money and time.