

It was a Saturday morning when I opened my dishwasher to find a puddle of water pooling around its base. My first thought? Great, another costly repair. I was tempted to call in a technician, but then I remembered the last time I waited for a pro—my kitchen was left a mess, and the bill was higher than I expected. That lightbulb moment hit me: DIY repair might be more accessible than I once believed.
Why Arm Yourself with the Right Tools?
When appliances break, it’s easy to feel overwhelmed. But honestly, a few well-chosen tools can turn a daunting task into a manageable project. Over my years of tinkering, I’ve learned that having these essentials not only saves money but also builds confidence in tackling common issues like clogged spray arms or leaking seals.
Is Owning Tools Really Worth the Hype?
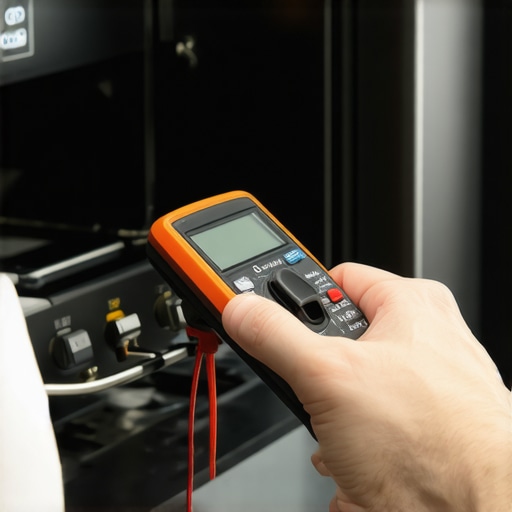
I’ll admit, early on, I made the mistake of thinking I needed a full toolbox to handle small repairs. Turns out, that’s overkill. A simple multimeter, a non-contact voltage tester, and a basic repair kit can cover most problems. Did I forget to mention that many of these tools are surprisingly affordable? Check out [the five-dollar multimeter](https://applianceoutletpro.com/the-five-dollar-multimeter-move-to-save-your-control-board) that’s perfect for testing circuits and avoiding dangerous shocks. Trust me, I learned the hard way that guessing isn’t the way to go—using the right diagnostic tools not only prevents accidents but also protects your warranty benefits, as detailed [here](https://applianceoutletpro.com/how-appliance-diagnostics-can-save-your-warranty-benefits).
Start with a Visual Inspection
Before diving into tools or disassembly, look for obvious issues. Check for leaks, unusual buildup, or broken parts. For example, I once noticed a cracked door gasket that was causing water to leak; replacing it took minutes and saved me a costly service call. Use a flashlight to inspect seals, hoses, and spray arms thoroughly.
Diagnose Circuits with Basic Tools
Equip yourself with a multimeter and a non-contact voltage tester. Test the power supply to ensure the dishwasher is getting voltage; think of it like checking if the car is receiving fuel before diagnosing engine issues. For instance, I used a multimeter to verify the control panel’s voltage, which prevented me from replacing a perfectly fine part.
Check the Door Switch and Thermal Fuse
Remove the control panel and locate the door switch. Using your multimeter, test for continuity; a broken switch is a common culprit for non-starting dishwashers. Similarly, test the thermal fuse—if it’s blown, your dishwasher won’t operate. Testing these components is quick and can rule out major failures early.
Assess Water Intake and Drainage
Verify that the water inlet valve is open and functional. Listen for a faint hum during filling; if absent, test the inlet valve solenoid with your multimeter. Next, examine the drain hose for clogs; disconnect it and run water through to check for blockages. I once cleared a stubborn clog by flushing the hose with a garden hose, which restored proper drainage.
Test the Spray Arms and Nozzles
Remove and manually spin the spray arms. They should turn freely; a jammed arm means poor cleaning. Clear clogged nozzles with a toothpick—this simple trick often fixes spray issues. I’ve used a pin to clear these nozzles, resulting in a noticeably cleaner load, saving me from re-washing dishes.
Inspect the Float Switch and Level Sensors
The float switch prevents overflows. Use the chalk trick: place a piece of chalk on the float to see if it moves freely—if stuck, clean or replace. Also, test the float switch with your multimeter to verify functionality. During a repair, I found that a sticky float caused the dishwasher to think it was full and skip filling cycles, which I fixed by cleaning the part.
Review Error Codes and Diagnostic Mode
Many dishwashers have a diagnostic mode that can be accessed by specific button presses. Follow the manufacturer’s instructions to enter diagnostics and interpret error codes. If your unit blinks or displays codes, look them up to pinpoint issues. I once used this feature to identify a faulty heating element, saving time and money.
Confirm Heating Element Functionality
A dishwasher that doesn’t dry or properly clean often has a faulty heating element. Use your multimeter to check for continuity; replace if broken. For quick testing, a hair dryer set on low can simulate heating to see if the dishwasher responds—just be cautious. I replaced my element following a test, which improved drying performance immediately.
Document and Keep Track of Repairs
As you work, note what’s worked and what hasn’t. Take photos during disassembly; these will help during reinstallation. Maintaining a repair log simplifies future troubleshooting and helps if you need professional assistance later. Remember, consistent diagnostics build your confidence for the next fix.
Many homeowners operate under misconceptions when it comes to appliance warranties and DIY diagnostics, which can lead to costly mistakes. One prevalent myth is that warranty coverage always foots the bill for repairs, but in reality, warranties often exclude damage caused by misuse or unqualified repairs. According to the Consumer Reports study on appliance warranties, nearly 60% of claims are denied due to exclusion clauses, highlighting the importance of understanding your policy details here.
Another common misconception is that if a simple fix is required, professional diagnostics aren’t necessary. However, skipping thorough troubleshooting can result in misdiagnosing the problem, leading to unnecessary part replacements. Advanced diagnostics involve nuanced analysis—such as testing control boards or float switches—that goes beyond basic visual inspections. Investing in proper testing tools like a multimeter is crucial; as I emphasize here, a $5 multimeter can save you from costly control board replacements.
A less obvious mistake is assuming that all appliance issues are simple or straightforward. For example, a dishwasher pausing mid-cycle might be thought of as a minor glitch, but further diagnostics could reveal a faulty heat sensor or a clogged drain valve—complex problems requiring specialized testing. Professional diagnostic modes, discussed here, often uncover such hidden issues that DIY methods might miss.
Why Does a Basic DIY Approach Sometimes Backfire?
Many homeowners believe that limited troubleshooting and generic fixes will extend their appliance’s lifespan, but this neglects the nuanced nature of modern dishwasher components. For instance, replacing a seemingly faulty pump without confirming the electrical signals or testing the control board can result in recurring failures. This is why understanding the complexities—like the interplay between sensors, switches, and electrical modules—is vital. Experts warn that poor diagnostics not only waste time and money but can also void manufacturer warranties. Proper diagnostics, including interpretation of error codes and testing with specialized tools, can protect your warranty eligibility, as detailed here.
To prevent falling into these pitfalls, always review your warranty terms and consider seeking professional diagnostics when necessary. Don’t hesitate to ask questions about what’s covered and how to ensure your repair efforts are effective. Have you ever fallen into this trap? Let me know in the comments!
Keeping it Reliable: Tools and Tactics for Long-Term Dishwasher Care
Maintaining your dishwasher isn’t just about fixing problems as they arise; it’s about establishing a routine that ensures longevity and peak performance. The right tools, combined with disciplined maintenance, can turn a complex appliance into a dependable part of your daily life. Over time, I’ve refined my toolkit and approach, emphasizing precision and efficiency to avoid unnecessary repairs and extend the lifespan of my appliances.
Why Precision Tools Make All the Difference
I personally rely heavily on a high-quality multimeter and a non-contact voltage tester. These inexpensive yet effective devices allow me to quickly verify electrical components, diagnose short circuits, and ensure safety before diving into disassembly. Investing in reliable diagnostic tools minimizes guesswork, prevents further damage, and preserves your warranty when used correctly.
Routine Checks That Save Money
Regular visual inspections can preempt many common failures. I recommend inspecting door gaskets and spray arms for cracks or clogs every few months. Clear nozzles using a toothpick or a small brush prevents spray issues that lead to poor washing results. Additionally, cleaning the filtration system and sump area regularly with a soft brush or cloth keeps debris from overburdening the motor and pump, which can be costly to replace.
Document Your Maintenance for Future Reference
Keeping a detailed log of repairs, inspections, and parts replacements helps identify recurring issues. Photographing disassembly steps and noting any unusual findings can expedite future troubleshooting. Remember, tendencies and wear patterns often reveal the underlying cause of failure, allowing you to plan proactive maintenance rather than reactive repairs.
Where’s the Future Heading?
Advances in diagnostic software integrated with smart appliances are on the horizon. These systems will continually monitor component health and notify homeowners proactively, much like health trackers for personal wellness. Eventually, IoT-enabled dishwashers might suggest specific maintenance steps via smartphone app alerts, streamlining diagnostics and ensuring optimal performance. For now, mastering manual diagnostics and proper care remains essential.
How do I maintain my dishwasher over time?
Adopt a consistent cleaning schedule, inspect critical seals and hoses regularly, and invest in essential diagnostic tools like a multimeter and leak detector. Always review your warranty specifics before any DIY intervention to avoid voiding coverage—learn more here. For complex issues, don’t hesitate to seek professional diagnostics, which often uncover hidden problems that can lead to expensive failures if ignored. Implementing these habits will significantly reduce unexpected breakdowns and extend your appliance’s lifespan.
The Hard-Won Wisdom Hidden in My Repairs
One of the most profound lessons I learned was that patience beats impatience—taking my time to diagnose issues accurately saved me time and money in the long run. I realized that every malfunction, no matter how trivial it seems, often follows a pattern that, once recognized, simplifies the repair process. Additionally, I discovered that investing in the right diagnostic tools—not just the flashy ones but reliable, simple devices—empowers you to make informed decisions, reducing the chance of costly mistakes. Lastly, I learned that embracing a learning mindset—viewing each repair as an opportunity to understand my appliance better—transformed my approach from frustration to confidence.