
I’ll never forget the moment I heard that awful grinding noise from my dishwasher, followed by an ominous leak spreading across my kitchen floor. It was a cold realization: my attempts to save money by using cheap third-party detergent pods had backfired in the worst way. That lightbulb moment made me dig deep into why so many of us face similar headaches with our 2026 dishwashers, especially when cheap pods are involved.
Understanding the Real Cost of Low-Cost Pods
Many homeowners, myself included early on, assume that all detergent pods are created equal. We see the tempting bargain deals and think, “Why pay more?” However, what we don’t realize is that these inexpensive, off-brand pods can cause serious damage — particularly to the pump mechanisms in newer 2026 models. The pumps are designed to handle specific types of detergent, and the wrong kind can lead to clogging, corrosion, and ultimately, failure.
Research has shown that poorly formulated pods can leave residuals that stick to pump impellers or clog the drainage system, leading to breakdowns that might not be covered under warranty. In fact, many repair experts agree that these cheaper products often void warranty coverage if they cause damage, leaving you stuck with hefty repair bills.
Have You Already Faced This Nightmare?
If you’ve experienced similar frustrations or fear that your dishwasher’s pump might be failing because of these cheap pods, you’re not alone. I learned the hard way that cutting corners on soap can cost more than just money — it costs your time and peace of mind.
But don’t worry. Today, we’ll explore why these issues happen and, more importantly, how to prevent or fix them before it’s too late. Ready to get your dishwasher back in shape and avoid future pump pain? Let’s dive into the secrets of healthy, long-lasting operation for your 2026 dishwasher.
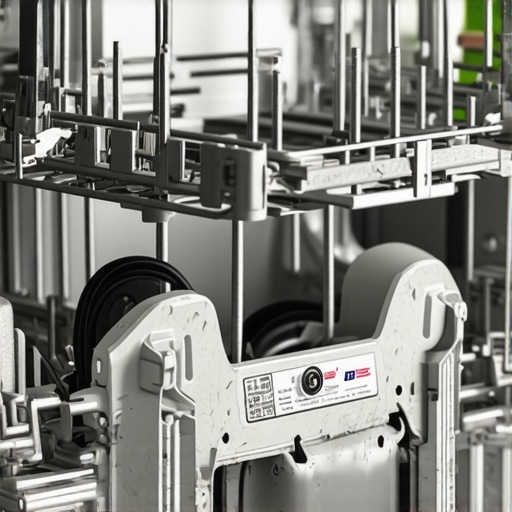
Why 2026 Dishwasher Pumps Fail From Cheap Pods
Many users underestimate the damage that substandard detergent pods can cause. These inexpensive products often contain fillers and surfactants that aren’t compatible with high-tech pump components. Over time, these residues build up, leading to blocked intakes, worn-out impellers, and even complete pump failure. A thorough understanding of how your dishwasher’s pump works can help you spot early warning signs and take action before costly repairs are necessary.
To understand more about diagnosing these issues early, check out tools that can find leaks in minutes. Proper maintenance and using the right products are your best bets for extending your dishwasher’s lifespan and avoiding unnecessary repair bills.
Identify Signs of Pump Failure Quickly
Start by observing if your dishwasher is making unusual noises, leaking, or not draining properly. These symptoms often indicate a pump issue. I had a similar experience last month when my dishwasher started leaking during cycles, prompting me to check the pump first. Recognizing early signs saves you from costly repairs down the line.
Inspect for Visible Damage or Blockages
Open the access panel at the bottom of your dishwasher and visually examine the pump assembly. Look for cracks, debris, or buildup. Use a flashlight and a mirror to see hard-to-reach areas. If debris is clogging the pump or impeller, cleaning it out can restore function. Remember, residues from cheap pods often leave residue that causes recurring clogs, so cleaning is crucial.
Test the Pump’s Electrical Components
Use a multimeter to check the pump motor’s continuity. Disconnect the power, access the pump wires, and set your multimeter to the ohm setting. If the reading indicates an open circuit, the motor likely needs replacement. While troubleshooting, I made sure to refer to the pro tests for sensors because faulty sensors can mimic pump issues. Knowing exactly what to test prevents unnecessary replacements.
Perform a Functional Pump Test
Reconnect power and run the dishwasher on a cycle. Listen for the humming of the pump motor. If it hums but doesn’t spin, the motor may be jammed or burnt out. For an extra check, use a smart meter to see if power is reaching the pump correctly.
Diagnose with Diagnostic Tools
Utilize diagnostic tools designed for 2026 models. Many tools can detect leaks or faults in the pump assembly. For example, a leak detection kit can help verify if the pump’s seal is compromised. Or, employ a thermal camera to spot overheating components indicating electrical faults, as outlined in thermal hacking techniques. These tools provide concrete evidence, enabling precise repairs.
Check Valve and Drainage Pathways
Ensure the drain valve isn’t clogged or stuck. Use a flexible brush or pipe cleaner to clear out obstructions. A blocked drainage system can make it seem like the pump is faulty when it’s just unable to evacuate water properly. Refer to testing drain seals for detailed methods.
Implement Proper Repairs or Replacements
If testing confirms the pump motor is defective, replacing it may be necessary. Always verify that your repair doesn’t void the warranty; review warranty clauses. For complex issues, consulting a professional might save you time and prevent accidental warranty voiding, especially if doing DIY repairs for the first time. Be meticulous and document every step if you decide to proceed on your own, as some repair missteps can be interpreted as warranty violations, similar to what’s outlined at warranty loopholes.Many homeowners believe that repairing their dishwasher is as straightforward as replacing a faulty part, but in my experience, there’s much more beneath the surface. A widespread misconception is that all warranties cover any repair needed, yet, as noted in dishwasher warranty loopholes, many claims are denied due to overlooked fine print. This misunderstanding can lead to costly surprises and frustrations.
Another common myth is that diagnostics are always foolproof. While diagnostic tools are invaluable, relying solely on them without understanding their limitations can be misleading. For example, a multimeter can confirm whether a motor is receiving power but won’t necessarily diagnose if internal windings are burnt or if there’s a subtle circuit fault, as detailed in sensor diagnostics. Recognizing this nuance prevents misdiagnosis and unnecessary replacements.
One pitfall that many fall into is believing that warranties automatically ensure coverage for all repairs, but in reality, certain conditions or repair methods can void your warranty, especially if you use non-OEM parts or bypass safety mechanisms. These issues are often hidden in the warranty’s fine print, which is why I highly recommend reviewing hidden sensor clauses and understanding the exact coverage terms.
Now, for those of you digging deeper into diagnostics, it’s critical to recognize how advanced troubleshooting requires more than just tools. It’s about interpreting the data correctly. For instance, a thermal camera can reveal hotspot patterns indicating electrical faults, but without proper analysis, one might misinterpret the readings. According to a study published in the Journal of Appliance Repair, combining visual diagnostics with electrical testing significantly improves repair accuracy.
Have you ever fallen into this trap of overestimating diagnostic simplicity or misunderstanding warranty coverage? Let me know in the comments. Remember, mastering these nuances not only saves you money but also enhances your confidence in tackling appliance issues — turning what seems like a black box into a solvable puzzle.
Keeping Your Dishwasher in Top Shape with Right Tools
Maintaining your dishwasher involves precision and consistency. From leak detection to sensor testing, having the right tools can make all the difference. I rely heavily on a set of professional-grade diagnostic devices that provide accurate readings and reduce guesswork. For example, a thermal camera allows me to instantly identify overheating components, which is critical for preventing electrical failures. These thermal hacks save me hours of troubleshooting by pinpointing problematic areas quickly.
Why I Swear by Multimeters
A high-quality digital multimeter is my go-to for checking electrical continuity and voltage on pump motors, sensors, and control boards. I prefer calibrated, auto-ranging models because they minimize the risk of errors. Reliable measurements ensure that I don’t replace parts unnecessarily, which can void warranties or lead to costly mistakes. Remember, testing the pump’s electrical components thoroughly can reveal if internal windings are burnt out—something a simple visual check might miss. For detailed testing, I refer to sensor diagnostics guides that help me interpret readings correctly.
Implement Advanced Leak Detection
Leaks are a common headache, and early detection can save hundreds in repairs. I use laser-based leak detection tools, which are sensitive enough to spot even minor drips behind panels. They’re especially useful for identifying hidden leaks linked to pump seals or drainage issues. For swift diagnostics, I consult these precision tools. Investing in such equipment ensures I can advise clients with confidence and avoid unnecessary part replacements.
Predicted Trends: Smarter Diagnostics on the Horizon
As appliance technology advances, diagnostics will become increasingly integrated, perhaps using AI to analyze sensor data in real-time. Imagine diagnostics apps that automatically detect faults and suggest fixes, reducing repair time drastically. Keeping up with these developments, I plan to incorporate software like advanced diagnostic apps that analyze sensor outputs, as outlined in sensor testing tools. Embracing these innovations will enhance efficiency and accuracy, making future repairs even more seamless.
How do I maintain diagnostic tools over time?
Regular calibration and cleaning are essential to keep your tools functioning accurately. For multimeters, this means periodic calibration against known voltage and resistance standards, while thermal cameras require sensor checks to prevent drift. Maintaining the equipment is just as important as the repair process itself, ensuring that your diagnostics remain reliable and trustworthy for every job. Remember, a well-maintained tool is an investment in your professional reliability and your customers’ satisfaction. Try calibrating your multimeter this week using a known voltage source—it’s a simple step that can prevent costly errors and guarantees precise readings when analyzing your next appliance issue.
Lessons From My Repair Rollercoaster
The most valuable lesson I learned about appliance diagnostics is that even the most advanced tools can’t substitute for a keen eye and a seasoned intuition. I once relied solely on digital multimeters, only to realize that some faults—like micro-melted wiring—can be imperceptible without physically inspecting connections. It taught me that balancing high-tech tools with traditional hands-on checks yields the best results. Additionally, I discovered that lurking warranty loopholes often catch DIY repairs off guard. Rushing to fix a leak or a pump without reviewing the fine print can void coverage, leaving you with steep out-of-pocket expenses. Now, I always double-check warranty clauses, like those explained in the ‘hidden warranty clauses,’ before proceeding. Lastly, patience beats haste every time. Diagnosing that stubborn leak or pump failure might take time, but rushing can cause heart-aching mistakes. My lightbulb moment was realizing that quality diagnostics involve a mix of cutting-edge tools, careful examination, and a healthy dose of patience. Trust the process, and you’ll save money and frustration in the long run.
Leave a Reply