
The last time my dishwasher started leaking unexpectedly, I felt that immediate mix of panic and frustration. Water pooled beneath the unit, threatening my kitchen floor and adding stress to my busy day. I realized then that being able to identify leaks quickly isn’t just a matter of convenience—it’s essential to protect your home and preserve your warranty coverage. That lightbulb moment led me down a path of discovering powerful, user-friendly tools that can pinpoint 2026 dishwasher leaks in just minutes.
Revolutionize Your Leak Diagnosis with These 3 Tools
You might be wondering, “Can I really find leaks fast without calling someone in?” Honestly, early in my experience, I made a critical mistake—trying to guess where the leak was without proper tools. It wasted time, cost me money, and at one point, risked voiding my warranty because I used improper techniques. But I learned from that slip-up, and today I want to share the tools that turned things around for me—and could do the same for you.
Don’t wait until the next leak surprises you with costly damages. These diagnostic tools help you act swiftly, saving money and stress. Plus, mastering them aligns with best practices outlined by appliance repair experts, helping you stay ahead of potential warranty issues. For more insight on protecting your warranty while diagnosing issues, check out [this comprehensive guide](https://applianceoutletpro.com/dishwasher-warranty-secrets-expert-diagnostics-repair-tips).
Now, if you’ve faced that sinking feeling of water pooling under your dishwasher and wondered how to find the culprit fast—stay tuned. I’ll walk you through each tool and how to use them so you can become your own repair hero.
Inspecting for Obvious Leaks and Water Trails
Start by unplugging the dishwasher and opening the door to check for pooled water or damp spots around the base. Use a flashlight to follow water trails along hoses and beneath the unit; these are clear indicators of possible leaks. I once used a paper towel to trace water pathways, which helped me pinpoint the origin—saving me hours of guesswork. Remember, leaks often follow gravity, so focus on lower connections first.
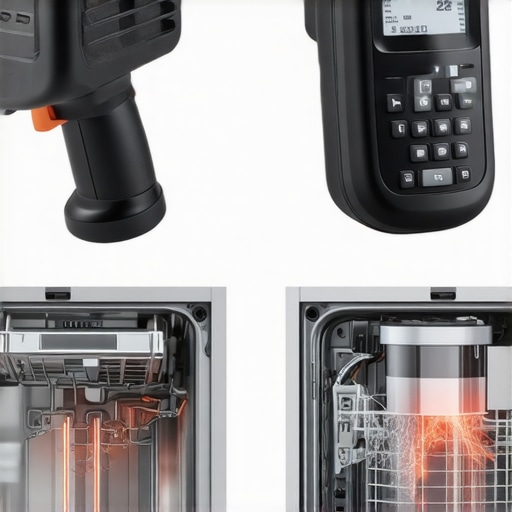
Using a Multimeter to Check Electrical Components
Next, test the dishwasher’s wiring and switches with a multimeter. Set it to measure continuity or resistance, and verify that components like door switches and water inlet valves aren’t open circuits. I recommend doing this step last because it confirms whether electrical faults could be causing leak sensors to malfunction. For detailed multimeter tests, see this guide.
Assessing Hoses and Seals
Examine inlet and drain hoses for cracks or disconnections. Remove the panels behind the dishwasher to access these hoses more easily. When I replaced a worn-out drain hose, a slight crack was visible only upon close inspection. Also, check sealant around the door gasket; a damaged gasket can leak during wash cycles. Remember, replacing worn seals prevents future issues and preserves your warranty, especially if you follow the procedures outlined in warranty protection tips.
Testing for Hidden Leaks with Food Coloring
This simple trick involves adding a few drops of food coloring to the dishwasher’s water inlet or tub. Run a short cycle and observe if color appears outside the unit—indicating leaks in seals or hoses. I did this when I suspected a leak but couldn’t see any water pooling; the colored water quickly revealed a tiny crack in a hose clamp. Use this method for quick, non-invasive diagnostics.
Monitoring During Operation
Once initial inspection and tests are complete, run the dishwasher through a cycle with all panels closed. Place dry paper towels or catch trays underneath to detect leaking water early. Note any dampness or water spots as the cycle progresses. I’ve caught leaks this way before they caused damage, especially when hidden behind panels. For more detailed tips, see leak detection tools.
Document Findings to Protect Your Warranty
Take photos and keep detailed notes of your inspection process and findings. This evidence supports your claim if you need to contact the manufacturer or service technician later. Many warranties require proof of proper diagnostics before repairs; so, adhere to the guidelines at warranty protection tips.
 While many homeowners believe that troubleshooting appliances is straightforward, the truth is that common misconceptions and overlooked nuances often lead to costly mistakes. One widespread myth is that DIY repairs won’t affect your warranty; however, applying the wrong techniques or using non-approved parts can void coverage entirely. For example, replacing OEM parts with generic substitutes without proper documentation may be flagged during warranty claims, as highlighted in expert guides on maximizing warranty benefits. Another pitfall is neglecting to document repair processes thoroughly, which weakens your position if disputes arise.
A less obvious but critical nuance involves understanding the specific diagnostic procedures endorsed by manufacturers. Relying solely on visual inspections or generic multimeter tests might miss subtle electrical faults, like intermittent circuit failures, that require advanced testing techniques. According to appliance diagnostics experts, such as those featured on trusted industry sites, mastering nuanced testing methods is essential to avoid misdiagnosis and unnecessary part replacements.
Furthermore, many assume that warranty restrictions are just paperwork hoops, but in reality, they serve to protect consumers from improper repairs that could cause further damage or safety hazards. For instance, failing to perform routine maintenance or ignoring manufacturer-prescribed testing intervals may unintentionally void your coverage, despite believing you’re ‘doing the right thing.’ It’s crucial to familiarize yourself with the fine print, as detailed in warranty-specific articles, and adhere to recommended diagnostic steps.
Are you aware of the advanced diagnostic errors that homeowners frequently make, such as misinterpreting error codes or neglecting to check for software glitches? These oversights can lead to unnecessary service calls or, worse, warranty rejection. For an in-depth look at these pitfalls and how to avoid them, consider reviewing trusted resources or consulting professional repair guides.
By digging into these nuances, you’ll equip yourself with the knowledge to perform effective diagnostics without risking your warranty. Remember, understanding the subtle differences in repair approaches can save you money and extend your appliance’s lifespan. Have you ever fallen into this trap? Let me know in the comments.Maintaining your dishwasher’s performance over time requires more than occasional cleaning; it demands the right tools coupled with a strategic approach. One device I personally rely on is a high-quality digital multimeter, set to measure both voltage and continuity. This tool helps me verify electrical components with pinpoint accuracy, especially vital in diagnosing sensor faults or circuit interruptions that often cause cycles to halt unexpectedly. For example, when troubleshooting error codes like the latest 2026 diagnostics, having a multimeter allows me to quickly confirm whether the control board is receiving correct voltages, saving hours on guesswork and preventing unnecessary part replacements. To deepen your diagnostic capabilities, I suggest reviewing [effective appliance diagnostics](https://applianceoutletpro.com/effective-appliance-diagnostics-to-secure-reliable-dishwasher-repairs), which offers comprehensive techniques tailored to modern dishwashers.
Next, consider adopting ultrasonic leak detectors, which I find invaluable for early identification of leaks in hidden hoses or seals that standard visual checks might miss. These electronic devices emit high-frequency sounds that pinpoint leaks with remarkable sensitivity, especially useful in scenarios where water traces are minimal or concealed behind panels. Integrating such tools into your maintenance routine enhances long-term reliability, aligning with the advice to use precise diagnostic methods recommended by industry experts.
In addition, performing regular software updates and firmware checks using manufacturer-approved tools can prevent software glitches that disrupt dishwasher cycles. Some advanced diagnostic apps have begun integrating with smart home ecosystems, offering remote troubleshooting insights and maintenance reminders, which could be the future of appliance care. As these technologies evolve, staying informed through trusted sources like appliance service bulletins becomes essential.
How do I keep my dishwasher running smoothly over years of use? Consistent maintenance combined with smart diagnostic practices forms the foundation. Scheduling quarterly checks with these tools—like verifying circuit voltages or inspecting seals with a leak detector—not only prevents breakdowns but also preserves warranty coverage. Remember, proactive diagnostics can identify potential issues before they escalate, ultimately extending the lifespan of your appliance.
For example, try using a multimeter to test the wiring connections to the door sensor. If you’re unfamiliar with this process, consult detailed guides such as [these diagnostic tips](https://applianceoutletpro.com/maximize-dishwasher-warranty-with-proven-diagnostic-repair-tips-5), which walk you through each step. Regularly performing such checks can save costly repairs and safeguard your warranty, especially when combined with thorough documentation.
Ultimately, investing in the right diagnostic tools and integrating them into your routine maintenance schedule ensures your dishwasher remains reliable year after year. The trend toward smarter, more connected appliances makes mastery of these tools even more valuable. As technology advances, expect to see AI-driven diagnostic apps that predict issues before they happen, further streamlining maintenance efforts. But until then, a digital multimeter and an ultrasonic leak detector remain your best allies for keeping your dishwasher—and your home—secure and efficient.
What I Wish I Knew When Starting Out
One of the most valuable lessons I learned is that rushing into repairs without proper diagnostics can backfire. Taking the time to understand each component and using the right tools saves time and preserves warranties. I’ve seen many homeowners overlook small details—like inspecting seals or testing electrical connections—that make all the difference in accurate diagnosis.
Another insight is that not all leaks are obvious. Hidden faults, such as micro-cracks in hoses or tiny electrical faults, require specialized detection methods. Recognizing this shifted my approach from guesswork to precision, which ultimately protected my appliance and my wallet.
Also, I realized the importance of documentation. Recording tests, taking photos, and noting findings can be crucial if warranty claims or repairs escalate. This habit ensures you’re prepared and can back up your diagnostics with clear evidence.
Lastly, understanding the nuances of warranty conditions is critical. DIY repairs aren’t always free from risk, especially if you unknowingly void coverage by using non-approved parts or missing essential steps. Educating myself on manufacturer guidelines and routines empowered me to stay within warranty boundaries while addressing issues effectively.
Tools and Resources That Make the Difference
My essential toolkit includes a reliable digital multimeter, which helps verify circuit voltages and component continuity. For spotting hidden leaks, an ultrasonic leak detector is invaluable—it detects sounds beyond human hearing, revealing leaks behind panels or within hoses. I also rely on food coloring tests to quickly identify leaks without invasive disassembly, and smartphone diagnostic apps are becoming increasingly useful for quick error code checks. For comprehensive guides, I recommend the detailed resources at this site.
Empower Yourself for Better Dishwasher Care
Your knowledge and the right tools can transform troubleshooting from a stressful guess into a confident diagnostic process. Taking proactive steps to learn and apply these methods not only keeps your dishwasher operating smoothly but also safeguards your warranty. The future of appliance repair is leaning toward smarter diagnostics and preventative maintenance—embrace these advances now to save yourself time and money.
Have you ever hesitated before performing a repair or diagnostic test? Share your experiences below—I’d love to hear how you’ve navigated your dishwasher maintenance journey!
,
Leave a Reply