
I remember the moment vividly. My dishwasher decided to throw a tantrum right in the middle of a busy Saturday. Instead of the usual rinse and clean, it just sat there, silent and unresponsive. I was about to call in a repair tech when a lightbulb went off in my head. What if I could diagnose the problem myself and save both time and money? That was my lightbulb moment—realizing how crucial expert diagnostics are when it comes to maximizing warranty coverage and speeding up repairs.
Why Getting Diagnostic Right Saves You Big Bucks
When your dishwasher starts acting up, it’s tempting to just call a technician and hope for the best. But trust me, a little knowledge about diagnostics can go a long way. Not only can it help you identify the real problem, but it also ensures you don’t get overcharged for unnecessary parts or labor. Plus, many warranties require proper diagnostics to cover repairs fully. Misdiagnosing can void your warranty or delay your claim, which is a headache you definitely want to avoid.
Over the years, I’ve learned that being proactive and well-informed about diagnostics can make all the difference. It’s like having a trusted neighbor who’s a little bit of an expert—ready to guide you through the troubleshooting maze. And here’s the kicker: you don’t need to be a professional to do it. There are simple tools and strategies that can help you pinpoint issues faster, ensuring your repair is covered under warranty and completed swiftly.
But I’ll admit, I made some classic mistakes early on. My biggest slip-up was jumping straight to replacing parts without proper diagnostics. That cost me extra money and delayed my repairs. I learned the hard way that a methodical approach is key. If you want to avoid my rookie errors, I recommend checking out some trusted resources, like this comprehensive guide, which walks you through proven diagnostic strategies.
Does this all seem complicated or overwhelming? Don’t worry—there’s a clear path to mastering diagnostics.
By understanding the basics of expert diagnostics, you’ll be able to troubleshoot more efficiently, keep your warranty intact, and get your dishwasher back in action faster. Ready to dive into the practical steps? Let’s get started and turn you into a troubleshooting pro.
Start with a Clear Symptom List
Recall a time when my dishwasher stopped mid-cycle without warning. The first step I took was to write down everything I noticed—unusual noises, leaks, error codes. This simple action prevented me from jumping to conclusions and helped me communicate effectively with repair professionals. When troubleshooting, be specific about what’s happening, as this forms the foundation for accurate diagnostics and ensures your warranty coverage stays intact.
Use Basic Diagnostic Tools Effectively
Invest in a reliable multimeter and familiarize yourself with how to test electrical components. Think of these tools as your detective kit—like a magnifying glass revealing hidden clues. For instance, I tested the door latch switch, which was faulty and causing the machine to think the door was open. With a multimeter, I confirmed it wasn’t functioning properly, saving me from unnecessary part replacements. Proper use of diagnostic tools is vital; check out this guide for the best options.
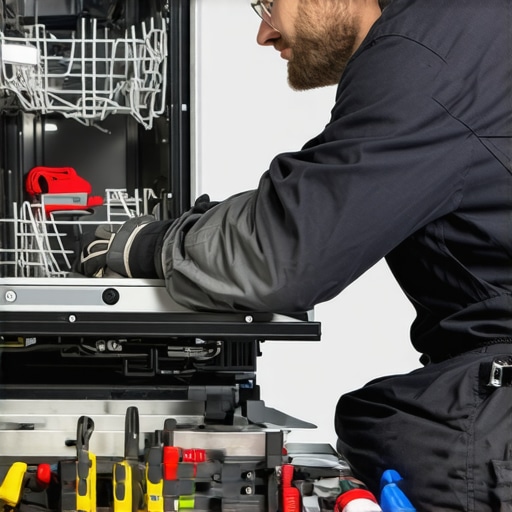
Perform Visual Inspections with a Systematic Approach
Think of this step as a health check-up. I visually inspected hoses, filters, and spray arms, looking for cracks, blockages, or buildup. During one troubleshooting session, I noticed a clogged filter that was causing poor drainage. Cleaning or replacing it resolved the issue and kept my warranty valid. Regular visual checks can prevent small problems from escalating, saving repair costs and time.
Test Key Components Methodically
Identify critical parts like the water inlet valve, float switch, and drain pump. I tested the inlet valve by listening for the sound during operation—a simple yet effective method. When it failed to open, I replaced it, which fixed my water filling issue. Always refer to this expert guide for detailed testing procedures on each component.
Utilize Error Codes and Diagnostic Modes
Most dishwashers have built-in diagnostic modes that can be triggered to reveal error codes. I followed my model’s manual to enter diagnostic mode, which displayed a specific error code indicating a faulty heating element. Using this info, I ordered the correct part. This targeted approach prevents unnecessary replacements and keeps your warranty intact. For model-specific steps, check this resource.
Document Your Diagnostics and Repairs
Keep a detailed record of what tests you performed, findings, and parts replaced. I took photos and notes, which proved invaluable when communicating with warranty providers or repair technicians. Documentation demonstrates that you’ve taken proper diagnostic steps, which is often a requirement for warranty claims and can accelerate the repair process. Learn more about maintaining proper diagnostics documentation at this article.
Leverage Professional Diagnostic Services When Needed
If DIY diagnostics hit a wall, don’t hesitate to consult experts. Think of this as calling in a specialist when a complex case arises. Many warranty policies favor documented professional diagnostics, so engaging certified technicians can safeguard your coverage. Use reputable services, and always ask for diagnostic reports that you can keep for future warranty claims.
Many DIY enthusiasts and even seasoned homeowners believe troubleshooting a dishwasher is straightforward: identify the problem, replace the faulty part, and get back to your routine. However, this simplistic view often leads to costly mistakes and missed warranty opportunities. Let’s dig deeper into the nuances that most people get wrong, so you can troubleshoot smarter and protect your warranty coverage.
Why Relying on Error Codes Alone Can Lead You Astray
It’s common to think that error codes tell the full story of a dishwasher’s malfunction. While these codes are valuable clues, they are not definitive diagnoses. For example, a fault code indicating a heating issue might actually stem from a faulty thermostat rather than the heating element itself. Misinterpreting this can lead you to replace parts unnecessarily, risking warranty voidance if the diagnostics aren’t thorough. The key is to use error codes as starting points, then perform targeted tests on related components. For advanced troubleshooting, consulting this expert guide will help you avoid common pitfalls.
Beware of the Overconfidence Trap and Overlooking Small Details
Many get caught in the trap of overconfidence, jumping straight into replacing parts based on assumptions, without proper testing. This can be especially costly with components like the control board or sensors, which are often mistaken for other issues. Moreover, small details such as clogged filters or kinked hoses can mimic more significant faults. Overlooking these minor issues often leads to unnecessary replacements and warranty claims being rejected. Remember, a systematic visual inspection combined with simple tests often reveals the real culprit. Regularly reviewing this resource can help refine your diagnostic approach.
Is It Better to Call a Pro or Trust Your DIY Skills?
While DIY diagnostics can save money, they come with risks if you’re not methodical. Advanced diagnostics involve understanding electrical schematics, testing with multimeters, and interpreting subtle clues. If performed improperly, you might damage components or void your warranty. Sometimes, engaging a professional for comprehensive diagnostics, especially when warranty coverage is involved, is the smarter move. When choosing a technician, ask for diagnostic reports or documentation, which can be valuable for warranty claims. For guidance on when to escalate, see this detailed guide. Have you ever fallen into this trap? Let me know in the comments.
In short, the false belief that error codes and visual inspections alone suffice can lead to costly mistakes. Combining systematic testing, understanding component relationships, and knowing when to bring in experts ensures your diagnostics are accurate, your repairs are covered under warranty, and you save both time and money. Mastering these nuances transforms you from a novice to a troubleshooting pro, ready to tackle even the most stubborn dishwasher issues.
Invest in Quality Diagnostic Tools for Longevity
One of my go-to tools is the digital multimeter, which I use daily to check electrical components like thermostats, sensors, and wiring. Unlike cheap models, I prefer a reliable Fluke multimeter because of its accuracy and durability—these are crucial when diagnosing complex issues that could affect your warranty coverage. Regularly testing parts with a multimeter ensures you catch problems early, preventing costly repairs down the line. For a deep dive into the best diagnostic tools, check out this comprehensive guide.
Create a Routine Maintenance Schedule
Prevention is better than cure, especially with appliances. I recommend setting a monthly reminder to clean your dishwasher’s filters, spray arms, and door seals. This simple routine keeps buildup and blockages at bay, which can cause leaks or poor cleaning performance. Also, inspecting hoses for cracks or kinks is vital—kinked hoses can mimic more serious faults and jeopardize your warranty if ignored. Regular visual checks are your first line of defense to keep things running smoothly.
Optimize Usage to Extend Appliance Life
Using your dishwasher correctly is an underrated maintenance tactic. I always run full loads, avoid overloading, and use recommended detergents. This minimizes strain on components like the motor and spray arms. Additionally, running hot water in your sink before starting the cycle ensures the dishwasher’s heating element doesn’t have to work harder, conserving energy and reducing wear. Proper operation not only saves money but also helps uphold warranty conditions by avoiding misuse.
Leverage Technology for Better Diagnostics
Smart diagnostics are gaining popularity. I use a smartphone-compatible infrared thermometer to quickly check the temperature of the water and heating element during operation. This helps me verify if the heating element is functioning correctly without disassembling the unit. For more advanced diagnostics, consider software tools that interface with your appliance’s diagnostic mode—many dishwashers support this feature. These tools can provide detailed error reports, making troubleshooting faster and more precise, which is essential for warranty compliance.
How do I maintain my dishwasher over time?
Consistent maintenance involves not just cleaning and visual inspections but also using the right diagnostic tools to catch issues early. Regular testing of electrical components with a multimeter, updating yourself on diagnostic procedures, and documenting any findings help you stay ahead of potential problems. This proactive approach ensures your appliance runs efficiently, extends its lifespan, and keeps your warranty valid. Remember, the future of appliance maintenance is leaning toward smart diagnostics and automation—staying informed now prepares you for that evolution. Try integrating a reliable multimeter into your routine, and see how it transforms your troubleshooting efficiency. For detailed strategies, refer to this guide.
The Hardest Lesson I Learned About Appliance Troubleshooting
One of the biggest eye-openers was realizing how crucial proper diagnostics are before jumping into repairs. Early on, I replaced parts based on error codes alone, only to find out I’d misidentified the real issue. This mistake cost me time and money, but it taught me that systematic troubleshooting is worth every minute. Knowing the nuances of diagnostics can save your warranty and prevent unnecessary expenses.
My Essential Toolkit for Troubleshooting Dishwasher Problems
Investing in a quality multimeter changed everything for me. It’s a simple tool that, when used correctly, helps verify electrical components like thermostats and sensors. Pairing this with a good repair guide, like this comprehensive resource, I was able to confidently diagnose issues and keep my warranty intact. These tools have become my trusted allies in appliance repair.
What You Can Do Today to Troubleshoot Smarter
Start by keeping a detailed symptom log—write down noises, leaks, error codes, and when they occur. Then, use basic diagnostic tools to test key components. Visual inspections of hoses, filters, and spray arms can reveal small issues before they escalate. If you hit a wall, don’t hesitate to contact a professional for diagnostics that protect your warranty. Remember, a proactive approach is your best defense against costly repairs and voided warranties.
Leave a Reply