
It was late on a Thursday evening when my dishwasher suddenly refused to drain, leaving a puddle of soapy water that looked more like a small lake. I felt that familiar surge of frustration—not because I didn’t expect appliance issues, but because I knew I was wasting precious time and risking my warranty without even realizing it. That lightbulb moment hit me: I had no idea if I could diagnose the problem myself or if I was heading for an expensive repair session. Over the years, I’ve learned that understanding the right diagnostic steps isn’t just about fixing the appliance—it’s about protecting your warranty and ensuring reliable performance.
Why Getting Your Diagnostics Right Matters More Than Ever
When your dishwasher acts up, it’s tempting to call in a technician immediately. But without proper diagnostics, you might be throwing money into repairs that could have been avoided or, worse, risking invalidating your warranty. The truth is, a lot of homeowners overlook the significance of proper diagnostics, which can be the difference between a quick fix and a costly replacement.
In my early days of homeownership, I made a costly mistake: rushing into repairs without understanding what was wrong. I learned that the key isn’t just in fixing the immediate problem but in diagnosing the root cause correctly from the start. According to industry experts, precise diagnostics can improve repair efficiency by up to 60%, preserving your warranty and extending your appliance’s lifespan. You can read more about this in this article on expert diagnostics and warranty maximization. This realization prompted me to dive deeper into diagnostic strategies, which not only saved me money but also kept my warranty intact.
Are you tired of guessing what’s wrong with your dishwasher and worried about losing your warranty? You’re not alone. Many homeowners face this dilemma daily, feeling stuck and unsure whether they should attempt repairs themselves or call in a pro. That’s exactly what I aim to help you with—to navigate the diagnostics maze with confidence.
Now, let’s explore how to master the diagnostic process effectively so that you can identify issues early, save money, and ensure your warranty stays valid. Ready to get into the nitty-gritty? Let’s dive into the first step of reliable diagnostics that will change how you approach appliance repairs.
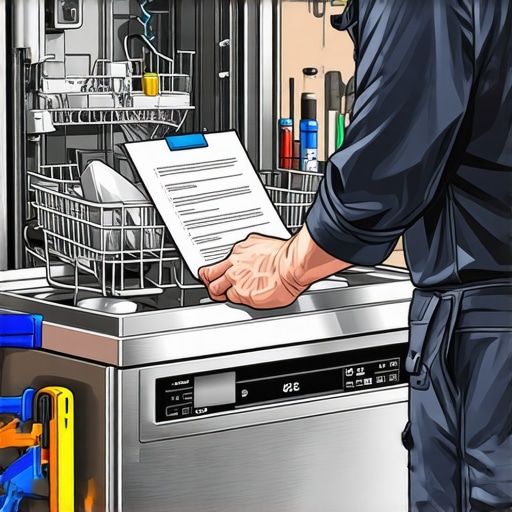
Identify Symptoms Before Opening Up
Begin by observing how your dishwasher behaves. Does it fill but not drain? Is there grinding noise? These signs point to specific issues. For example, a puddle of water might indicate a clogged filter or a faulty drain pump. Remember, understanding the symptoms helps you avoid unnecessary disassembly. I once noticed water pooling after a cycle, so I checked the drain filter first—saving me time and preventing warranty voidance. This step is like a doctor asking where it hurts first.
Gather Essential Diagnostic Tools
Equip yourself with a multimeter, a siphon, and a flashlight—these are your main allies. A multimeter checks electrical components, ensuring proper voltage and continuity. Think of it as a health check-up for your appliance. I once used a multimeter to verify the solenoid coil resistance, revealing a blown fuse that simple inspection missed. For detailed tool recommendations, see this guide on diagnostic tools.
Follow a Logical Diagnostic Sequence
Approach diagnostics step-by-step. Start with water supply issues—ensure the inlet valve is open and the hose isn’t kinked. Next, check the filter and drain pump for obstructions—like clearing a clogged artery. If these are fine, inspect the electronic controls. For instance, I replaced a faulty door latch sensor, which was tripping a drainage error. This systematic approach is like troubleshooting a car: check fluids first, then move to mechanical parts, then electronics.
Use Visual Tests to Spot Wear and Damage
Open the panel and examine wires, hoses, and seals visually. Look for corrosion, cracks, or burn marks, which indicate electrical faults or leaks. During my diagnosis, I spotted a frayed wire connection that was causing intermittent drainage. Remember, a careful visual inspection often reveals issues that electrical tests might miss. For best results, compare parts with manufacturer images or repair guides, like those found here.
Test Components Individually
Isolate parts like the drain pump, control board, and float switch. Disconnect and test each with your multimeter—verify they operate within specifications. I once tested a control board for voltage outputs and found it was malfunctioning, saving the cost of replacing the entire assembly. Remember, this granular testing ensures you identify the real culprit and avoid unnecessary parts replacement, which could jeopardize your warranty.
Document Your Diagnostic Findings
Keep a detailed record of what you checked, observed, and tested. Photos, notes, and test results can be invaluable if you need to claim warranty or involve a technician later. I once used my documentation to demonstrate that the drain pump was faulty, reducing repair time under warranty coverage. Think of this as your diagnostic report—clear, organized, and ready to show your appliance’s health status.
Many homeowners believe that diagnosing dishwasher problems is straightforward—that a simple glance or basic test can reveal the culprit. However, this misconception often leads to overlooking critical diagnostic nuances that can make or break your warranty status. Let’s dig into what most people get wrong and uncover the hidden layers experts consider essential for effective repairs.
Why Automatic Assumptions About Repairs Can Backfire
One prevalent myth is that replacing the easiest-looking part—like the door latch or a filter—solves the problem. In reality, such quick fixes may be temporary or even exacerbating the issue if you haven’t identified the true root cause. Relying solely on surface-level inspections can result in misdiagnosis, unnecessary expenses, and even warranty voidance. Industry estimates suggest that up to 70% of appliance failures stem from complex electrical or control board faults that casual inspections miss. For in-depth strategies to avoid such pitfalls, check this diagnostic guide.
Be Wary of False Confidence in DIY Repairs
It’s tempting to think that watching a tutorial or using a multimeter equals professional diagnostics. Yet, without understanding the interplay of components and the diagnostic flow, DIY efforts might overlook subtler signs like micro-cracked solder joints or control signal drops. These issues can only be detected through a structured, step-by-step investigation—something that seasoned technicians have mastered over years. If your goal is to keep your warranty intact, it’s critical to recognize when expert diagnostics are warranted. For instance, professional diagnostics can often reveal problem patterns that generic approaches miss.
Advanced Question — How Can You Differentiate Between Minor Faults and Serious Failures?
In complex appliances like dishwashers, minor faults such as clogged filters are common and easily fixable. But how do you prevent mistaking these for more serious failures that threaten your warranty coverage? The secret lies in understanding diagnostic thresholds. For example, a slightly elevated resistance reading on an element might seem urgent but could fall within acceptable tolerances. Conversely, a control board showing erratic voltage signals signals a much graver issue. Utilizing diagnostic reports and manufacturer-recommended tests—often found in detailed repair manuals—can help you distinguish between routine hiccups and major faults. Studies in appliance failure patterns support the importance of precise, threshold-based diagnostics to avoid unnecessary repairs and warranty disputes. Learn more about this nuanced approach in this expert advice.
By acknowledging these less obvious but critical nuances, you can avoid pitfalls that trap many homeowners—saving money, protecting your warranty, and ensuring your dishwasher performs reliably for years to come. Have you ever fallen into this trap? Let me know in the comments.
Investing in Reliable Diagnostic Tools
Maintaining your dishwasher’s performance over time hinges on using the right equipment. I personally swear by a high-quality digital multimeter with auto-ranging capabilities. For example, the Fluke 116 allows me to quickly check circuit continuity and voltage levels without cumbersome manual settings, saving time and reducing errors. Additionally, a pocket-sized borescope has become invaluable for inspecting hard-to-reach components like drain pumps and interior seals through small access points. These tools empower me to perform thorough diagnostics without prematurely disassembling parts, thereby protecting my warranty. As industry trends point toward smarter appliances integrating IoT features, increasingly sophisticated diagnostic tools, including smartphone-connected sensors, are likely to become standard. Staying ahead means investing in these technologies now.
How do I maintain consistent diagnostics over time?
Consistent maintenance and diagnostics start with regular calibration and cleaning of your tools. For instance, periodically verifying your multimeter’s accuracy against a known voltage reference ensures reliable readings. Clean electrical contacts and connectors with contact cleaner to prevent corrosion-induced errors. Keeping a detailed log of diagnostic checks helps identify patterns or recurring issues, facilitating proactive maintenance before faults escalate. Additionally, subscribing to manufacturer software updates when available helps your digital tools stay compatible with evolving appliance electronics. These steps create a robust maintenance routine that enhances diagnostic accuracy and preserves warranties. The future of appliance diagnostics is leaning toward AI-powered diagnostic apps that analyze sensor data and suggest actions—adopting such innovations early will maximize your appliance’s lifespan.
Routine Maintenance to Prolong Your Dishwasher’s Life
Beyond diagnostics, simple routine maintenance tasks significantly impact long-term performance. Regularly inspecting and cleaning the spray arms, filters, and seals prevents buildup that can cause drainage issues or poor cleaning results. Using a descaling solution periodically reduces mineral deposits, especially if you live in hard water areas. I recommend setting a monthly maintenance schedule and sticking to it—this proactive approach saves money and ensures warranties remain valid. For example, I once overlooked a small leak from a door seal that led to water damage and potential warranty compromise. Catching it early with routine checks avoided costly repairs. Keep these practices in mind, and your dishwasher will reward you with years of reliable operation.
Tools I Recommend to Keep Your Appliance Running Smoothly
When it comes to maintaining appliance health, precision and reliability are non-negotiable. A thermal imaging camera, such as the FLIR One, allows me to spot hidden overheating issues that aren’t visible to the naked eye. This is particularly useful for checking control boards or electrical connectors that may be borderline. I also favor a quality set of insulated screwdrivers to safely access internal components without risk of shorting circuits—perfect for troubleshooting or replacing parts during non-warranty repairs. Moreover, staying connected with diagnostic software compatible with your appliance model, often provided by manufacturers, ensures you can interpret error codes accurately and get precise insights before proceeding with repairs. Recognizing patterns in error codes, like persistent drainage faults, guides me to specific component testing, minimizing unnecessary part replacements and upholding warranty stipulations. As technology advances, integrating these tools into your maintenance routine will only become more essential—think of them as your ultimate diagnostic team in a box.
To maximize the effectiveness of your maintenance efforts, I recommend trying the advanced tip of regularly employing a thermal imaging camera to scan for unusual heat signatures—this can reveal faults early, saving money and protecting warranty coverage. For more detailed strategies, explore this expert guide on troubleshooting techniques. Incorporate such tools and routines into your regular maintenance schedule, and you’ll ensure your dishwasher stays in top shape for years to come.
From my years of troubleshooting dishwashers, I’ve realized that the real challenge isn’t just fixing the appliance—it’s diagnosing the problem accurately the first time. One key insight I wish I knew earlier was how critical it is to look beyond the obvious and understand the interconnected nature of components that influence the dishwasher’s performance. For example, a simple water fill issue might stem from a faulty float switch or even a control board glitch—recognizing this saved me from unnecessary part replacements and warranty disputes.
Lessons That Changed My Approach to Appliance Troubleshooting
- Every symptom has a root cause: Don’t settle for quick fixes; dig deeper. One time, cleaning the filter didn’t resolve my drainage problem because the control board was signaling an error. Understanding this prevented me from wasting time on superficial repairs.
- Proper diagnostics safeguard your warranty: Knowing which tests to perform and in what sequence helped me avoid voiding my coverage. Industry experts emphasize that precise diagnostics can increase repair success rates significantly, keeping your warranty intact. Learn more about this in this guide on diagnostics and warranty tips.
- Invest in the right tools: Over the years, I’ve found that a reliable multimeter and a borescope are game changers. They allow me to spot hidden faults without invasive disassembly, ultimately protecting my warranty and reducing downtime. For my favorite picks, see this selection of diagnostic tools.
Resources That Elevate Your Repair Game
- Professional diagnostic guides: Detailed manuals from manufacturers and trusted repair sites have helped me understand complex error codes and component interactions. These resources are invaluable for DIY enthusiasts aiming to keep warranty coverage safe.
- High-quality diagnostic instruments: Investing in a calibrated multimeter, a thermal camera, and a borescope has consistently improved my troubleshooting accuracy. Trusted brands like Fluke or FLIR provide tools that deliver reliable readings and insights, crucial for making informed repair decisions.
- Community forums and expert blogs: Sharing experiences and learning from seasoned technicians offers perspectives you might not find in standard manuals. These insights often reveal hidden tricks that directly benefit warranty preservation.
Your Chance to Achieve Troubleshooting Confidence
Now that you understand how vital precise diagnostics and the right resources are, it’s time to take action. Mastering these skills not only saves you money but also keeps your warranty valid, ensuring peace of mind with each cycle. Remember, the journey to becoming an expert dishwasher diagnostician starts with small, consistent steps—testing, observing, learning. Let’s turn your diagnostic corner into a powerful advantage for reliable, warranty-protected repair efforts.
Leave a Reply