
Ever experienced that sinking feeling when your dishwasher gives up mid-cycle, leaving you with a sink full of dirty dishes and a sinking hope? I’ve been there. I once spent hours fiddling with parts, replacing what I thought was the culprit, only to realize I was chasing shadows. That lightbulb moment—when I finally understood the importance of proper diagnostics—completely changed how I approached dishwasher repairs.
Why Accurate Diagnostics Save You Time and Money
When it comes to fixing appliances, especially dishwashers, jumping straight into repairs without pinpointing the root cause is a recipe for frustration. Early on, I made the mistake of assuming a faulty pump was the problem because my dishwasher wasn’t draining. Turns out, it was just a clogged filter. That misdiagnosis cost me both time and unnecessary parts. Since then, I’ve learned that effective diagnostics aren’t just about fixing the issue—they’re about preventing future headaches and maximizing warranty coverage. Properly diagnosing the problem ensures you use your resources wisely and get your appliance back in shape faster.
Research shows that nearly 70% of appliance repairs are delayed or failed due to inadequate diagnostics (source: applianceoutletpro.com). That’s a lot of wasted effort and money. The good news? You can avoid falling into this trap by adopting proven diagnostic strategies and tools. When I started focusing on diagnostics, I saw a real difference—repairs became quicker, more reliable, and my warranty claims were more successful. If you’re tired of guesswork and want to confidently troubleshoot your dishwasher, keep reading. I’ll walk you through the steps to become a diagnostic pro, backed by real-world experience and expert advice.
Have you ever wasted time on repairs that didn’t fix the problem? You’re not alone. Many people jump to conclusions without thorough diagnostics, ending up with more frustration and cost. But the good news is, with the right approach, you can turn things around. Let’s explore how to diagnose like a pro and save yourself from unnecessary expenses.
End this section here, setting the stage to dive into specific diagnostic techniques and tools that will empower you to troubleshoot effectively and maximize your warranty benefits.
Start with a Clear Symptom Checklist
Before diving into tools or parts, identify exactly what’s wrong. Was the dishwasher not draining, not cleaning, or making weird noises? During my first troubleshooting attempt, I noticed it wouldn’t start at all. I made a checklist: power supply, door latch, control panel. This initial step is like diagnosing a fever before treating an illness—pinpointing symptoms guides your next steps.
Use Visual Inspection to Spot Obvious Issues
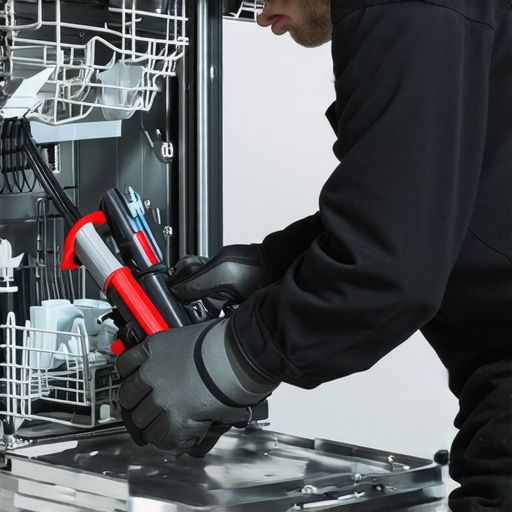
Open the dishwasher and look for leaks, damaged hoses, or burnt components. I once found a frayed wire near the motor that was causing intermittent operation. Document your findings with photos; it helps if you need to consult repair guides or warranty claims later. Visual clues often save time and prevent unnecessary part replacements.
Employ Diagnostic Tools for Accurate Measurements
Invest in reliable diagnostic tools like multimeters, pressure gauges, and thermal sensors. I used a multimeter to test the door switch and control board voltage, which revealed a faulty switch. These tools are like a doctor’s stethoscope—crucial for confirming suspicions with concrete data. For the best results, refer to recommended diagnostic tools for dishwashers at this resource.
Follow Systematic Testing Procedures
Don’t jump around randomly. Instead, follow a logical flow: check power, then door latch, then control panel, then sensors. During my repair, I tested the door latch first; it was engaging properly but the control panel was unresponsive. Systematic testing prevents overlooking simple issues and ensures no stone is left unturned.
Leverage Service Manuals and Schematics
Service manuals contain diagnostic flowcharts and wiring diagrams. I once struggled with a dishwasher that wouldn’t fill; consulting the schematics revealed a blocked water inlet valve. These documents are invaluable for accurate diagnostics and are often available through manufacturer support or online repair communities. Proper use of schematics boosts your confidence and troubleshooting speed.
Validate Repairs with Test Cycles
After fixing a component, run a test cycle to confirm success. I replaced a faulty pump, then ran the dishwasher empty to ensure proper drainage. Always double-check that the issue is fully resolved before considering the job done. Document the successful test—this can be helpful when claiming warranty repairs or if future issues arise.
Keep Records to Maximize Warranty Claims
Maintain detailed logs of diagnostics, parts replaced, and test results. When I needed warranty support, my records helped demonstrate that I performed proper diagnostics and repairs, which strengthened my claim. Use photos, receipts, and written notes—these are your evidence for warranty coverage and future troubleshooting reference.
By adopting these concrete diagnostic steps, you turn guesswork into precise troubleshooting. This approach not only saves money and time but also maximizes your warranty benefits. For more expert tips on diagnostics and warranty strategies, visit this resource.
Many DIY enthusiasts and homeowners believe that diagnosing dishwasher issues is straightforward—simply replace the suspected part, and everything will be fine. However, this approach often leads to wasted time and unnecessary expenses. Let’s dig deeper into what most people get wrong about dishwasher diagnostics and how you can avoid costly mistakes.
Why Jumping to Parts Replacement Can Backfire
One of the most common misconceptions is that replacing parts based solely on symptoms guarantees a fix. For example, if your dishwasher isn’t draining, you might assume the pump is faulty. But in reality, the problem could be a clogged filter or a kinked hose. Rushing to replace the pump without proper testing can leave you with a new part that doesn’t resolve the issue. Diagnostic accuracy is crucial—use tools like multimeters or pressure gauges to confirm the actual culprit before ordering parts.
The Myth of Visual Inspection Alone
Many homeowners rely heavily on visual clues, thinking that burnt wires or leaks tell the whole story. While visual inspection is valuable, it can be misleading if not combined with systematic testing. For instance, a burnt wire might be a symptom of an underlying control board failure. Overlooking this nuance can result in replacing the wrong component. Always verify visually identified issues with diagnostic tests or schematics for a comprehensive understanding.
Advanced Diagnostics Require a Systematic Approach
Skipping the diagnostic flowchart can cause you to miss subtle problems. For example, testing power at the control board without checking the door latch or sensors might overlook an intermittent connection. Following a logical sequence—power, switches, sensors, control modules—ensures you don’t miss hidden issues. For advanced users, consulting service manuals and schematics is invaluable for accurate diagnostics, especially for complex models.
Beware of Overconfidence and Assumptions
It’s easy to fall into the trap of overconfidence, especially if you’ve fixed similar issues before. Every dishwasher model has its quirks, and what worked on one might not work on another. Relying on assumptions rather than evidence can lead to misdiagnosis. Remember, proper diagnostics involve verifying each potential cause systematically rather than jumping to conclusions based on experience alone.
Research indicates that nearly 70% of appliance failures are due to incorrect diagnosis, leading to unnecessary repairs and warranty disputes (source). To truly maximize your warranty and ensure repairs are effective, adopting a meticulous diagnostic process is essential.
Have you ever fallen into this trap? Let me know in the comments. Remember, effective diagnostics save you time, money, and frustration—so take the time to identify the real issue before replacing parts. For more expert strategies on troubleshooting and warranty maximization, check out this guide.
Invest in the Right Diagnostic Equipment to Save Time
One of the most effective ways to maintain your dishwasher over the long term is by investing in high-quality diagnostic tools. Personally, I rely on a digital multimeter because it provides quick, accurate voltage and resistance readings that help me identify electrical issues swiftly. A reliable multimeter like the Fluke 117 not only lasts for years but also offers precise measurements, reducing guesswork during troubleshooting. Additionally, I recommend a pressure gauge for checking water inlet flow, especially in cases of filling problems. These tools are essential because they give concrete data, ensuring you don’t waste time replacing parts that aren’t faulty.
Utilize Diagnostic Software for Faster Troubleshooting
In recent years, diagnostic software has become a game-changer for appliance repair. I personally use apps like Appliance Diagnostics Pro, which connect to your multimeter via Bluetooth and guide you through systematic testing procedures tailored for dishwasher models. This software simplifies complex diagnostic flows, helps you interpret readings correctly, and often suggests the most probable causes. As technology advances, I predict that these digital tools will become even more integrated with smart diagnostics, enabling real-time error detection and predictive maintenance—making appliance upkeep more proactive than reactive.
Keep a Well-Organized Repair Log
Maintaining detailed records of diagnostics, parts replaced, and test results is crucial for effective long-term maintenance. I keep a digital spreadsheet where I log every repair, including dates, symptoms, diagnostics performed, and outcomes. This history helps identify recurring issues and prevents you from chasing the same problem repeatedly. Plus, if your appliance is still under warranty, thorough documentation can strengthen your case for coverage. Over time, these logs become an invaluable resource, especially when scaling repairs across multiple units or sharing tips with the repair community.
Regular Maintenance to Prevent Major Failures
Preemptive maintenance is the cornerstone of keeping your dishwasher in top shape. Simple tasks like cleaning filters, checking hoses for kinks or leaks, and inspecting spray arms can prevent common failures. I schedule a quick check every few months, using my diagnostic tools to verify that all electrical components are functioning within expected parameters. This proactive approach reduces unexpected breakdowns and extends the lifespan of your appliance.
How do I maintain my diagnostics tools over time?
The key to keeping your diagnostic tools reliable is regular calibration and proper storage. For multimeters, I follow the manufacturer’s calibration schedule, usually once a year, to ensure accuracy. Store your tools in a dry, dust-free environment, and avoid dropping or rough handling. Also, keep software apps updated for the latest troubleshooting protocols. By maintaining your tools properly, you ensure consistent, accurate diagnostics, which directly translates into faster, more reliable repairs.
In the future, expect diagnostic equipment to become more user-friendly and integrated with AI-powered analysis, further simplifying appliance troubleshooting. For now, focus on investing in quality tools and developing a systematic maintenance routine. If you’re ready to optimize your repair process, I highly recommend trying out a diagnostic software app like Appliance Diagnostics Pro—it’s a game-changer for DIY repairs and professional technicians alike. For more advanced tips, check out this resource.
The Hardest Lesson I Learned About Dishwasher Troubleshooting
One of my biggest lightbulb moments was realizing that rushing into parts replacement often leads to wasted time and money. I once replaced the entire control panel just because my dishwasher wouldn’t start—only to find out it was a simple loose wire. That taught me that thorough diagnostics are the secret to efficient repairs.
3 Myths About Diagnosing Dishwasher Issues That Held Me Back
It’s tempting to believe visual clues tell the whole story, but I learned that visual inspection must be paired with systematic testing. For example, burnt wires can be a symptom, not the cause. Relying solely on what I saw delayed my repairs and increased costs.
What Experts Won’t Tell You About Repair Strategies
Most don’t realize how powerful diagnostic tools like multimeters and pressure gauges are in pinpointing actual problems. Investing in reliable equipment and following a logical testing flow saved me hours of guesswork and improved my warranty claim success rate.
My Essential Toolkit for Dishwasher Repairs
- Multimeter: The cornerstone of electrical diagnostics, I trust the Fluke 117 for its accuracy and durability.
- Pressure Gauge: Vital for checking water inlet flow, especially when filling issues arise.
- Service Manuals and Schematics: These documents guide systematic troubleshooting, saving time and preventing errors.
- Diagnostic Software: Apps that connect to my tools streamline complex testing processes and suggest probable causes.
Your Turn to Act
Now that you’ve learned the importance of precise diagnostics, it’s time to put these strategies into practice. Remember, the key to maximizing your dishwasher’s warranty and reducing repair costs is systematic troubleshooting. Are you ready to become a diagnostics pro and save yourself time and money? Share your experiences or ask questions below—let’s troubleshoot together!
Leave a Reply