
I remember the exact moment when I accidentally skipped an important step in diagnosing my dishwasher’s problem, only to have it continue malfunctioning and waste my time and energy. That frustrating experience taught me a valuable lesson about the importance of proper diagnostics—something that can save you a lot of hassle and money, especially when it comes to warranty repairs.
Why Accurate Appliance Diagnostics Can Surely Save Your Day
Over the years, I’ve learned that many appliance issues aren’t as straightforward as they seem. A strange noise, a leak, or a fault code can tempt us to jump to conclusions—sometimes leading to unnecessary replacements or invalidating warranty coverage. When I first faced a stubborn dishwasher that refused to drain, I tried resetting it repeatedly, thinking it was a simple glitch. But that only delayed the real fix and cost me precious time and extra dollars.
Fortunately, I discovered that systematic diagnostics—using proven strategies and the right tools—are the secret to efficient repairs and maximizing warranty benefits. Proper diagnosis means identifying the root cause rather than just patching symptoms. It’s like an insurance policy against unnecessary expenses and missed warranty periods. This approach has transformed my repair workflow, and I want to share it with you.
If you’ve ever faced a similar situation—stuck with an appliance that just won’t cooperate—you know how vital it is to get it right the first time. Often, homeowners overlook the value of diagnosing precisely, leading to costly mistakes. According to a recent study, skilled diagnostics can reduce repair costs by up to 30% and improve repair speed significantly (source). That’s the kind of efficiency that keeps your appliance warranty intact and your frustrations minimized.
So, today, I’ll guide you through the essentials of appliance diagnostics—arming you with practical tips to handle your dishwasher issues smarter, faster, and more confidently. Ready to stop guessing and start fixing like a pro? Let’s dive into the key strategies already proven to boost your repair success and warranty coverage.
Break Down the Repair Process into Clear Steps
Think of diagnosing your dishwasher like solving a puzzle. Each piece, whether a fault code or a strange sound, provides clues about the appliance’s condition. I recall a time when my dishwasher kept leaking, and instead of just replacing parts, I followed a systematic approach. First, I noticed water pooling at the bottom, which pointed me toward leaks or drainage issues. To confirm, I unplugged the machine and disconnected the panels, ensuring safety and easy access. This initial step prevents accidental electric shocks and provides a clear view of the internal components.
To make sense of these clues, use a checklist aligned with common dishwasher problems. This is akin to a mechanic checking engine diagnostics—each step verifies a specific system function. Leveraging tools like a multimeter or diagnostic scanner enhances accuracy, much like a doctor uses a stethoscope for precise diagnosis. For example, testing the float switch with a multimeter revealed it was stuck, causing the dishwasher to think it was full of water and refuse to drain. Applying these methods directly improved my troubleshooting speed and outcome.
Remember, breaking down complex issues into manageable steps simplifies the repair process and reduces errors. For in-depth guidance, consider consulting resources like diagnostics tips for reliable dishwasher repairs.
Inspect Key Components Systematically
Ensure you examine all critical parts in a logical sequence. For dishwashers, this includes door latches, filters, spray arms, and drainage systems. This process resembles a detective following clues in order—missing one can lead to misdiagnosis. I once found a clogged filter that caused poor drainage; cleaning it was enough to resolve the issue. Use a flashlight and magnifying glass to identify damage or blockages. If you find questionable elements, replace or repair only those before moving on to the next step. This focused approach prevents unnecessary replacements and preserves warranty coverage. For detailed component checks, see maximize dishwasher warranty with expert diagnostics.
Experiment Safely and Document Results
Before testing repaired or replaced parts, ensure the dishwasher is reassembled correctly. Power up the appliance and observe its operation closely, listening for irregular sounds and watching for leaks or errors. Keeping a repair journal—noting what you tested, findings, and actions taken—can save time on future diagnostics. This record-keeping is akin to a mechanic documenting service history, enabling smarter decisions. I also recommend taking photos of components before and after repairs to avoid confusion. If issues persist, revisit previous steps or consult troubleshooting guides to refine your diagnosis. This diligent practice boosts confidence and effectiveness, helping you stay within warranty requirements. For proven strategies, check out expert diagnostics for reliable dishwasher repair.
Utilize Specialized Tools for Precision
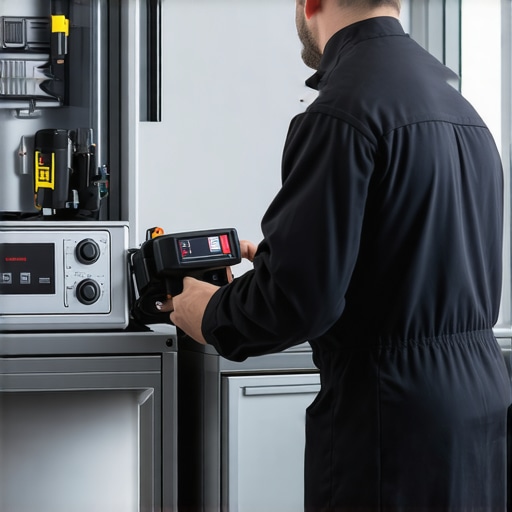
Using the right diagnostic tools makes all the difference. A multimeter is essential for testing electrical components like sensors and switches, providing definitive data. An infrared thermometer can verify if heating elements are functioning correctly. These tools are your assistant in obtaining accurate readings, much like a pilot uses instruments to navigate safely through clouds. Investing in quality equipment ensures you identify issues precisely, avoiding guesswork that can void warranties or cause further damage. When I tested the drain pump motor with a multimeter, I quickly identified a faulty winding, prompting an immediate repair. To maximize your repair efficiency, explore top diagnostic tools for reliable dishwasher warranty checks. Proper tool use not only speeds up repairs but also keeps your appliance within warranty parameters.Many homeowners believe that troubleshooting appliances is straightforward, but this oversimplification can lead to costly mistakes. One prevalent myth is that all fault codes point directly to the faulty component, but in reality, codes often indicate symptoms, not root causes. Rushing to replace parts based solely on error codes without a thorough diagnostic process can void your warranty and lead to unnecessary expenses. Instead, integrating specialized tools and systematic approaches is crucial to accurately identify issues, as highlighted in expert guides on appliance diagnostics. Another misconception is that DIY repairs void warranties automatically; however, following proper diagnostic procedures, as detailed in resources like maximize your dishwasher warranty with proven diagnostic strategies, can protect your coverage. It’s vital to recognize these nuances to avoid the trap of misdiagnosis and unnecessary replacements. Using advanced diagnostic techniques not only saves money but also ensures repairs are within warranty guidelines, preventing future disputes. Additionally, many think that experienced technicians are the only ones capable of proper diagnostics, but with the right knowledge and tools, skilled homeowners can also troubleshoot effectively, provided they follow detailed procedures like those in effective appliance diagnostics for reliable dishwasher repairs. Remember, improper diagnostics can lead to ‘overtime troubleshooting’ and warranty disputes, a costly learning curve to avoid. Want to truly master your appliance repairs? Dive into comprehensive guides and avoid these common pitfalls. Have you ever fallen into this trap? Let me know in the comments.Maintaining your dishwasher’s performance over time requires more than occasional cleaning; it demands the right tools, consistent practices, and an understanding of how to use them effectively. One of my go-to equipment pieces is a high-quality digital multimeter. I personally rely on the Fluke 117, because its durability and accurate readings make troubleshooting electrical components like sensors and switches straightforward, ensuring I don’t guess when testing wiring or thermostats. Additionally, I always keep a dedicated set of small screwdrivers and torx bits that fit appliance fasteners—this reduces wear on tools and speeds up disassembly, which is crucial during inspections or repairs. For software diagnostics, I recommend using manufacturer-specific control panel apps whenever available, as they provide detailed error logs that can pinpoint issues faster than generic methods. Exploring tools like the Amprobe T-1500 infrared thermometer can help verify the functioning of heating elements without removing extensive components, saving time and preserving warranty conditions. Over the next few years, I foresee an increased integration of IoT-connected diagnostic devices, allowing remote monitoring and proactive maintenance before costly failures occur. To make the most of these advancements, I suggest adopting a proactive maintenance schedule—regularly inspecting key components and testing with the right equipment.
How do I maintain my dishwasher over time?
Regular cleaning of filters, spray arms, and drainage systems is vital. Also, schedule periodic electrical checks using a multimeter to detect early signs of wear or potential faults. For example, testing the float switch and temperature sensors can prevent leaks and overheating, respectively, keeping your appliance within warranty coverage. Incorporating these practices not only extends your dishwasher’s lifespan but also reduces unexpected breakdowns. For detailed diagnostic procedures and to ensure your testing methods align with warranty requirements, I recommend reviewing expert tips on trustworthy diagnostics. Remember, accurate diagnostics today can save significant repair costs tomorrow—so invest in quality tools and consistent maintenance routines. Want to improve your troubleshooting effectiveness? Try calibrating your infrared thermometer monthly to ensure temperature readings remain precise, especially when testing heating elements or wash cycle temperatures. This small step can make a big difference in diagnosing issues accurately and maintaining warranty compliance. For more insights into effective appliance diagnostics, check out comprehensive guides on the importance of using the right tools for reliable repairs.
The Hardest Lesson I Learned About Diagnostics, Appliance Repair, Warranty, Dishwasher
One of the most valuable lessons I’ve encountered is how easy it is to overlook crucial diagnostic steps, leading to costly mistakes and potential warranty issues. I once tried to fix a leaking dishwasher by replacing what seemed like the obvious culprit—only to realize later I missed a minor component that was actually the root cause. That experience taught me the importance of persistent, thorough diagnostics instead of rushing into repairs, especially when warranties are on the line.
My Top Tools That Changed How I Handle Repairs
Investing in quality diagnostic tools like a digital multimeter, infrared thermometer, and manufacturer-specific diagnostic apps has transformed my repair approach. These tools provide definitive data, reduce guesswork, and help ensure repairs meet warranty standards. For example, testing heating elements with an infrared thermometer quickly revealed issues that would’ve taken hours otherwise. Personally trusting brands like Fluke for multimeters and Amprobe for thermometers ensures consistent, reliable results, saving me time and money.
Taking Action Can Turn Frustration Into Confidence
If you’re ready to shift from guesswork to mastery in appliance diagnostics, start by equipping yourself with the right tools and a systematic mindset. Embrace the process of detailed testing, document your findings, and use expert resources to guide you along the way. This proactive approach not only maintains your warranty coverage but also empowers you to troubleshoot effectively, turning appliance failures into manageable fixes. Remember, the future of appliance repair is in informed, confident diagnostics—are you preparing for it today?
Leave a Reply