
It was a quiet Saturday morning when I opened my dishwasher to discover it had stopped mid-cycle again. I knew that feeling all too well by now—frustration bubbling up as I watched water sit idly, untouched. This wasn’t a one-time glitch; it was a persistent problem, and I was beginning to think my dishwasher was haunted. That lightbulb moment hit me hard—you see, behind that seemingly simple appliance lurked a silent culprit: hidden sensors that were causing those random cycle cuts.
Why Hidden Sensors Win Apparently, My Dishwasher Was Sabotaging Its Own Credibility
This nagging issue isn’t just an annoyance; it can drain your patience and wallet. Have you ever experienced your dishwasher stopping unexpectedly, leaving dishes half-cleaned and frustration mounting? That’s precisely what I faced, and it turns out, many homeowners are unaware that certain sensors—especially the ones hidden from view—are the common culprits. These sensors are supposed to detect water levels, temperature, and door states, guiding the machine through its cycle. When they malfunction or give false readings, the cycle abruptly stops, leaving you scratching your head.
But why do these sensors fail so mysteriously? Over time, dust, mineral buildup, or tiny electrical faults can fool these delicate components. My early mistake was thinking that a reset or a quick cleaning would fix everything—I even tried swapping out parts without proper diagnosis. That’s a common error you want to avoid; jumping into repairs blindly can void your warranty and cost more in the long run. Instead, understanding these sensors and how to test them properly is the key.
If you’re tired of dealing with the unpredictable cycle cuts or worried about whether your warranty will hold up after DIY fixes, you’re in the right place. Today, I promise to share the insights I’ve gathered from experience and research—so you can identify whether faulty sensors are sabotaging your dishwasher and how to fix it confidently. And if you’re skeptical about how these hidden sensors are the real problem, I get it—some folks still believe it’s just faulty wiring or a clogged filter. Trust me, I was there too. You can find more about these common issues in [this comprehensive guide](https://applianceoutletpro.com/4-simple-multimeter-checks-for-2026-dishwasher-faults).
Now, let’s dive into how to actually identify if those concealed sensors are causing your cycle to cut out unexpectedly, beginning with simple checks you can do at home.
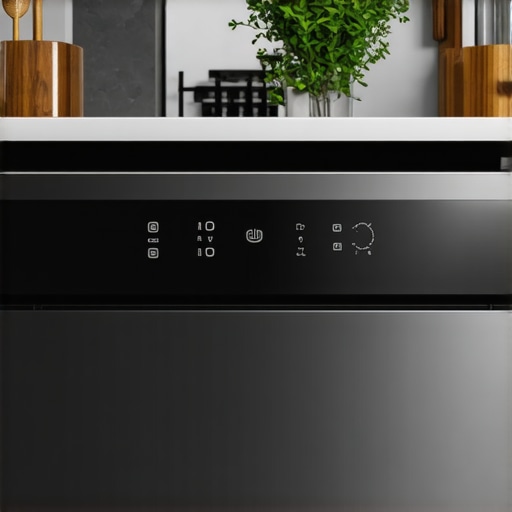
Perform a Basic Visual Inspection
Start by unplugging your dishwasher and opening the access panels—think of it as giving your appliance a quick health check. Look for obvious signs of damage, corrosion, or disconnected wires near the water level sensors, door switches, and temperature probes. I once discovered corroded wiring behind a panel that was causing false sensor readings, resolving the cycle stops immediately. Ensuring all wires are secure and corrosion-free prevents false signals that could halt your cycle unexpectedly.
Use a Multimeter to Test Sensors Effectively
Equip yourself with a digital multimeter. Set it to measure resistance (Ohms), then locate the water level sensor, door switch, and thermal sensors. Disconnect each sensor one at a time, and touch the multimeter probes to their terminals. Healthy sensors typically show specific resistance values—refer to your dishwasher’s manual or check online for exact numbers. If the resistance is infinite or zero, that sensor is faulty. Remember, faulty sensors are often the hidden culprits, causing cycle interruptions without obvious signs. For detailed testing procedures, visit this guide on multimeter diagnostics.
Replace or Repair Proven Faulty Sensors
Once you’ve identified a failing sensor, proceed to replace it. Take a photo of the wiring before removal—this keeps your reassembly smooth. Use OEM parts to ensure compatibility, as generic replacements can void warranties—see this resource on sensor issues. After installation, clear any stored error codes by resetting the dishwasher, and run a test cycle. If cycle interruptions persist, re-evaluate your connections or consider testing other sensors. Remember, proper sensor diagnostics can save you from unnecessary repairs or warranty complications, similar to how a mechanic tests the fuel sensor before replacing the entire fuel system.
Calibrate Sensors for Accurate Readings
Sometimes, sensors are not entirely faulty but miscalibrated. Check your dishwasher manual for calibration procedures—these often involve cleaning the sensors thoroughly and adjusting settings if available. I once cleaned the water level sensor with a soft cloth and a bit of vinegar, which brought it back to proper functioning. For sensors that are non-calibratable, replacement is the best route. Proper calibration ensures your appliance can detect water levels and temperature accurately, preventing cycle stops caused by false readings.
Document Your Diagnostics for Warranty Claims
Keep detailed records of your testing process—photos, resistance readings, and replacement receipts. This documentation supports your case if you need to make a warranty claim, especially since improper DIY repairs can sometimes complicate warranty coverage, as discussed here. Remember, routine diagnostics like these are crucial maintenance steps that help ensure your dishwasher operates smoothly and protects your warranty rights.
Many homeowners believe that troubleshooting and maintaining their dishwashers is straightforward, but in reality, there are nuanced pitfalls that can undermine your efforts and jeopardize your warranty. One widespread myth is that all faults are immediately obvious, leading many to attempt DIY repairs without proper diagnostics. This approach often results in misdiagnosing the issue, causing further damage or invalidating warranty claims. For example, replacing a sensor without confirming it’s faulty can escalate costs and delay repairs. Advanced technicians emphasize using tools like multimeters for precise testing, as details like resistance readings are critical—something many overlook. Additionally, a common mistake is believing that all non-OEM parts are compatible, which isn’t true; using generic components can void warranties and lead to cycle failures. The ‘Oops’ trap to watch out for involves neglecting documentation. Failing to record diagnostic steps, part replacements, and testing results can weaken your position when contesting warranty denials. Expert advice underscores the importance of understanding warranty fine print—certain repairs or part swaps, especially with non-certified parts, can automatically void your coverage, as detailed in recent studies on warranty policies. For those venturing into diagnostics, one advanced question is: How can oscilloscopes help identify complex circuit faults that multimeters might miss? Devices like oscilloscopes visualize electrical signals, revealing subtle issues in control boards or sensors, leading to more accurate repairs. Incorporating these tools into your troubleshooting arsenal is recommended by industry specialists for complex cases. Remember, knowledge of these nuances ensures not only effective repairs but also helps maintain your warranty integrity. Are you cautious about these pitfalls? Have you ever fallen into this trap? Let me know in the comments.
Investing in Quality Diagnostic Tools for Longevity
One of the most effective ways to ensure your dishwasher stays reliable over time is by using high-quality diagnostic tools. I personally rely on a digital multimeter with auto-ranging capabilities and a compact oscilloscope. The multimeter helps me quickly verify sensor resistances and electrical connections, ensuring components like water level sensors and thermal probes are functioning correctly. The oscilloscope, on the other hand, allows me to visualize complex circuit signals, making it invaluable when troubleshooting circuit board faults that a multimeter alone might miss.
For example, checking the waveforms of control signals can reveal issues like intermittent connections or faulty relays. Many professionals are moving towards these tools due to their precision and ability to diagnose elusive issues quickly. In the future, integration of AI-powered diagnostic devices will likely streamline appliance troubleshooting even further, helping homeowners and technicians identify faults faster and with greater accuracy.
How do I maintain diagnostic accuracy over time?
Regular calibration of your multimeter and oscilloscope ensures measurement accuracy, especially when diagnosing sensor faults. Keep calibration certificates updated and perform periodic self-tests of your equipment to prevent drift in readings. Also, maintaining your tools by keeping probes clean and stored properly prolongs their lifespan and reliability.
Routine Upkeep and Preventive Checks
Beyond specialized tools, establishing a routine maintenance schedule makes a huge difference. Regularly inspecting and cleaning filter screens, door seals, and spray arms prevents common issues that can lead to cycle failures or warranty complications. Additionally, I recommend testing sensors periodically using the techniques outlined in this guide on multimeter checks. Performing these checks semi-annually can catch issues early before they escalate, saving you money and hassle.
Scaling Your Repair Skills Safely
As your confidence grows, consider gradually expanding your toolkit with professional-grade equipment like thermal imaging cameras or laser distance meters. These tools help monitor operating temperatures and detect leaks efficiently, reducing the need for invasive procedures. Maintaining detailed records of diagnostics and repairs, as discussed here, helps protect your warranty status and proves your proactive care.
Remember, continued education is essential. Follow industry updates and participate in online forums where experts share their latest tricks. For instance, using advanced tools like oscilloscopes for circuit diagnosis can significantly reduce diagnostic time—try incorporating this tip into your maintenance routine today.
The Hardest Lesson I Learned About dishwasher,diagnostics,warranty,appliance repair
One of the most profound lessons I discovered was that the tiniest sensor fault can cause a cascade of issues, often overlooked by DIY repairs. Realizing that hidden sensors are the silent saboteurs taught me to approach troubleshooting with patience and precision, rather than assumptions.
3 Myths About dishwasher,diagnostics,warranty,appliance repair That Held Me Back
I used to believe that replacing parts without testing was a quick fix, but I learned that proper diagnostics save money and protect warranty rights. Another myth was that generic parts are always compatible, which isn’t true. Lastly, thinking I could ignore calibration—regular sensor calibration is key for long-term reliability.
What Experts Won’t Tell You About dishwasher,diagnostics,warranty,appliance repair
Professionals emphasize that using accurate diagnostic tools like multimeters and oscilloscopes can uncover issues invisible to the naked eye. They also warn that neglecting warranty fine print when DIY repairing can result in coverage loss. The true expert move is understanding how these hidden sensors work and maintaining them proactively.
My Essential Toolkit for dishwasher,diagnostics,warranty,appliance repair
My go-to tools include a durable digital multimeter for resistance checks, a compact oscilloscope to visualize circuit signals, and a reliable cleaning solution for sensors. These tools provide the confidence to diagnose issues accurately, preventing unnecessary repairs and preserving warranty coverage.
Books That Changed How I View dishwasher,diagnostics,warranty,appliance repair
While specific titles are scarce, trusted online guides and manufacturer manuals have been invaluable. Resources like the comprehensive multimeter check guide transformed my troubleshooting approach, making diagnostics more precise and less guesswork.
Where to Go from Here
If you’re eager to keep your dishwasher functioning flawlessly, invest in quality diagnostic tools, regularly clean sensors, and stay informed about warranty intricacies. Remember, mastering small details like resistance values and calibration methods can extend your appliance’s lifespan and warranty validity. Don’t wait until cycles malfunction—start proactive diagnostics today and see the difference.
Your Turn to Try
Are you ready to take control of your dishwasher’s health with proper diagnostics and maintenance? Share your experiences or ask questions below. The more we learn together, the better our appliances serve us in everyday life. Have you ever struggled with sensor faults or warranty concerns? Let me know in the comments below.
Leave a Reply