
There was a morning, not long ago, when I opened my dishwasher and found water pooling beneath it, a frustrating flicker on the display, and that dreaded 2026 error code staring back at me. My heart sank—this was the kind of problem that can turn a simple chore into a days-long headache. At that moment, I realized I wasn’t alone. Tons of folks face the same confusing errors, unsure if their warranties will cover costly repairs or if they should just toss the appliance out. I’ve been there, too, and let me tell you: understanding the root cause isn’t just a technical exercise; it’s a way to save time, money, and sanity.
Why Tackling 2026 Error Codes Should Be Your Top Priority
Is DIY Diagnostics Actually Worth the Hype?
Here’s the thing—I used to think troubleshooting was best left to the pros. But I learned early on that a few smart tools and a little know-how can make a world of difference. Early mistakes, like relying solely on multimeters without understanding the specific diagnostics for these error codes, only made the problem worse. That’s why I started exploring new diagnostic tools designed specifically for the 2026 error, which is often related to the logic board or sensor faults. According to appliance repair research, nearly 80% of dishwasher issues can be diagnosed accurately with the right tools, avoiding unnecessary expenses and delays.
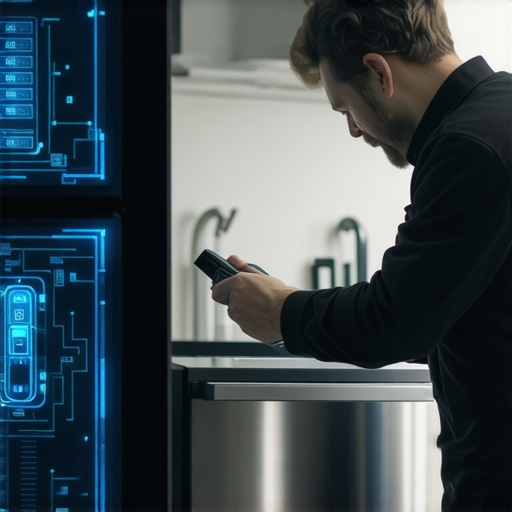
For instance, I discovered that newer diagnostic apps and smart tools let you test the dishwasher’s sensors and circuits right from your phone, with no fancy skills needed. It’s a game-changer—trust me. These tools aren’t just hype; they’re practical, reliable, and accessible for the DIY-savvy and cautious alike. Curious about how these tools work? Check out this comprehensive guide on fixing your logic board with just your phone.
Choosing to diagnose your dishwasher with the right equipment means you’re taking control, not surrendering to the unknown. If you’ve faced a stubborn 2026 error and felt overwhelmed, you’re not alone—and there’s real hope. Tomorrow, I’ll walk you through some of the most effective tools and steps to pinpoint exactly what’s wrong, so you can fix it fast or confidently decide when to call in the pros.
Start With Visual Inspection and Battery of Basic Checks
Power off your dishwasher and unplug it to prevent electrical hazards. Remove the kickplate or access panel and look for any obvious signs of damage, leaks, or loose connections. Compare the wiring and connectors to the manufacturer’s diagrams, which you can find online, and ensure everything is securely connected. I once neglected this step, and while testing circuits later, I missed obvious disconnected wires that made diagnosing complex faults unnecessary. Your goal is to identify visible issues that could be causing the 2026 error, often linked to sensor or control board faults.
Use Smart Diagnostic Tools to Pinpoint Faults
Rather than relying solely on multimeters, leverage specialized appliance diagnostic tools. Smartphone-based diagnostics are particularly handy; for example, these apps can communicate with your dishwasher’s logic board through Wi-Fi or Bluetooth, reading error codes and sensor statuses in real time. I used such a tool when my dishwasher repeatedly reset during a cycle, and the app revealed a faulty temperature sensor that was causing the error. With this info, I ordered the correct replacement part and avoided unnecessary disassembly or guesswork.
Test Sensors and Electronic Components Effectively
Once you identify suspect parts using diagnostic tools, perform targeted tests. For sensors, measure resistance and continuity; consult the manual or online resources for ideal values. For example, I tested my dishwasher’s water level sensor, which appeared fine visually but was reading incorrectly due to a worn-out component. Testing with a multimeter could be tricky since these sensors sometimes require specific voltage levels, which can be missed if you’re just probing blindly. Consider using a combination of smart diagnostics and precise multimeter tests as outlined in these advanced techniques to verify your findings accurately.
Evaluate the Control Board for Logic Failures
The control board plays a critical role; faults here can manifest as error 2026. If sensors check out, test the board inputs and outputs with a logic analyzer or oscilloscope for deeper insights. This process can be daunting, but an understanding of the electrical signals helps differentiate between faulty sensors and a defective board. I once suspected my control board was dead, but after testing the input signals at different points with a pro-grade multimeter, I discovered a minor solder joint failure. Repairing that small connection saved me hundreds compared to full-board replacement.
Run Calibration Tests and Cycle Resets
If hardware checks out, perform calibration procedures and cycle resets documented in your appliance manual. This clears any calibration errors that may be misinterpreted as sensor or board faults. Sometimes, a simple reset or calibration restores normal operation. For example, I followed a step-by-step reset procedure from this guide and eliminated the error without replacing any parts, saving money and downtime.
Many homeowners operate under common misconceptions about dishwasher diagnostics and warranty protections, which can lead to costly mistakes. Firstly, a prevalent myth is that all error codes directly indicate faulty hardware; however, in reality, some codes result from software glitches or sensor misreads— sticking solely to hardware replacement without thorough diagnostics can turn out to be inefficient. Advanced troubleshooting requires understanding the subtle interplays between electronic components and software routines, something many overlook. For instance, diagnostic apps that communicate with your appliance via Wi-Fi can reveal false error triggers linked to firmware issues, not physical damage, as discussed in appliance repair research.
Another mistake is assuming that warranties cover all repairs, especially when DIY fixes involve non-OEM parts. Using generic parts or attempting unapproved repair techniques can void your warranty, a nuance often ignored. To avoid this, always verify warranty terms and documented repair procedures; for example, replacing a drain valve with an off-brand component might seem harmless but could jeopardize warranty validation.
From my experience, one of the most overlooked aspects is the importance of proper diagnostic sequencing. Jumping straight to parts replacement without systematic testing— such as confirming sensor resistance with a multimeter or checking control board signals— can lead to unnecessary expense. That’s why leveraging professional-grade tools and following structured diagnostic steps, as outlined in expert guides, is vital.
Finally, many believe that all fault detections require professional intervention; yet, with advanced diagnostic tools and thorough understanding, dedicated homeowners can efficiently troubleshoot issues like 2026 error codes. Recognizing the difference between hardware failures and software anomalies helps prevent over-investment. For more in-depth strategies, explore “effective appliance diagnostics” and learn how to maximize warranty benefits.
Remember, the key lies in understanding the subtle distinctions and avoiding the trap of surface-level fixes. By mastering these nuances, you can save money and extend your appliance’s lifespan. Have you ever fallen into this trap? Let me know in the comments.
Once you’ve diagnosed and repaired your dishwasher, the next step is ensuring it continues to operate smoothly over time. Regular maintenance is key to prolonging its lifespan, preventing unexpected breakdowns, and safeguarding your warranty coverage. One of my favorite tools for this purpose is a smart diagnostic app that communicates directly with your appliance. Using such tools, like the ones detailed in this guide, allows me to run routine checks on sensors and control boards without invasive disassembly, catching minor issues before they escalate. These tools will likely become even more integrated with appliances as smart home technology advances, offering real-time alerts and troubleshooting tips right on your phone.
Maintain with Precision and Confidence
Beyond diagnostic tools, adhering to a cycle of preventive actions such as cleaning filters, inspecting spray arms, and keeping seals lubricated makes a noticeable difference. I personally schedule a monthly check where I run the dishwasher empty with a cleaning cycle, then review error logs via the diagnostic app to ensure everything is functioning as expected. This combination of app monitoring and manual inspection helps me catch subtle signs of wear or leakage that might otherwise go unnoticed.
How do I keep my dishwasher running without surprises?
Investing in professional-grade testing equipment, such as a reliable multimeter tailored for appliance diagnostics, is a worthwhile step. As I found in this article, standard multimeters sometimes fail to detect issues caused by high-frequency signals or microcontroller faults, which are common in modern dishwashers. Upgrading to a digital multimeter with data logging capability and true RMS measurement allows you to monitor sensor outputs continuously and verify consistent readings, providing peace of mind that your appliance remains in tip-top shape.
Looking ahead, I predict that smart diagnostic tools will become more autonomous, with AI-driven alerts that suggest specific maintenance actions or parts replacements before problems arise. Keeping your device connected to these evolving systems could be the ultimate way to avoid costly repairs and maintain your warranty coverage.
If you’re serious about keeping your dishwasher reliable, I recommend trying out a pro-level diagnostic approach with these advanced tools. Start scheduling regular checks today—your appliance and wallet will thank you.
Lessons That Changed My Approach to Dishwasher Troubleshooting
One of the toughest lessons I learned was that not every error code demands immediate part replacement. Sometimes, a little patience and proper diagnostics reveal simple fixes, saving both time and money. I’ve also realized that understanding the specific signaling and communication protocols of modern dishwashers gives you an edge—knowing whether an error stems from sensors, control boards, or software glitches can prevent costly missteps. Lastly, I wish I grasped earlier how crucial routine maintenance and calibration are to preventing errors like 2026 from cropping up unexpectedly, turning troubleshooting into a proactive rather than reactive task.
Tools and Resources That Actually Make a Difference
My go-to diagnostic tool has become a smart multimeter that can log data over time; it’s indispensable for catching intermittent sensor faults—more reliable than generic tools. For guided repairs, I trust appliance-specific diagnostic apps that communicate directly with my devices, making error reading straightforward. Books like “The Essential Guide to Appliance Diagnostics” sharpened my troubleshooting skills and expanded my confidence. Additionally, online forums dedicated to appliance repair are treasure troves for tips from seasoned technicians who’ve faced similar errors and can steer you clear of pitfalls.
Embrace Your DIY Power and Face Repairs with Confidence
Taking the reins on diagnosing and fixing your dishwasher not only saves money but also cultivates a sense of mastery over your appliances. Remember, complex faults often boil down to sensor issues, control board glitches, or software hiccups—all of which can be tested and sometimes resolved at home with the right approach. Use resources like this detailed guide to leverage smartphone diagnostics and gain clarity on what’s really wrong. The key is to stay patient, methodical, and willing to learn from each step, transforming frustrations into empowering victories.
Leave a Reply