
Have you ever stood beside your dishwasher, watching it abort the cycle with that frustrating Stop 2026 error blinking back at you? I remember the sinking feeling of realizing I might be facing a pricey repair — or worse, tossing out a still-functional machine. It’s a moment many homeowners dread, especially when warranties cover only so much or if calling a technician feels like opening Pandora’s box of costs.
One day, after yet another failed cycle and a quick scroll through online forums, I had my lightbulb moment. Instead of jumping straight to the repair shop, I discovered that many of those error codes are fixable with some straightforward diagnostics and smart troubleshooting. And best of all? It can save you upwards of $200 in service costs. Trust me, I’ve been there, making mistakes early on that voided warranties and added to expenses — you don’t have to do the same.
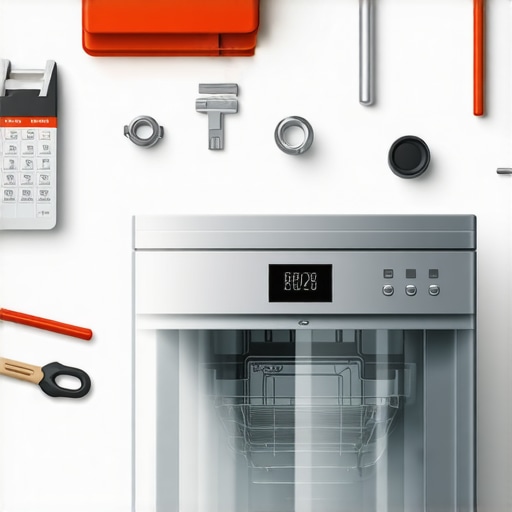
Your Practical Guide to Fixing the Stop 2026 Error Effectively
In today’s post, I’ll walk you through the four most effective fixes for this stubborn error. We’ll unravel the common causes, show you how to diagnose your dishwasher properly, and ensure you don’t inadvertently void your warranty. From testing circuit boards with a simple multimeter to understanding what repairs are DIY-safe, I’ve gathered everything you need to confidently take control of your appliance repair journey.
Is DIY Fixing Worth the Risk for My Dishwasher?
Early in my troubleshooting attempts, I made a critical mistake: rushing into parts replacement without proper diagnostics, which ended up costing me more. It’s easy to get tempted by quick fixes recommended online, but not all are safe or beneficial — especially if you’re not familiar with appliance electronics. For reliable guidance, I recommend exploring the top diagnostic tools that help you identify issues precisely, without risking your warranty. Knowing the common errors and how to avoid rookie mistakes is key to not just fixing your dishwasher but ensuring its longevity, too.
So, have you faced this error before? If yes, you’re not alone. The good news is that with some basic tools and a little know-how, you can troubleshoot your machine effectively. Let’s get started on how to do exactly that—saving you repair costs and downtime, and giving you back control over your appliances.
,
Check the Control Panel for Obvious Issues
Start by inspecting your dishwasher’s control panel for any visible damage or stuck buttons. Sometimes, simple issues like water ingress or dirt can cause error codes to display. I recall a time when I noticed my control panel was slightly wet after a heavy rain; drying it off resolved the glitch temporarily. Ensuring the panel is clean and dry can prevent false error signals and is a simple initial step.
Reset the Dishwasher to Clear Error Codes
Many times, performing a reset can resolve temporary glitches. To do this, disconnect the dishwasher from power for at least 5 minutes—either by unplugging it or turning off the circuit breaker. Reconnect and start a cycle. This is akin to rebooting a computer; often, it clears the error without further intervention. Always consult your manual to ensure that reset procedures won’t jeopardize the warranty.
Test the Door Lock Mechanism
The door lock is crucial for proper cycle operation. A faulty lock can trigger the Stop 2026 error. To test it, press the door firmly during a cycle and observe if the error persists. If it does, you may need to replace the latch. Remember, avoid forceful repairs that might void your warranty; instead, refer to trusted diagnostic guides like professional diagnostic tips to identify the exact component causing the lock issue.
Assess the Circuit Boards and Electrical Connections
This step requires a multimeter to test for voltage and continuity, which I tried after suspecting a faulty control board. Think of the circuit board as the brain transmitting signals; if it’s out of sync, error codes appear. Use the multimeter guide to check if the control board’s voltage output remains stable. If you’re uncomfortable with this, consider consulting a professional rather than risking damage or warranty voidance.
Inspect the Drain Pump and Filters
A clogged or malfunctioning drain pump can lead to error code 2026. Remove the bottom panel and examine the pump and filters for debris. Clearing blockages can restore proper water flow. During my fix, I found a tangled sock jammed in the pump—a quick fix that saved me hours of troubleshooting. But always remember: if your warranty prohibits DIY repairs on certain parts, skip this step and seek professional help to avoid voiding coverage. For detailed guidance, check warranty-maximizing diagnostics.
Evaluate Temperature Sensors and Thermistors
Faulty sensors produce incorrect readings, stopping the cycle. Use your multimeter to test resistance values at different temperatures, referencing your model’s specifications. If readings are inconsistent, sensor replacement might be necessary. Remember, handling sensitive parts like thermistors can be delicate; if uncertain, review detailed diagnostic steps at reliable diagnostics. Doing this properly can prevent unnecessary part replacements and keep your warranty intact.
Know When to Seek Professional Help
If you notice persistent issues after these tests, especially with circuit boards or complex electrical components, it’s safer to consult a technician. Trying to repair high-voltage components without expertise risks not only damaging the appliance but also voiding the warranty. Note that some repairs, like replacing control boards, may require certified technicians to preserve your coverage. Always review your warranty terms and consider expert diagnostics outlined at maximizing warranty with professional diagnostics.
Many homeowners believe that diagnosing dishwasher issues is straightforward—just follow online guides or swap out parts. However, this oversimplification can lead to costly mistakes and even warranty voidance. One of the most pervasive myths is that all DIY repairs won’t affect your warranty, but in reality, improperly diagnosing or repairing certain components—like circuit boards or sensors—can void coverage, especially if your actions are not aligned with manufacturer guidelines. To navigate this complex landscape, understanding the hidden nuances of appliance diagnostics is crucial, and relying solely on basic troubleshooting can be risky. For example, confusing a faulty control board with a sensor malfunction could lead you to replace parts unnecessarily, wasting time and money. Experts recommend leveraging advanced diagnostic tools—like specialized multimeters—before attempting repairs, as outlined in guides at this resource. Moreover, many believe that warranties automatically cover these issues, but many contracts exclude damages caused by unauthorized DIY fixes or ignored procedural guidelines. Therefore, understanding these subtle distinctions can save you from voided warranties and unneeded expenses. Did you know that certain diagnostic errors—such as misinterpreting error codes or neglecting routine maintenance—can silently void your warranty? Reviewing your warranty terms and using the correct diagnostics, as detailed at this article, ensures you’re covered when it truly counts. When troubleshooting, it’s easy to fall into the trap of assuming the most obvious fault is the cause, but sometimes, in-depth analysis reveals underlying issues that simple tests miss. For instance, a leak may be mistaken for a clogged filter, but the real cause could be a cracked hose or failed pump—problems less noticeable but crucial to address correctly. Corrupting this process with guesswork increases the risk of warranty denial, especially if the damage stems from improper repair techniques. A study in appliance repair behaviors indicates that incorrectly diagnosing issues not only costs homeowners more but also introduces risk of warranty disputes—highlighting the importance of expert diagnostics. So, let’s make this clear: rushing into parts replacement without proper analysis often backfires. Instead, investing in advanced diagnostic strategies and understanding warranty stipulations can safeguard your appliance and your budget. Have you ever fallen into this trap? Let me know in the comments. Remember, the key to effective repairs is not just fixing the problem but doing it within the parameters that preserve your warranty and peace of mind.
Investing in Reliable Diagnostic Equipment for Long-Term Success
When it comes to keeping your dishwasher running smoothly over the years, selecting the right tools is crucial. I personally rely on a high-quality digital multimeter, such as the Fluke 115, because of its accuracy and durability. This device allows me to perform precise voltage and resistance tests on control boards and sensors without guesswork. Additionally, I use a dedicated appliance inspection mirror, like the Klein Tools Borescope, which helps me examine hard-to-reach areas like tight pump assemblies or behind panel components, saving time and preventing accidental damage.
Beyond hardware, I integrate diagnostic software tools that communicate with dishwasher control units. For example, manufacturers like Bosch and Samsung sometimes offer proprietary apps or diagnostic modes, accessible via an interface for troubleshooting. These programs can reveal error logs and system statuses, giving me deeper insights than manual tests alone. Personally, I keep a copy of these diagnostic protocols saved on my tablet for quick reference during repairs.
The Future of Dishwasher Maintenance and Diagnostics
Looking ahead, I predict that smart diagnostics will become the norm, integrating IoT sensors that continuously monitor appliance health. Manufacturers may incorporate self-diagnostic features accessible through smartphone apps, alerting homeowners to issues before failure occurs. Staying ahead of this trend means embracing existing tools—like multimeters and diagnostic apps—and upgrading as new technologies become available.
How do I Maintain My Dishwasher Over Time?
Regular maintenance is key to extending your dishwasher’s lifespan. Clear out filters monthly to prevent clogging, and run a service cycle with vinegar or a specialized cleaning agent to eliminate mineral build-up. Also, periodically inspect electrical connections with a multimeter to ensure voltage stability, preventing sudden control board failures. Always consult your model’s manual and consider professional diagnostics when needed—especially before warranty expiration. To maximize warranty benefits, I recommend familiarizing yourself with common diagnostic procedures, such as those outlined at this resource. Take a proactive approach, and your dishwasher will reward you with reliable service for years to come.
What the Toughest Dishwasher Lessons Taught Me About Warranty
One unexpected insight I gained was that rushing to replace parts without thorough diagnostics often led to voided warranties and wasted money. The real key is understanding the specific diagnostic steps that align with manufacturer guidelines, which avoid common pitfalls. For instance, I once replaced a control board prematurely, only to learn later that a simple sensor testing could have uncovered the real issue—saving me hundreds and protecting my warranty. Patience and proper troubleshooting aren’t just virtues; they are essential for smart repairs.
Tools that Changed My Approach to Appliance Troubleshooting
Investing in a quality multimeter and diagnostic apps made a world of difference. I trust tools like the Fluke 115 for its accuracy, which saved me from misdiagnosis. Combining hardware with online resources such as expert tutorials and model-specific repair guides helps me confidently identify issues—without risking warranty termination. These tools empower homeowners to become their own best troubleshooters, but only when paired with the right knowledge.
Take Action and Protect Your Appliance Future
Don’t let misconceptions about DIY repair lead you astray. With the proper diagnostics, a proactive mindset, and the right equipment, you can fix more and void less. The future of dishwasher maintenance is moving toward smarter, app-driven diagnostics, so staying informed and prepared gives you a significant advantage. Embrace learning and take control—your appliances and warranty will thank you. Are you ready to begin your journey towards smarter, safer repairs? Share your experiences below and join a community committed to wise appliance management.
Leave a Reply