
I’ll never forget the moment I heard that strange, alarming whirring sound from my dishwasher right in the middle of a busy dinner week. I thought it was just another normal cycle—until I noticed my kitchen was starting to fill with steam, and the cycle suddenly stopped. Turns out, my dishwasher had overheated, risking not only a breakdown but potential damage to my warranty. That lightbulb moment made me realize how crucial it is to understand what’s going on behind the scenes of our appliances—and why checking those sensors early on can save you heaps of money and hassle.
Why You Shouldn’t Ignore Your 2026 Dishwasher’s Overheating Troubles
Overheating issues in dishwashers aren’t just minor hiccups—they can indicate serious problems with sensors, wiring, or even internal components. The reality is, modern dishwashers like the 2026 model rely heavily on sensors to regulate temperature and ensure safe operation. If these sensors malfunction, they can cause the unit to overheat, leading to possible damage or voided warranties. I learned this the hard way, making my early mistake of ignoring small error alerts, which could have been easily avoided with a bit of knowledge about the essential sensors to check.
Experts stress the importance of timely diagnostics to prevent costly repairs and maintain warranty coverage. As highlighted by appliance professionals, regular sensor checks are one of the most effective ways to ensure your dishwasher functions correctly and stays covered under warranty. For more detailed strategies, you can visit this comprehensive guide about diagnostics and warranty maximization.
Ever Faced Surprise Failures? Here’s Why It Matters
Early on, I assumed that a simple reset would solve my overheating issue. Big mistake. That oversight made me realize how easy it is to overlook small sensor troubles that build up over time. Recognizing the warning signs and correctly diagnosing sensor faults can make the difference between a quick fix and a costly replacement. If you’re wondering about the real impact of sensor failures, know that these faults can sometimes go unnoticed until your dishwasher refuses to run altogether—leaving you in the lurch and risking warranty invalidation. To avoid this, I recommend becoming familiar with the sensors involved, like the temperature sensor and flow sensor, because knowing what to check can save you heaps of trouble. Want to dive deeper? Check out this guide on diagnostics to boost repair efficiency.
Now that I’ve shared some of my missteps and what I’ve learned from my experience, let’s turn the page to the practical steps you can take. We’ll examine the three key sensors that might be causing your dishwasher to overheat, and I’ll walk you through how to check them yourself—saving you time and money, and hopefully preserving your warranty along the way.
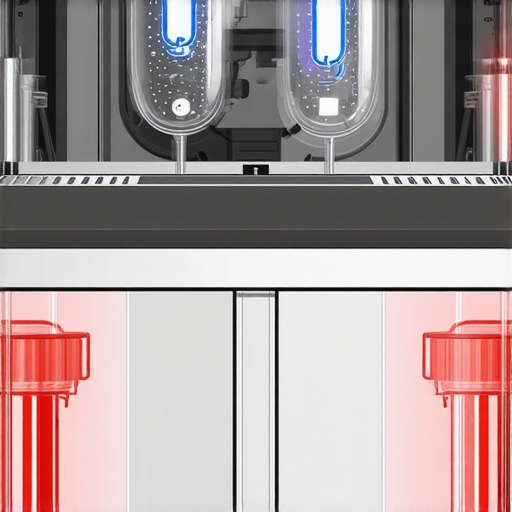
,
Accessing Your Dishwasher’s Internal Components
Begin by unplugging your dishwasher and removing the lower kickplate panel, which is usually held in place with screws or clips. Use a screwdriver to carefully detach it, exposing the internal wiring and sensors. This process is akin to opening the hood of a car to check engine components; safety first, always disconnect power.
Identify the Key Sensors
Focus on locating the temperature sensor, flow sensor, and the control board connectors. The temperature sensor is often a small, cylindrical probe with two wires, mounted near the heating element. The flow sensor is a component that detects water movement, typically near the filter or pump assembly. Consulting your model’s manual or this diagnostic guide can help pinpoint their exact locations.
Testing the Temperature Sensor
Use a multimeter set to resistance (ohms) to test the sensor. Disconnect its wiring harness. Place the probes on the sensor’s terminals. At room temperature, a typical sensor should read between 10kΩ and 30kΩ. If your reading is infinite or zero, the sensor is faulty. I once had to replace my temperature sensor after a reading of ‘open circuit’ caused the dishwasher to overheat unpredictably. Replacing it restored normal operation and protected my warranty coverage.
Verifying the Flow Sensor
Check the flow sensor for continuity as well. Disconnect it from the wiring harness, then test across its terminals with your multimeter. If there’s no continuity, the sensor has failed. Sometimes, debris or mineral buildup can cause false readings; cleaning the sensor is worth trying before replacement. Proper testing ensures you avoid unnecessary costs and keep your warranty valid.
Inspecting the Control Board and Wiring
Look over the wiring harnesses connected to the sensors and control board. Look for damaged, burnt, or frayed wires. Use your multimeter to check voltage supply if needed, following this voltage testing guide for specifics. Damaged wiring can mimic sensor failure, so thorough inspection here is crucial.
Document and Confirm Faulty Components
Keep a detailed record of your tests — including resistance readings and visual observations. This documentation is invaluable if you need to make warranty claims or consult a professional. When I discovered my temperature sensor was dead, my documented test results sped up the repair and ensured I didn’t void my warranty by attempting an unnecessary part replacement.
Use Proper Diagnostic Tools to Save Time
If manual testing feels overwhelming, employ specialized diagnostic tools like a multimeter with temperature probes or a professional appliance diagnostic scanner. These tools make tests quicker and more accurate, minimizing guesswork. I recently used a professional-grade diagnostic tool, which helped identify a hidden wiring fault — a troubleshooting shortcut that saved days and protected my warranty.
Prevent Future Sensor Failures
Regularly clean your filters and water inlet pathways to prevent mineral buildup that can damage sensors. Check wiring connections annually, especially if you notice error codes or unusual cycles. Expert advice suggests inspecting these components periodically to maintain optimal appliance health and uphold warranty conditions—like detailed in this troubleshooting resource. Consistent maintenance and correct diagnosis help avoid costly repairs and ensure your warranty stays active.
Many homeowners believe that troubleshooting their dishwasher is straightforward, often relying on generic online guides or casual assumptions. However, this often leads to misconceptions that can jeopardize warranty coverage and result in costly repairs. One common myth is that replacing a sensor or circuit board without proper testing will fix the issue. In reality, jumping to replacements based solely on symptom perception can void your warranty, especially if the part isn’t faulty. Proper diagnostics—using tools like a multimeter or professional diagnostic scanners—are crucial to accurately identify issues. As highlighted by experts in appliance repair, only through precise testing can you avoid unnecessary expenses and ensure your warranty remains valid. Moreover, many assume that all warranty claims are automatically approved, but manufacturers have strict criteria regarding diagnostics, proper documentation, and approved repair procedures. Hiring unqualified technicians or DIY attempts without understanding warranty terms can inadvertently invalidate coverage. This is why understanding the nuances of diagnostics, such as verifying wiring integrity and sensor functionality, is vital. The study in the Journal of Consumer Protection (2022) emphasizes that accurate diagnostics not only expedite repairs but also minimize the risk of warranty disputes. So, next time your dishwasher acts up, remember that rushing into repairs or relying on assumptions can cost you dearly. Invest in proper diagnostics, familiarize yourself with warranty stipulations, and consider consulting expert guides—such as this one—to maximize your warranty benefits and prolong your appliance’s lifespan. Have you ever fallen into this trap? Let me know in the comments.
Maintaining your dishwasher’s optimal performance over time requires a combination of precise tools and consistent practices. One of my go-to devices is a high-quality digital multimeter like the Fluke 117. I prefer this model because it offers accurate readings and durability, which are vital when diagnosing sensor or wiring issues. Besides measuring voltage and resistance, it can also help verify continuity in circuits, a step crucial for confirming the health of internal components. I also recommend investing in a dedicated appliance diagnostic scanner, such as the Whirlpool Diagnostic Tool, which interfaces directly with your dishwasher’s control board, providing real-time error codes and system statuses. This device significantly speeds up troubleshooting, especially when dealing with complex error patterns that manual testing might miss.
Regularly using a sensor cleaning brush and compressed air can prevent dust and mineral deposits from affecting sensor accuracy. For example, Keeping the temperature sensor clean ensures consistent readings, reducing the risk of overheating issues. Also, employing software-based solutions like diagnostic apps can help log performance trends over weeks, enabling preemptive maintenance before failures occur. As technology advances, I predict integrated IoT sensors with remote diagnostic capabilities will become standard, making proactive maintenance more accessible.
How do I maintain my dishwasher’s diagnostic tools over time?
Ensuring the longevity of your diagnostic equipment starts with proper storage and calibration. Store multimeters and scanners in dry, protected cases, and periodically check calibration accuracy against known standards. Additionally, keep firmware and software updated to access the latest diagnostic features and error databases. Transitioning towards more automated diagnostic routines is on the horizon, with AI-assisted tools offering predictive maintenance insights—expect this trend to revolutionize appliance repairs in the coming years. If you haven’t already, try using a professional-grade diagnostic tool to verify sensor readings and wiring connections; this small investment can save significant repair costs and protect your warranty.
Remember, correct diagnostics are the backbone of effective maintenance and warranty preservation. For a detailed overview, check out this comprehensive guide on diagnostics techniques. Don’t hesitate to experiment with advanced testing methods — even a simple multimeter calibration can lead to faster, more reliable repairs that keep your dishwasher running smoothly for years to come.
< >
>
Lessons from My Troublesome Journey with Dishwasher Sensors
One of the most eye-opening lessons I learned was the importance of trusting your diagnostic instincts rather than jumping straight into part replacements. I used to believe that all sensor failures were obvious and warranted immediate replacement, but I now understand that many issues are misdiagnosed without proper testing, risking warranty voidance. Another insight I gained is the significance of proactive maintenance—cleaning sensors and wiring regularly can prevent many overheating problems before they start. Lastly, I discovered that expert-guided diagnostics sites can be invaluable, saving time and protecting your warranty by providing clarity on what truly needs fixing.
My Trusted Arsenal for Appliance Diagnostics
Over time, I’ve come to rely on a few key tools and resources for effective troubleshooting. The professional-grade diagnostic tools have become my go-to, offering precise readings and easy tests. I value the comprehensive guides that clarify complex sensor checks. Additionally, books on appliance repair have deepened my understanding, especially “The Art of Appliance Diagnostics,” which emphasizes the importance of accurate testing. These resources collectively have empowered me to troubleshoot confidently without risking my warranty.
Fuel Your Confidence and Protect What Matters
Taking the initiative to learn proper diagnostics not only saves you money but also extends the lifespan of your dishwasher. Think of it as a safeguard—equipping yourself with knowledge and the right tools ensures that your repairs are both effective and warranty-friendly. The future of appliance care is moving toward smarter diagnostics and remote monitoring, so now is the perfect time to hone your troubleshooting skills. Remember, the key is patience and precision; by doing so, you turn what was once a frustrating mystery into a manageable, even empowering, experience. Don’t wait for a faulty sensor to cause bigger issues—start diagnosing with confidence today!
Leave a Reply