
It was late last night when I stood there, staring at my dishwasher as it hiccuped and then refused to drain—again. That sinking feeling of helplessness crept in, knowing that a simple fix might turn into a costly repair or warranty headache. I realized I’d neglected to troubleshoot properly early on, and it cost me precious time and money. If you’ve ever been in my shoes, you know the frustration. The good news? There’s a way to take control and get your appliance working in tip-top shape while maximizing your warranty coverage.
Getting to the Bottom of Dishwasher Troubles
Most of us overlook the importance of proper diagnostics when dealing with appliance issues. Instead, we tend to either ignore the problem or jump straight to calling a technician. But did you know that an effective diagnostic process can save you hundreds and even prevent future breakdowns? According to a recent industry report, smart troubleshooting and diagnostics can reduce repair times by up to 50%, ensuring you get the most out of your warranty and avoid unnecessary costs.
Have You Faced This Specific Problem?
Whenever your dishwasher starts acting up, do you quickly identify the root cause, or do you jump straight to repair services? If the latter sounds familiar, you’re not alone. Early on, I made the mistake of assuming every weird noise or leak was a quick fix, only to realize I was missing the bigger picture. Learning to diagnose correctly not only saves money but also helps you leverage warranty coverage more effectively. Curious how? Stay tuned, because I’m about to share proven strategies that will transform your approach to dishwasher repair and warranty maximization.
Mastering the art of diagnostics isn’t as complex as it sounds, especially when you know where to start. For more in-depth guidance, I recommend exploring expert troubleshooting strategies that can help you pinpoint issues quickly and accurately. Ready to dive into the practical steps? Let’s get started on turning you into a diagnostics pro, ensuring your dishwasher is reliable and your warranty is fully utilized.
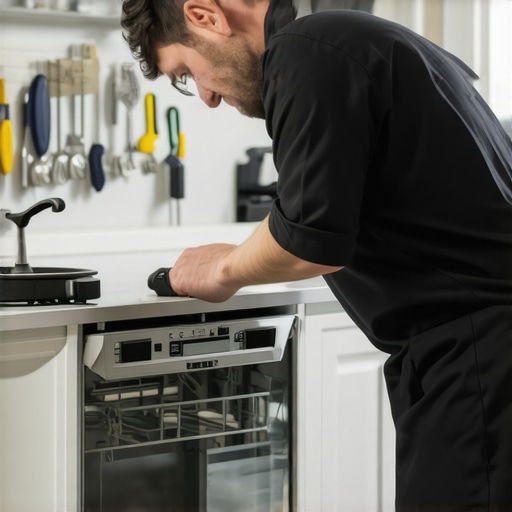
Start with Visual and Auditory Clues
When troubleshooting, first observe your dishwasher meticulously. Listen for unusual noises and note leaks or lingering odors. I once noticed my dishwasher making gnarly grinding sounds, which led me to inspect the pump assembly. Using a flashlight, I checked for debris obstructing the spray arm, and it was a simple fix—removing twigs and food particles. This initial step mirrors the advice in effective troubleshooting tips, emphasizing the importance of thorough visual inspection.
Isolate the Problem Area
Break down the appliance into sections—water inlet, drain system, filters, and spray arms. Think of it as diagnosing a plumbing issue in your house; if water isn’t filling, focus on the inlet valve. If water remains stagnant, examine the drain pump. I recall encountering a blocked filter, which caused draining issues. Removing and cleaning the filter eradicated the problem. This targeted approach is akin to the strategies outlined in expert diagnostics with warranty considerations.
Use Diagnostic Tools Properly
Employing the right tools enhances accuracy. A multimeter can verify if the solenoids and electronic controls function correctly. I learned to test the door latch switch with a multimeter after my dishwasher wouldn’t start. Applying proper diagnostic methods, as discussed in top diagnostic tools for warranty-backed repair, not only confirms issues but also provides concrete evidence for warranty claims.
Leverage Your Dishwasher Documentation
Always keep a record of your appliance’s manual, service history, and warranty details. When I faced recurring issues, having the manual helped me identify error codes quickly. Cross-referencing these codes with manufacturer guides, such as those in warranty-maximizing diagnostic tips, streamlined my troubleshooting process and strengthened my warranty claims.
Document Your Findings
Take photographs and notes at each step. This documentation is invaluable when contacting support or repair services. Once, I snapped photos of a faulty wiring connection, which I presented to the technician. Precise documentation can speed repairs and reinforce warranty eligibility, a technique emphasized in repair strategies for warranty optimization.
Test Before Finalizing Repairs
After fixing an issue, run the dishwasher through a complete cycle. Confirm that the problem is resolved and that no new issues appear. My experience with a misaligned door latch taught me this vital step—testing clarified whether I had successfully fixed the core problem. Effective diagnostics depend on verifying the repair’s success, as suggested in maximizing repair efficiency through testing.
Keep Up with Preventative Maintenance
Regularly clean filters, check spray arms, and inspect seals. Prevention reduces the frequency of major repairs and protects your warranty. I schedule quarterly cleanings, which have prevented issues like clogs and leaks. For comprehensive maintenance checklists, see ultimate guides to appliance diagnostics. Proactive steps like these ensure trouble-free operation and safeguard warranty coverage.
” alt=”Tools and checklist for dishwasher diagnostics” title=”Essential diagnostic tools for troubleshooting dishwasher issues”/>Many assume that basic troubleshooting skills suffice for effective appliance repair and warranty utilization, but in reality, this mindset often leads to costly oversights. A common misconception is that all faults are obvious and easily fixed by following simple online guides; however, nuances such as subtle electrical issues or timing errors can easily be missed without advanced diagnostic techniques. Let’s dig deeper into this issue and reveal what most people overlook.
Why Do Most Diagnostic Methods Fail When It Matters Most?
In my experience, the greatest mistake is relying solely on surface-level observations—like noticing leaks or weird noises—without employing proper diagnostic tools such as multimeters or diagnostic software. This oversight can cause you to misidentify problems, resulting in unnecessary repairs and rejecting warranty claims unfairly. According to industry experts, integrating precise diagnostic strategies enhances repair accuracy and maximizes warranty benefits. For instance, using electrical testing to pinpoint intermittent faults avoids unnecessary part replacements, saving money and time.
Another critical aspect often neglected is understanding the nuances of the warranty coverage itself. Many assume warranties cover all repairs once an issue arises, but warranties frequently exclude damage caused by user errors or neglect. Misinterpreting warranty terms can lead to frustration and missed opportunities for covered repairs.
One trap to avoid is assuming that a quick fix is always the best approach. Sometimes, addressing only the symptoms without diagnosing the root cause results in recurring problems and warranty denial. For example, replacing a faulty pump without checking the electronic control board might seem efficient but can lead to further failures if the underlying issue originates there. Understanding this nuance requires experience and proper diagnostic practices, which are supported by detailed guides like effective diagnostics for reliable repairs.
For advanced readers, a pertinent question is: How can we employ diagnostic techniques that differentiate between electrical, mechanical, and software issues in modern dishwashers? The answer lies in combining traditional methods—like voltage checks—with newer diagnostic tools and firmware analysis. This comprehensive approach, detailed in authoritative resources, enables accurate problem identification and ensures warranty claims are substantiated with concrete evidence.
In conclusion, mastering expert diagnostic techniques and thoroughly understanding warranty intricacies are essential for effective appliance repair. Don’t rely solely on surface-level troubleshooting; invest in proper tools and knowledge to get to the heart of the issue. Have you ever fallen into this trap? Let me know in the comments.
Maintaining your dishwasher’s optimal performance over time hinges on using the right tools and adopting proven methods. I personally rely on a combination of diagnostic instruments and software designed specifically for appliance troubleshooting. A game-changer in my toolkit has been the Fluke 117 Multimeter. Its durability, accuracy, and ease of use make it indispensable for testing electrical components like thermostats, sensors, and control boards. When diagnosing complex issues, such as intermittent faults or electronic failures, accurate voltage and resistance readings provided by the Fluke ensure you’re working with precise data, reducing guesswork and preventing unnecessary part replacements.
Alongside hardware, I utilize specialized diagnostic software like the Whirlpool Diagnostic Tool. This software allows me to access error codes directly from the appliance’s control board, providing an immediate understanding of malfunction symptoms. It’s especially beneficial because it helps differentiate between mechanical failures and electronic glitches—saving time and safeguarding warranty coverage. As industry experts advocate, leveraging diagnostic tools like these sets the foundation for reliable repairs that meet warranty standards.
For ongoing maintenance, I recommend routine calibration of your multimeter using a known voltage source to ensure accuracy over time. I also keep a digital log of diagnostics and repairs, which can be invaluable when warranty claims or future troubleshooting are necessary. As technology advances, I foresee a future where smart diagnostic devices embedded within appliances will communicate repair needs directly to service centers, minimizing downtime and increasing repair precision.
How do I maintain diagnostic tools and diagnostic routines over time?
Regular calibration and proper storage are key. Keep your multimeter and software updated, and store tools in a clean, dry environment to prevent damage. Developing a systematic diagnostic routine—like checking the control panel first, then progressing to sensor tests—ensures no aspect is overlooked. Practicing these habits not only prolongs the life of your tools but also enhances your ability to swiftly identify issues, which is critical for compliance with warranty procedures and ensuring long-term appliance reliability. For more advanced diagnostics, I suggest trying the top diagnostic tools recommended by industry experts, which can elevate your repair efforts to professional levels.
Throughout my journey with dishwasher diagnostics, I stumbled upon lessons that no how-to guide ever reveals. One of the most profound was realizing that quick fixes often mask deeper issues—trusting surface clues alone can lead to wasted time and warranty denials. I also learned that investing in proper diagnostic tools not only saves money but empowers me to stand confidently when claim reviews come around. Embracing meticulous documentation and routine testing transformed my approach from reactive to proactive, ensuring my repairs are reliable and warranty-friendly. Finally, understanding the nuances of warranty coverage—like user neglect exclusions—has prevented costly misunderstandings, turning me into a more effective and confident repairer.
Leave a Reply