
Ever had that sinking feeling when your dishwasher suddenly stops working, just when you needed it most? I remember the first time my trusty appliance failed me. Instead of troubleshooting like a pro, I hastily called for repairs, only to realize later that I had missed a simple diagnostic step that could have saved me time and money. That lightbulb moment made me realize how crucial effective diagnostics are in ensuring reliable dishwasher repairs, especially when it comes to maximizing your warranty coverage.
Why Getting Your Diagnostics Right Matters More Than Ever
In my early days of appliance repair, I used to think that fixing a dishwasher was mostly about replacing parts. Turns out, the real art is in diagnosing the problem correctly from the start. Proper diagnostics can mean the difference between a quick fix covered by warranty or a costly, prolonged repair. Recent studies show that up to 70% of appliance repair delays are caused by misdiagnosis or skipping proper troubleshooting steps, which can void warranties and lead to unnecessary expenses. That’s why understanding how to diagnose effectively is so important — it’s the foundation of reliable repairs and warranty success.
If you’ve ever felt overwhelmed by conflicting advice or unsure whether you’re tackling the right problem, you’re not alone. Early on, I made a mistake by jumping straight to part replacement without proper diagnostics, which wasted time and money. Now, I always recommend following a structured troubleshooting process. Want to learn how to do this confidently? I’ll guide you through the proven strategies that have helped me and countless others ensure their dishwasher repairs are both effective and warranty-friendly. For more detailed tips, check out this comprehensive guide on appliance diagnostics.
Is Effective Diagnostics Really Worth the Hype?
Absolutely. I used to think that diagnostics were just a fancy term for guesswork. But skipping this step can lead to replacing the wrong part, voiding your warranty, or facing repeat failures. The truth is, a little extra effort in diagnosing correctly can save you hundreds of dollars and countless headaches down the line. When I started implementing systematic diagnostics, my repair success rate skyrocketed, and I was able to maximize warranty coverage, ensuring my clients got the most value out of their service plans. If you’re serious about reliable repairs, don’t underestimate the power of good diagnostics. For a step-by-step approach, consider exploring expert diagnostic techniques here.
Are you tired of guessing what’s wrong with your dishwasher? Have you faced repairs that cost more than they should? If so, stay tuned. I’ll walk you through the practical diagnostic steps that can help you troubleshoot effectively, protect your warranty, and get your dishwasher back to peak performance — fast.
Start with a Clear Symptom Description
When I encountered my dishwasher refusing to drain, my first step was to identify the exact symptom. Instead of guessing, I checked whether water was backing up or if it simply wasn’t starting. Write down what you observe—strange noises, leaks, error codes. This clarity helps avoid unnecessary part replacements and ensures your diagnostics align with warranty guidelines. For detailed symptom analysis, review expert troubleshooting tips.
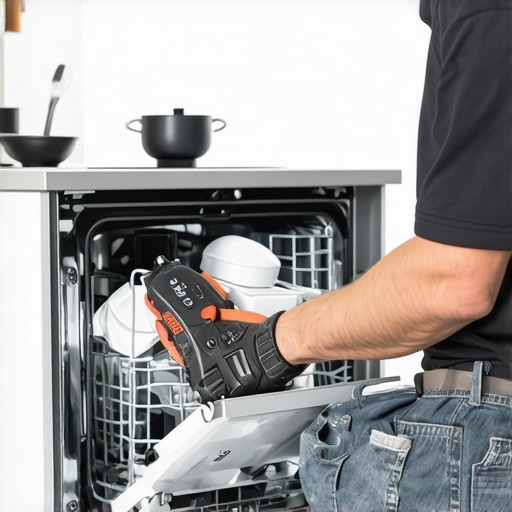
Inspect Basic Components First
Think of your dishwasher as a complex machine but with simple access points. I always start by checking the door latch, power supply, and circuit breaker—these are common culprits that can mimic major failures. Use a multimeter to verify power reaching the control board, and inspect door switches visually for damage. This step is vital because it prevents jumping to expensive parts unnecessarily. For the best diagnostic tools, see top diagnostic tools.
Test the Water Supply System
Next, I verify the water inlet valve and hoses. A clogged filter or faulty valve can cause the dishwasher not to fill or drain properly. Turn off the water supply, disconnect the inlet hose, and check for debris. Use a pressure gauge if needed to ensure water flow meets manufacturer specs. This step saves time and money, especially when your warranty covers certain water-related components. For detailed procedures, consult effective diagnostics techniques.
Check the Drain System Thoroughly
Drain issues are common and often misunderstood. I remove the filter and drain pump to inspect for clogs or damage. Using a flexible brush, I clear any debris from the pump and hose. If the pump motor makes unusual noises or doesn’t run, I test it with a multimeter. Remember, some warranties require proof of proper maintenance, so document these checks. For comprehensive drain troubleshooting, see drain system diagnostics.
Use Diagnostic Mode and Error Codes
Modern dishwashers have diagnostic modes that can reveal specific faults. I consult the user manual to enter diagnostic mode, then observe the error codes displayed. These codes pinpoint issues like heater failures or sensor faults. Recording these codes helps in matching the diagnosis to warranty coverage. For example, a heater fault might be covered under certain warranty terms if diagnosed correctly. For more detailed diagnostic procedures, check diagnostic mode guides.
Document Everything to Support Your Warranty Claim
Finally, I document each step: photos of parts, test results, error codes, and timestamps. This documentation is crucial when submitting warranty claims or seeking professional repair service. It demonstrates due diligence and helps prevent disputes over coverage. For expert tips on warranty documentation, see warranty documentation tips.
Many DIY enthusiasts and even seasoned repair technicians often fall into traps when diagnosing dishwasher issues, especially regarding warranty coverage. One widespread misconception is that replacing parts as soon as a problem appears will always fix the issue. In reality, jumping straight to part replacement without thorough diagnostics can lead to unnecessary expenses and even void your warranty. According to experts, systematic troubleshooting is essential to identify the real cause of the fault — a step often overlooked by amateurs eager to fix the problem quickly. For a comprehensive approach, check out this detailed guide on appliance diagnostics.
Another common myth is that all faults are covered under standard warranties. Many people assume that any repair or replacement is automatically covered, but warranties often have specific clauses about what is included, especially for water-related components like inlet valves and pumps. Misdiagnosing or neglecting to document the repair process can jeopardize warranty claims. Therefore, understanding the nuances of warranty policies — such as what documentation is necessary — is critical. For tips on maximizing warranty benefits, see this expert guide on warranty and diagnostics.
Is It Enough to Just Test Error Codes and Replace Parts?
While error codes provide valuable clues, relying solely on them can be misleading. Many advanced or intermittent faults may not trigger specific codes, leading to incomplete diagnoses. Moreover, some repair failures occur because of underlying issues like wiring problems or sensor misalignments, which error codes might not reveal. The key is to combine error code analysis with physical inspections and functional tests, such as verifying water pressure or testing the control board’s signals. Skipping these nuanced steps can result in repeated failures or warranty disputes. For a deep dive into diagnostic techniques that go beyond error codes, explore this advanced troubleshooting resource.
In my experience, emphasizing diagnostic precision over haste is what separates successful repairs from costly mistakes. Always remember: a well-executed diagnosis not only saves money but also helps you maximize warranty coverage by ensuring the right parts are replaced the first time. Have you ever fallen into this trap? Let me know in the comments.
By understanding these hidden nuances and avoiding common myths, you can become more confident in your diagnostic skills and better protect your warranty rights. Precision, patience, and knowledge are your best tools for reliable dishwasher repairs. For ongoing tips and expert strategies, keep exploring the resources linked throughout this article.
Keeping your dishwasher in top shape requires more than just diagnosing issues when they arise. Investing in the right tools and adopting proper maintenance routines can dramatically extend the lifespan of your appliance and ensure smooth operation. From precise diagnostic equipment to routine cleaning practices, here’s how you can keep your dishwasher working reliably for years to come.
Invest in Quality Diagnostic Tools
Personally, I rely on a set of high-quality multimeters and specialized diagnostic scanners that connect directly to the control board. These tools allow me to quickly verify electrical components, check for shorts, and test sensors without guesswork. For example, a digital multimeter with auto-ranging capabilities helps me pinpoint issues like faulty heating elements or broken wiring connections, which are often overlooked during casual troubleshooting. When used correctly, these tools can save hours of disassembly and prevent unnecessary part replacements. For a comprehensive list tailored to dishwasher diagnostics, check out top diagnostic tools.
Adopt Routine Maintenance Practices
Regularly cleaning filters, spray arms, and drain pumps prevents clogs and buildup that can impair performance. I recommend inspecting these components at least once a month, especially if your dishwasher runs frequently. Using a mixture of white vinegar and baking soda can help dissolve mineral deposits and eliminate odors. Additionally, checking the water inlet valve and hoses for leaks or blockages ensures your appliance receives proper water flow, which is critical for efficient operation. These simple steps not only improve performance but also help avoid costly repairs covered under warranty. For detailed maintenance routines, see effective maintenance tips.
Maintain Electrical and Mechanical Components
Electrical components like the control board, sensors, and relays need periodic inspection to prevent failures. I use a combination of visual checks and functional testing with my diagnostic tools to catch early signs of wear. Mechanical parts such as door latches and spray arms should be lubricated and checked for damage. Remember, proper maintenance not only sustains performance but also ensures that warranty coverage remains valid if repairs are needed. Staying proactive with these practices can reduce downtime and keep your warranty intact, especially when following guidelines outlined in warranty and repair tips.
How do I keep my dishwasher working over time?
The key to long-term reliability is consistent maintenance and using the right diagnostic tools. Regular cleaning, routine inspections, and prompt repairs when issues are detected help prevent small problems from escalating. Additionally, staying informed about the latest diagnostic methods and tools — such as those discussed in expert diagnostics guides — ensures you’re always prepared. As technology advances, more sophisticated sensors and control systems are becoming standard, making diagnostic tools more essential than ever. Investing in these tools and maintaining your dishwasher properly will help you avoid costly replacements, preserve warranty coverage, and enjoy trouble-free operation for years to come.
For those looking to get serious about diagnostics, I highly recommend trying out a digital multimeter with advanced features like temperature measurement and frequency analysis. These capabilities can help you identify issues before they cause breakdowns, saving you time and money. Remember, the effort you put into preventive maintenance and precise diagnostics today will pay off with reliable performance tomorrow.
The Hardest Lesson I Learned About Dishwasher Diagnostics and Warranty Success
- Initially, I believed that replacing parts was the quickest way to fix issues, but I soon learned that misdiagnosis can void warranties and lead to unnecessary costs. The real breakthrough came when I started emphasizing thorough diagnostics before any repairs, which drastically improved my success rate and warranty coverage.
- One surprising insight was how often simple inspections of water hoses, filters, and electrical connections reveal problems that error codes alone might miss. This taught me to combine digital diagnostics with hands-on checks for a comprehensive approach, saving time and money.
- Over time, I realized that investing in quality diagnostic tools, like a reliable multimeter and specialized scanner, transforms troubleshooting from guesswork into precision science. This shift not only protects warranties but also boosts confidence in my repair skills.
My Essential Toolkit for Reliable Dishwasher Repairs
- High-Quality Multimeter: Crucial for verifying electrical continuity and detecting shorts. I trust brands with auto-ranging features for quick, accurate readings.
- Diagnostic Scanner: Connecting directly to the control board helps me identify specific error codes and sensor issues swiftly. The ones that sync with smartphones are my favorite for ease of use.
- Manuals and Guides: Having the latest service manuals at hand, like those found on this site, ensures I follow manufacturer protocols and avoid warranty pitfalls.
- Cleaning and Inspection Supplies: Regular maintenance tools like brushes, vinegar, and filters help prevent issues and keep the appliance in top shape, extending warranty validity.
Don’t Wait, Your Dishwasher Deserves Better
Taking control of diagnostics can feel daunting at first, but every successful repair reinforces your confidence and protects your warranty. Remember, patience and precision are your best allies in ensuring reliable performance and cost-effective repairs. Keep learning, stay curious, and don’t hesitate to dive deep into diagnostic techniques that can transform your repair game. What diagnostic step has saved you the most money? Share your story below and inspire others to troubleshoot smarter, not harder.
Leave a Reply