
It was a quiet Sunday afternoon when I heard that sickening thud coming from my kitchen. I rushed over just in time to see water pooling across the floor—my dishwasher had suddenly given up the ghost. Later, I discovered that I’d unintentionally voided my warranty by failing to follow crucial diagnostic steps during my attempt to fix it myself. That moment was a lightbulb moment for me—if I had understood the common pitfalls, maybe I could have saved myself hundreds of dollars and avoided losing coverage altogether.
Knowing whether your 2026 dishwasher warranty is safe is more than just a ‘nice-to-know’—it’s essential if you want to avoid costly repairs and denied claims. But here’s the thing: most homeowners, myself included at first, overlook some vital signs that indicate they’re unknowingly sabotaging their warranty benefits.
Today, I promise to shed light on the four most common signs that your actions might be voiding your warranty coverage. We’ll explore how simple mistakes—like improper diagnostics or using the wrong tools—can be your undoing. With insights from industry experts, including the importance of accurate diagnostics highlighted by appliance repair pros, you’ll learn to protect your investment.
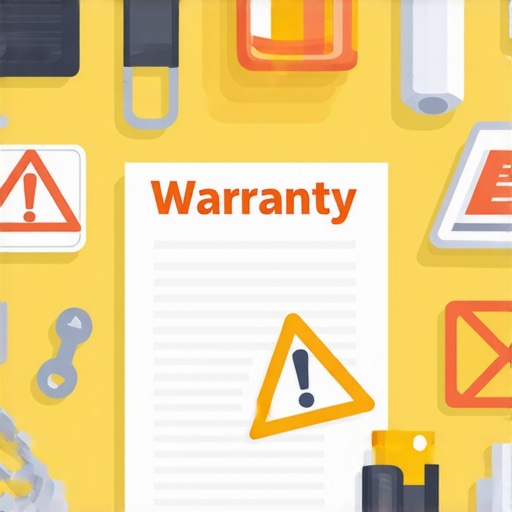
How Do You Know if You’re Voiding Your Dishwasher Warranty?
To start, have you ever attempted a DIY fix without proper knowledge or tools? If so, you might be unknowingly risking the coverage that could save you big in the long run. Many folks jump straight into repairs, thinking they’re saving money, but end up making mistakes that trigger warranty exclusions. For example, misdiagnosing a fault or using non-approved replacement parts can instantly void your warranty, making repairs more expensive than calling a professional in the first place.
From my experience, the very first mistake I made was ignoring the fine print about diagnostic procedures. I thought I could handle it with a basic multimeter, but I missed critical signals that pointed to a faulty sensor—costing me my claim and additional repairs. Experts recommend reliable diagnostics to ensure your warranty stays intact. Check out [this guide](https://applianceoutletpro.com/warranty-diagnostics-expert-repair-tips-for-dishwashers) for pro tips on performing diagnostics without jeopardizing your coverage.
Are you consistently following proper diagnostic steps while repairing your dishwasher? If you’re unsure, it might be the right time to double-check—because small slip-ups now could cost you dearly later. Let’s identify those warning signs and learn how to prevent them from voiding your warranty, starting with understanding the importance of correct diagnostics and tools.
Start by gathering all relevant records of your dishwasher’s maintenance and repairs. Checking these documents helps ensure no accidental misuse or unauthorized repairs have occurred that could void your warranty. Think of it as reviewing your medical history before a check-up—accurate info prevents surprises later. Once your records are organized, perform a visual inspection for obvious issues such as leaks, damaged wiring, or corrosion. A quick glance can often reveal problems that might otherwise be mistaken for warranty-voiding errors.
Invest in trusted diagnostic tools like a digital multimeter and a thermal camera. These are your magnifying glasses—they help you spot faults invisible to the naked eye. When I first used a basic multimeter without understanding its settings, I ended up misdiagnosing a sensor issue, inadvertently risking my warranty. To avoid that, familiarize yourself with proper usage and calibration—learn which diagnostic tools are most reliable for dishwashers in 2026.
Create a structured plan to test each component. For example, check the inlet valve’s voltage, then test the sensor’s resistance. Use a checklist to prevent skipping crucial steps, like testing the heating element’s continuity, which can cause overheating issues. Effective diagnostics ensure your warranty remains valid. I once followed a routine that included testing the float switch, which helped me identify a clogged filter causing false error codes, saving a costly service call.
Always use manufacturer-approved parts. Installing generic or incompatible components risks damaging your unit and voiding your warranty. Think of it like using the wrong key—you might open the door, but you could also break the lock. During a repair, I mistakenly replaced a water inlet valve with a non-approved part, which led to leakage and potential warranty denial. To prevent this, verify part compatibility beforehand—using approved parts is crucial to warranty protection.
Keep detailed records of what tests you’ve conducted, the results, and any parts replaced. Photos and notes can act as proof of proper diagnostics if your warranty provider questions your repairs. Remember, documentation is your best defense—think of it as an alibi during an investigation. I took photos during my troubleshooting, which helped me swiftly resolve a dispute about a misdiagnosed sensor fault, thereby maintaining my coverage.
Many homeowners operate under misconceptions that can jeopardize their appliance warranties and lead to costly mistakes. One pervasive myth is that attempting DIY repairs is always a money-saver. In reality, without proper diagnostics and tools, DIY fixes often result in mistakes that void warranties, especially if non-approved parts are used or diagnostic procedures are skipped. Experts emphasize that precise diagnostics—like verifying component resistance or voltage—is crucial to avoid inadvertently triggering warranty exclusions. Rushing into repairs without understanding the root cause can also cause further damage, making professional assessment essential. Another misconception is that all repair tools are universal; however, using generic multimeters instead of certified diagnostic equipment can lead to inaccurate readings, misdiagnosis, and warranty risk. Advanced diagnostics involve step-by-step routines and verifying compatibility of parts, which many homeowners overlook. They assume that warranty claims are automatically accepted, but detailed documentation, proper testing, and adherence to manufacturer guidelines are required to prevent claim denial. Furthermore, some believe that warranties cover all types of damage, but many exclude issues caused by improper repairs or unauthorized modifications. Recognizing these nuances helps to protect your investment and avoid common pitfalls that could cost hundreds in repairs or void your warranty prematurely. To deepen your understanding of how to safeguard your warranty during diagnostics and repairs, check out this comprehensive guide on maximizing warranty benefits with expert diagnostics. Remember, the key is to approach appliance repair with knowledge and caution—it’s better to consult professionals than trust myths that can duplicitously harm your coverage. Have you ever fallen into this trap? Let me know in the comments.
How do I keep my dishwasher running smoothly over time?
Ensuring your dishwasher stays in top shape requires investing in precision tools paired with proper maintenance routines. From my experience, the cornerstone of effective diagnostics is having the right equipment that offers accuracy and durability. I personally rely on high-quality digital multimeters like the Fluke 117 for their reliable readings and built-in features that prevent user errors. This particular model’s auto-ranging capability reduces the chances of inaccurate measurements, which is crucial when diagnosing temperature sensors or checking wiring continuity.
In addition to multimeters, thermal imaging cameras such as the FLIR One provide an invaluable perspective by visually highlighting hot spots or cooling components, assisting in spotting faulty heating elements or intermittent connections. I’ve found this to drastically reduce troubleshooting time, especially with complex errors that are not apparent through visual inspection alone.
When diagnosing water inlet valves or drain sensors, ultrasonic leak detectors have proven effective. Devices like the UE Systems Ultraprobe help me locate elusive leaks or blocked passages that can cause cycle failures, safeguarding against unnecessary replacements or warranty issues.
Software tools also play a role. Using manufacturer-specific diagnostic apps synchronized via Bluetooth gives me access to error code databases and repair guides tailored to my appliance model. This integration ensures that I follow manufacturer protocols, helping maintain warranty coverage.
Looking ahead, I predict a growing integration of IoT diagnostics, where smart sensors on appliances communicate directly with diagnostic apps, providing real-time health reports. Staying updated with these advancements will be essential for proactive maintenance and ensuring long-term appliance health.
To maintain your dishwasher effectively over time, consider establishing a regular inspection routine that includes these diagnostic tools. For instance, testing each component quarterly with a multimeter can catch issues early, preventing costly repairs and warranty pitfalls.
Envision a scene where a technician uses a digital multimeter and thermal camera side-by-side while inspecting a dishwasher. The image caption: “Combining precise tools ensures proper diagnostics for lasting performance.”
Remember, investing in the right diagnostic equipment and staying updated with current technologies can significantly extend the lifespan of your dishwasher and protect your warranty. For detailed guidance on tools specifically suited for 2026 models, check out this comprehensive review. Try testing your inlet valve with an advanced multimeter today – it’s a simple step that can save you from future headaches and expenses.
Lessons I Wish I Discovered Early on
One of the most eye-opening moments was realizing that DIY repairs without proper diagnostics can do more harm than good, potentially voiding my warranty and leading to costly repairs. I learned that using non-approved parts, even with good intentions, can trigger warranty exclusions unexpectedly. The importance of thorough documentation of every diagnostic step became clear—having photos or notes saved me during disputes, ensuring my coverage remained intact. These lessons taught me to approach repairs cautiously, valuing precision over speed, and reminded me that sometimes, professional help preserves my warranty and my peace of mind.
A Toolbox Filled with Trusted Resources
My go-to tool is the Fluke 117 multimeter, trusted for its accuracy and durability—it’s essential for diagnosing electrical issues properly. I also rely on thermal imaging cameras like the FLIR One, which visually pinpoint faulty heating elements or loose connections that standard tools might miss. For comprehensive repairs, this collection of diagnostic tools has proven invaluable, helping me perform precise tests aligned with manufacturer standards, ultimately safeguarding my warranty. Lastly, the appliance-specific diagnostic apps provide step-by-step guidance and error code interpretations that keep me on track and compliant.
Your Next Step Toward Confident Repairs
Don’t let fear hold you back from taking control of your dishwasher’s health and warranty. Proper diagnostics, the right tools, and a cautious approach not only extend your appliance’s lifespan but also ensure your warranty stays active when you need it most. Remember, this journey is about learning and empowering yourself—every accurate test and careful repair adds to your confidence and savings. Dive into the resources above, stay vigilant with your maintenance routine, and don’t hesitate to reach out for professional guidance when in doubt. Your dishwasher—and your warranty—will thank you for it.
Leave a Reply