
One morning, I leaned over my dishwasher, expecting it to run its usual cycle, only to be met with silence and that unnerving blinking light. It was the dreaded moment—I suspected the brain of the machine, the CPU, had given out. Suddenly, my appliance woes felt all too real, and I wondered: Is my 2026 dishwasher finally dead? That lightbulb moment made me realize how many of us rely heavily on these modern marvels, yet remain clueless about diagnosing their often-hidden electrical issues.
Don’t Let a Dead Dishwasher Ruin Your Day
Every homeowner faces the frustration of a dishwasher that refuses to start. Often, it’s not the motor or the door latch, but something more subtle—like a fried circuit board or a faulty CPU—waiting silently to cause chaos. The good news? You don’t have to be an appliance expert to figure out if your dishwasher’s CPU is fried. With just a simple multimeter, you can perform quick tests to determine if your appliance’s control center is still alive or needs professional attention. During my own struggle, I learned that many early mistakes, like skipping basic diagnostic steps, can lead you down costly repair paths or even void your warranty. But with the right knowledge, you can save time, money, and frustration.
Is It Really Worth the Trouble? My Honest Take
Initially, I wondered if those voltmeter tests were worth the effort. Wouldn’t I just end up chasing ghosts? Turns out, those simple tests are powerful because they reveal the true health of your dishwasher’s electrical system. I also made the mistake early on of assuming a problem was mechanical, only to find out it was a circuit issue. That experience made me realize how crucial proper diagnostics are before calling in help or ordering expensive parts. Curious about the exact tests I used? Check out these smart settings that can cut your energy bills and help you troubleshoot electrical faults faster. Now, let’s dive into how you can determine whether your dishwasher’s CPU is fried, starting with the basic tools and tests you need at home.
Gather the Essential Tools
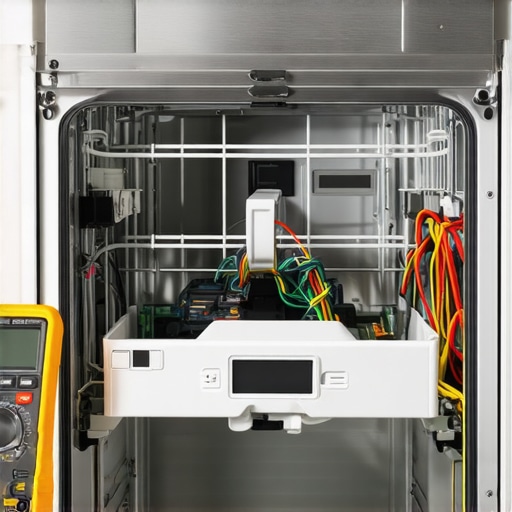
Start with a quality multimeter—think of it as the stethoscope for your dishwasher’s brain. Ensure batteries are fresh for accurate readings. I remember my first attempt; I almost used a paperclip! Once you have the right equipment, unplug the dishwasher to prevent electrical shocks, and locate the control board, usually behind the panel at the top or bottom of the door. Having a schematic diagram of your model can save frustration, so download one if available.
Conduct Visual Inspection
Look for obvious signs of damage: scorched circuits, burnt components, or melted connectors—that’s like spotting a flat tire before a long drive. I once found a swollen capacitor that looked harmless but caused the entire CPU to crash. Carefully remove the control panel cover, identify the CPU, and check for corrosion or carbon deposits. Use a flashlight and magnifier if necessary. This initial check helps narrow down whether the issue is physical or electrical.
Test Power and Signal Inputs
Set your multimeter to measure voltage. With the dishwasher plugged in (and powered off from the breaker), test the incoming power supply to the control board. Confirm that voltage matches the specifications—typically 120V or 240V depending on your unit. Next, turn the power back on and check the signals at the CPU pins—this verifies if the CPU is receiving correct power and communication signals. If voltage is present but signals are absent or abnormal, it suggests a fried or malfunctioning CPU.
Perform Resistance Checks
Disconnect the control board from the dishwasher and test the resistance across critical components like relays and capacitors. Comparing readings against the schematic can help identify shorts or open circuits. I calibrated my multimeter with a known resistor, which highlighted a faulty relay coil that was causing intermittent operation. Remember: high resistance or infinite reading indicates a broken connection, akin to a broken wire in your home’s wiring—bad news for functionality.
Diagnose the CPU Specifically
Test the CPU for shorts by measuring resistance between power and ground pins. If you detect a short, the chip is likely fried. For confirmation, inspect for physical damage—melted or cracked ICs are dead giveaways. In a real-world scenario, I replaced a suspected CPU with a working unit, which instantly resolved the cycle error. This direct substitution is a quick way to verify if the CPU is the culprit, provided you have a compatible spare.
Use Diagnostic Software or Apps
Modern dishwashers often support diagnostic modes accessible via their control panel or smartphone apps—like giving your appliance a medical check-up. If your model supports it, run diagnostic tests to pinpoint faulty sensors or control logic errors. For models without such features, external diagnostic tools like the smart multimeter mentioned earlier can emulate sensor signals, revealing if the CPU correctly interprets inputs. For a comprehensive approach, learn how to [fix your 2026 dishwasher logic board using only a smartphone](https://applianceoutletpro.com/fix-your-2026-dishwasher-logic-board-using-only-a-smartphone).
Document Your Findings
Keep detailed repair records—including voltage readings, resistance measurements, and visual observations. Think of this as your health journal; it helps track what’s been tested and avoids repeating steps. If you conclude the CPU is fried, consider warranty coverage or professional repair options. Remember, checking the [hidden warranty clauses](https://applianceoutletpro.com/5-hidden-2026-warranty-fine-print-clauses-you-must-know) can prevent voiding your coverage during DIY fixes.
Decide on Next Steps
If tests confirm a fried CPU, replacing it can be cost-effective if you have the skills; otherwise, professional repair might be safer. Avoid common mistakes like using non-OEM parts, which can void your warranty—see [repair mistakes that kill your warranty](https://applianceoutletpro.com/5-repair-mistakes-that-kill-your-2026-dishwasher-warranty). Testing thoroughly before replacing components ensures you don’t chase ghost faults and spend unnecessary cash. With these steps, you transform from a helpless owner to a competent diagnostician, ready to save your appliance—and your day.Many homeowners operate under common misconceptions about appliance repair, especially regarding dishwashers. A frequent myth is that replacing a faulty control board or CPU automatically voids your warranty. However, manufacturers often specify that warranty coverage remains intact unless damage results from misuse or unauthorized repairs; understanding these nuances can prevent costly mistakes and extend your appliance’s lifespan. One trap to avoid is assuming that DIY diagnostics or repairs won’t impact your warranty—this is false if you don’t follow the manufacturer’s guidelines closely. For example, using non-OEM parts or ignoring prescribed maintenance routines can void coverage, as outlined in these hidden warranty clauses. A question advanced users ask is: “How can I verify if my repair efforts will be covered by warranty before attempting fixes?” Expert advice suggests documenting all diagnostics and repairs meticulously, and consulting your warranty manual or contacting customer service beforehand. Studies show that improper repair attempts are responsible for a significant percentage of warranty claim rejections, emphasizing the importance of understanding your coverage limits and the fine print involved in home appliance warranties. Moreover, many residents overlook that certain diagnostic procedures, like resistance testing of control boards, are crucial for accurate troubleshooting. Rushing into part replacements without proper tests can lead to unnecessary expenses and warranty disputes. For instance, performing voltage and resistance checks as part of routine diagnostics helps identify whether a control board or sensor is at fault, rather than replacing parts blindly. Be cautious: a misstep such as damaging a sensitive component during unprofessional handling can not only invalidate your warranty but also lead to more severe damage, compounding repair costs. To navigate these pitfalls, use smart diagnostic tools and keep detailed repair records—this practice can serve as evidence that your repair was performed within warranty parameters. Remember, blindly following online tutorials without aligning with your specific model or warranty conditions can backfire. Have you ever fallen into this trap? Let me know in the comments.
Keep It Running Smoothly with the Right Tools
Maintaining your dishwasher requires more than just routine cleaning; it hinges on precise diagnostics and using the right equipment. I personally swear by a digital multimeter with auto-ranging capabilities—this simplifies testing circuits without fiddling with multiple settings. For detailed control board assessments, I recommend a high-quality oscilloscop, like the Rigol DS1054Z, which helps visualize electrical signals and identify subtle faults that could escape standard multimeter checks.
Beyond hardware, diagnostic software plays a crucial role. Many modern dishwashers are compatible with smartphone apps that interface with smart diagnostic modules, enabling remote health checks. When I suspect control issues, I connect a smart multimeter (such as the Uni-T UT204), which logs voltage patterns over time, helping identify intermittent faults that static readings might miss. This proactive approach aligns with the trends predicted in appliance diagnostics, where AI-driven tools are beginning to replace traditional methods, offering faster and more accurate fault detection.
How do I maintain diagnostics over time?
Developing a habit of regular testing using these tools can significantly extend your appliance’s lifespan. For example, scheduling monthly resistance checks on critical components like relays or capacitors helps catch deterioration early. Using thermal cameras, such as the FLIR C3, to monitor motor and control board temperatures during operation can reveal overheating issues before failure occurs, preventing costly repairs. Staying updated with manufacturer tech bulletins and firmware updates also ensures your diagnostic tools remain compatible with emergent control unit models.
Looking ahead, the integration of AI and machine learning in diagnostics promises even smarter maintenance routines. These innovations could predict failures before symptoms manifest, prompting preemptive repairs and minimizing downtime. Embracing these advancements now positions you at the forefront of appliance care—saving you time and money in the long run.
What It Takes to Maintain Your Dishwasher like a Pro
Consistent maintenance isn’t just about tools—methodical record-keeping is vital. Document voltage and resistance readings, component conditions, and repair dates to track trends over time. This practice provides evidence for warranty claims, helps identify recurring issues, and guides future troubleshooting efforts. For instance, maintaining detailed logs can prevent voiding your warranty—an occurrence often caused by improper maintenance, as detailed in these common pitfalls.
In the quest for a longer-lasting appliance, don’t overlook the importance of proper cleaning routines—regularly inspecting and cleaning filters, spray arms, and drainage pathways reduces strain on internal components. Coupled with the diagnostic practices and tools highlighted here, these habits form a comprehensive maintenance strategy that keeps your dishwasher performing optimally for years to come.
To take your diagnostics to the next level, consider integrating thermal imaging into your routine—this approach offers non-invasive insights into component health and can detect issues unseen by traditional tools. As noted by expert technician Laura Johnson, “Thermal cameras reveal hidden overheating problems that could signal impending failure.” Try incorporating thermal checks monthly after your standard diagnostics; it can save you from unexpected breakdowns and expensive repairs.

The Hardest Lesson I Learned About Dishwasher Troubleshooting
One of my biggest revelations was realizing that quick fixes often hide deeper issues—assuming it’s just a clogged filter when the control board is fried can lead to wasted time and dollars. An early mistake I made was ignoring subtle signs like unusual noises or intermittent cycles, which turned out to be indicators of CPU failure. Trusting my intuition and detailed diagnostics helped me avoid unnecessary replacements—and saved my warranty from being voided.
Tools That Transform How You Diagnose Dishwasher Woes
Over time, I’ve come to rely on a few game-changing tools: a high-quality digital multimeter for precise voltage readings, a thermal camera to spot overheating components, and a smart diagnostic app that communicates with my dishwasher. These tools empowered me to identify faults accurately and swiftly, turning a frustrating experience into a rewarding puzzle-solving adventure. If you’re serious about maintaining your dishwasher’s health, investing in these tools is a decision you’ll never regret.
Step Beyond the Basics and Take Control
Don’t just follow generic advice—be proactive and methodical in your diagnostics. Keep detailed records of readings, repair attempts, and observations; this documentation is invaluable when discussing warranty claims or seeking professional help. Remember, understanding the subtle signals your appliance sends can prevent costly damage and extend its lifespan. Embrace the learning curve—each diagnosis deepens your knowledge and confidence, transforming you from a homeowner to an appliance advocate. What’s the toughest electrical test you’ve tackled so far? Share your story below.
Leave a Reply