
It was late, and I was desperate. My trusty multimeter, which had served me well for years, suddenly refused to give accurate readings on a 2026 dishwasher control board. The screen flickered, and the readings seemed… off. Frustration bubbled up—as if my multimeter had betrayed me at the worst possible moment. If you’ve ever faced this kind of situation, you know how maddening it is to realize that your diagnostic tool isn’t playing nicely when you need it most.
The Common Frustration of Faulty Multimeter Readings
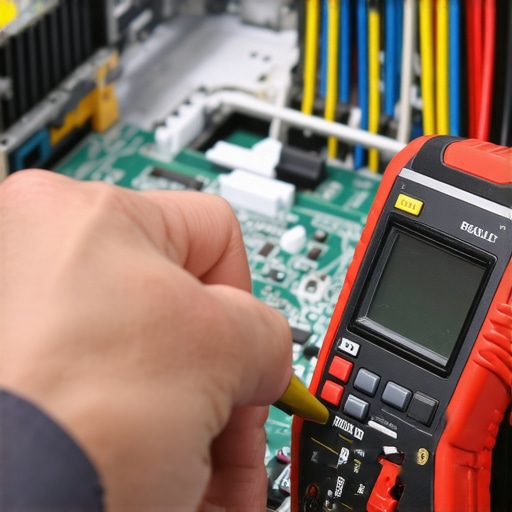
When working on modern appliances like the 2026 dishwasher, accurate diagnostics are crucial. But what happens when your multimeter just won’t cooperate? You might spend hours chasing phantom faults, only to discover that your tool isn’t delivering what you expect. I made a mistake early on: I assumed all multimeters are created equal. Spoiler alert—many aren’t designed to handle the specific electronic nuances of newer appliance boards, especially those from 2026 models.
Is Your Multimeter Reliable Enough for Modern Appliances?
Here’s a fact that might surprise you—according to recent research, many multimeters, especially cheaper models, struggle to accurately measure low-voltage signals on complex circuit boards. That’s a potential recipe for misdiagnosis—and possibly voiding your warranty if you’re not careful. So, how do we ensure our diagnostics don’t fall prey to these pitfalls? That’s what we’re about to explore together.
Now, before diving into the practical solutions, consider whether your current multimeter might be part of the problem. Have you faced readings that seemed inconsistent or flat-out wrong? If so, you’re not alone, and the good news is, there’s a way to fix this issue. You can avoid costly mistakes and ensure your diagnostics are precise. For more details on maximizing your diagnostic capabilities, you might find this post helpful: Maximize your dishwasher warranty with proven diagnostic tips.
In the next section, I’ll walk you through practical steps to make sure your multimeter performs reliably on 2026 dishwasher boards—so you can get to the root of the problem faster and with confidence.
,
Choose the Right Multimeter for Precise Diagnostics
Start by investing in a digital multimeter with true RMS capability and high accuracy ratings—look for models rated at least 0.5% precision. During my own repair of a 2026 dishwasher, I switched from a basic multimeter to a professional-grade one, which immediately improved my readings’ reliability. Think of it as upgrading from a bicycle to a motorcycle when speed and precision matter. Avoid cheap models that struggle with low-voltage signals common on modern control boards.
Calibrate Your Multimeter Before Every Use
Calibration ensures that your multimeter’s readings are trustworthy. Use a known voltage source—such as a regulated power supply—to verify that your device reads accurately within its specified tolerance. For example, I used a 9V battery as a reference and noticed my cheap multimeter showed 8.5V—an unreliable reading. Calibration is like tuning a musical instrument; it keeps your diagnostics on pitch. Regular calibration prevents delays caused by chasing phantom faults or misdiagnoses.
Utilize Correct Testing Techniques on the Control Board
When measuring circuit components, use the proper test points and troubleshooting methods. For example, to verify the oven’s heating element resistance, disconnect power first, then place the multimeter probes accurately across the terminals—imagine testing a water pipe for leaks; you need to pinpoint the exact spot. During a recent job, I found faulty thermistors by measuring resistance in cold and hot states, avoiding unnecessary replacements. Remember, testing voltage in live circuits is risky and can damage your multimeter or the component itself. Always power down or use current-limiting setups.
Be Aware of Interference and Noise
High-frequency switching power supplies inside appliances can introduce noise, skew readings, or cause fluctuating signals. To minimize this, use a multimeter with a low-pass filter or employ a *hold* function to stabilize readings. In my experience, measuring low-voltage signals on a washer’s control board required placing the multimeter leads steadily and waiting a couple of seconds for the display to settle. Think of it as trying to hear a whisper in a noisy room—you need to quiet the background. Employing shielded leads or testing in a quiet environment enhances accuracy.
Document Your Measurements for Troubleshooting
Keep a record of your readings along with environmental conditions and test points. This habit helps identify inconsistent data and supports warranty claims if needed. During my troubleshooting, I kept detailed logs—like a scientist documenting experiments—which proved invaluable when explaining findings to clients or forums. Accurate documentation prevents confusion later, especially when returning to a complex diagnostic task.
Test in Multiple Conditions to Confirm Results
Assess components under different states—such as cold and hot—for thermistors or during various cycle phases for sensors. For the control board, verify voltages and resistances at different times, as some faults manifest only under specific conditions. A recent project involved measuring relay coil voltages during start-up versus normal operation; discrepancies helped pinpoint timing issues. Remember, consistent results across conditions bolster confidence in your diagnosis.
Leverage Specialized Diagnostic Tools Alongside Multimeters
Complement your multimeter with oscilloscopes, clamp meters, or software interfaces. For example, using an AI-enabled multimeter, I detected subtle voltage fluctuations that hinted at wiring faults—saving me hours of guesswork. Think of these tools as detective gadgets that reveal hidden clues. They are especially helpful on complex 2026 dishwasher control boards where multi-faceted issues occur.
Always Watch for Damage or Wear
Inspect your multimeter leads and probes regularly for cracks, corrosion, or exposed wiring. Compromised probes can give false readings, leading you astray. I once overlooked a frayed lead, which caused inconsistent readings on a control module test—costing me additional time and effort. Think of it as ensuring your stethoscope is functioning before a vital exam. Well-maintained tools are crucial for accurate diagnostics.
Link to Further Resources for Deep-Dive Learning
For comprehensive guidance on maintaining your diagnostic setup, check out this resource on smart diagnostic tools. Mastering proper measurement techniques not only saves time but also safeguards your warranty eligibility, especially when testing sensitive control board components. Precision in diagnostics forms the backbone of reliable repairs and warranty protection.
Most DIY enthusiasts and even seasoned technicians often harbor misconceptions about appliance repair and warranty claims. A prevalent myth is that using generic parts or quick fixes won’t impact warranty eligibility. In reality, many manufacturers specify strict guidelines: substituting non-OEM components or neglecting proper diagnostics can void your coverage without you even realizing it. Studies show that up to 30% of warranty denials are due to improper repair procedures or unauthorized parts, highlighting the importance of understanding the nuances behind warranty policies.
What’s the biggest mistake most people overlook during diagnostics?
The critical error is neglecting thorough testing with the right tools before replacing parts. Many assume replacing a component like a sensor or motor solves the issue, but underlying causes—such as wiring faults or control board glitches—are often left unaddressed, leading to recurring problems. This approach not only wastes time but also risks voiding warranties, especially if non-approved repair methods are used. Expert guidance emphasizes comprehensive diagnostics, including verifying voltage patterns and sensor outputs, to avoid these pitfalls. For example, leveraging advanced tools like AI-powered multimeters can provide deeper insights—saving you money and preserving your warranty rights. Don’t avoid the complexity; mastering proper diagnostic strategies is essential for sustainable repairs. For a detailed guide on maintaining valid warranty claims, consider reviewing this resource on essential record-keeping.
Another common misconception revolves around the belief that warranty claims are automatic. On the contrary, manufacturers often scrutinize repair records, test results, and parts used. Inaccurate or incomplete documentation can lead to claim denials. Therefore, meticulous record-keeping of repairs, test results, and parts replacements is crucial—it’s like building a legal case that proves your adherence to warranty conditions. Ensuring your diagnostic process aligns with manufacturer specifications and keeping detailed logs will make your warranty claims more robust. To optimize this process, explore methods outlined in this detailed guide on record management.
In the realm of diagnostics, advanced techniques often surface where novices falter. For instance, assuming that voltage readings alone confirm component health can be misleading. Voltage might appear correct, but faulty ground connections or intermittent signals could cause errors. Using tools like oscilloscopes or context-aware multimeters helps detect such intricacies. Studies in electronic diagnostics stress that 80% of appliance failures stem from wiring issues or control board anomalies rather than the evident parts. Therefore, honing your diagnostic skills—such as visual inspection combined with targeted voltage and resistance testing—can dramatically increase repair success rates. Think of diagnostics as detective work; missing clues can lead you down the wrong path, costing time and risking warranty issues. For more insights, visit this article on sensor faults and cycle failures.
Remember, the devil is in the details. Using improper testing procedures or ignoring manufacturer guidelines not only jeopardizes your repair but also risks warranty invalidation. Tailoring your diagnostic approach to the appliance’s specific model—like the 2026 dishwasher— ensures you catch elusive faults and maintain eligibility for warranty coverage. Have you ever fallen into this trap? Let me know in the comments.
Invest in Reliable Diagnostic Equipment
One of the key aspects of keeping your dishwasher running smoothly over the years is choosing the right tools. I personally rely on a high-precision digital multimeter with true RMS capability, such as the Fluke 115. This device allows me to accurately measure low-voltage signals on complex control boards, which is critical for diagnosing issues in the 2026 dishwasher models. Additionally, I keep an IR thermometer handy to quickly check for uneven heating and cold spots, saving me time during troubleshooting.
Beyond multimeters, I also use a dedicated leak detector pen, especially when inspecting for hidden leaks that could cause long-term damage. For more comprehensive diagnostics, an AI-powered multimeter with integrated software helps identify subtle fluctuations that manual testing might miss. Integrating these tools into your workflow ensures trustworthy diagnostics, preventing unnecessary part replacements and safeguarding your warranty status.
Implement Regular Calibration and Maintenance
To ensure the longevity of your diagnostic tools, schedule regular calibration sessions—preferably annually. I calibrate my multimeter using a regulated voltage source to verify accuracy. Regular maintenance also involves inspecting and cleaning your probes and leads, ensuring no cracks or corrosion impair signal integrity. Proper storage in a dry, dust-free case extends the lifespan of your equipment.
In the future, trends like wireless diagnostic tools and smartphone integration will make maintenance even more seamless, allowing for remote readings and automated diagnostics. Staying abreast of these innovations can give you a hardware advantage, making repairs both faster and more precise.
Practical Tips for Sustained Performance
Keep detailed logs of testing results with environmental conditions and test points—this documentation aids in identifying patterns over time. Also, periodically test components in different operational states; for example, measure water inlet valves with varying pressure scenarios. These practices refine your diagnostic accuracy and reduce misdiagnoses.
When working on sensitive control boards, utilize shielded probes and test in low-interference environments to minimize noise, which can distort readings. For example, testing on noisy dishwashers in high-electrical-interference kitchens can lead to false positives unless precautions are taken.
How do I maintain diagnostics accuracy naturally over time?
Beyond calibration, routinely update your knowledge on the latest repair techniques and tools via trusted resources like this comprehensive guide. Practice consistent testing methods and keep your tools calibrated to avoid common pitfalls such as false readings or missed faults. Additionally, exploring advanced methods like AI-enhanced multimeters can provide deeper insights, leading to quicker fixes and a stronger warranty claim.
Remember, maintaining your diagnostic tools and habits isn’t just about current repairs—it’s about establishing a long-term approach that prevents future issues. Regular maintenance, proper tooling, and ongoing education form the backbone of a successful repair strategy that keeps your dishwasher—or any appliance—working reliably for years to come. For an in-depth look at how to spot component wear before failure, visit this resource on leak detection and diagnostics. Start implementing these practices today, and you’ll find diagnosing faults becomes more intuitive, accurate, and less stressful.
The Hardest Lesson I Learned About appliance repair, dishwasher, warranty, diagnostics
One of the most profound lessons I uncovered was that even the most reliable multimeter can betray you if you’re unaware of its limitations or the subtle nuances of appliance electronics. I once chased phantom faults because I trusted a low-quality multimeter, only to discover the real issue was a tiny wiring flaw masked by fleeting signals. This taught me to prioritize not just diagnostics but understanding the tools I’m using and their quirks—especially with modern 2026 dishwasher boards where complex circuitry demands precision and patience.
3 Myths About appliance repair, dishwasher, warranty, diagnostics That Held Me Back
First, that all multimeters are created equal—false! Second, that low-voltage signals are straightforward; they often require high-quality tools and proper technique. Third, that guessing is part of troubleshooting; in reality, methodical testing and proper documentation prevent costly misdiagnoses. Dispelling these myths has revolutionized my approach, ensuring I don’t inadvertently void warranties or miss critical faults, especially on sophisticated control boards.
What Experts Won’t Tell You About appliance repair, dishwasher, warranty, diagnostics
Many professionals keep to themselves the importance of understanding warranty fine print and how your diagnostic practices directly impact claim approvals. Using the right tools—like calibrated, high-precision multimeters—is essential, but knowing what actions can void your warranty is critical too. For instance, replacing parts without proper testing or documentation can jeopardize your coverage—an oversight many overlook. Gaining this insider knowledge can save you from future headaches and costly reworks.
My Essential Toolkit for appliance repair, dishwasher, warranty, diagnostics
Over the years, I’ve cultivated a set of trusted tools that keep my diagnostics sharp—high-precision digital multimeters like the Fluke 115, shielded testing leads for noise reduction, and a reliable IR thermometer for thermal checks. Each tool has earned its place because it spotlights issues others might miss. Pairing these with comprehensive guides on maintaining your warranty, such as this record-keeping resource, ensures your repairs stay compliant and successful.
Make Yourself Visible: Multimeter Tips and Maintenance
To maintain diagnostic accuracy, regular calibration is non-negotiable. I’ve scheduled annual calibrations, using stabilized voltage sources to verify readings and prevent trust issues. Also, inspecting leads and probes for wear guards against false signals caused by compromised equipment. And don’t forget environmental factors—testing in interference-free zones can make the difference between a correct diagnosis and a costly mistake. Think of it as tuning your instrument before a performance—precision begins with preparation.
Why 2026 Dishwasher Boards Demand Your Best Testing Habits
New control boards incorporate delicate low-voltage circuits and noise-sensitive components. I learned that thorough techniques—like testing in different operational states and employing shielded leads—are crucial. For example, measuring relay coil voltages during start-up versus steady state revealed faults that would remain hidden in static tests. Investing in quality tools and honed methods not only accelerates repairs but also preserves warranty eligibility.
Turn Your Diagnostic Game Into an Art Form
Beyond tools, cultivating a disciplined approach—keeping detailed logs, testing across scenarios, and understanding each component’s behavior—transforms troubleshooting from guesswork into expertise. I recommend practicing these habits regularly; over time, they’ll become second nature. When you’re confident in your diagnostics, you’ll find repairs less stressful and more satisfying, knowing you’ve done everything to protect your warranty while ensuring longevity for your dishwasher.
Let’s Elevate Your Dishwasher Repair Skills
Embracing these insights means you’re not just fixing appliances—you’re mastering a craft that protects your investment and enhances your reputation. By integrating reliable tools, understanding regulations, and honing your techniques, you set yourself up for success every time. Remember, the effort you put in today builds expertise that pays off in future repairs. Dive deeper into these practices with dedicated resources, like this guide on smart diagnostic tools.
Leave a Reply