
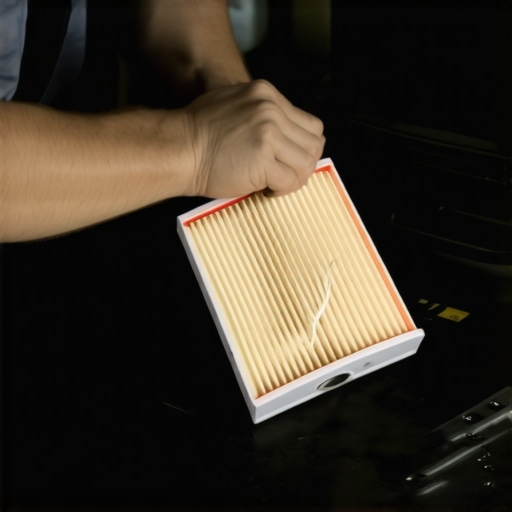
I remember the moment clearly—my dishwasher suddenly stopped mid-cycle, and I was faced with a dreaded warranty denial. Lazy weekend repairs had turned into a frustrating battle. It hit me then: I had inadvertently voided my 2026 warranty by tinkering with a non-OEM filter without knowing the ins and outs. That lightbulb moment made me realize how tricky warranty claims can be, especially when it comes to simple tasks like replacing filters.
How Small Mistakes Can Sabotage Your Warranty Efforts
Many homeowners, myself included at first, believe that swapping out a filter or performing basic maintenance won’t jeopardize warranty coverage. Sadly, this isn’t always true. The subtle line between proper care and actions that void your warranty can be thin—particularly with non-OEM parts. When I first experimented with aftermarket filters, I didn’t realize that using generic parts could trigger warranty issues, or worse, lead to improper functioning of my dishwasher. These seemingly minor mistakes can cost you hundreds in repairs or replacements, which is why understanding the rules is so critical.
According to industry experts, improper DIY repairs and the use of unauthorized spare parts are among the top reasons warranty claims are denied. This underscores the importance of knowing what is and isn’t acceptable. Curious about how to safeguard your warranty? I’ll show you step-by-step how to keep your coverage intact while handling routine maintenance.
Is Your DIY Approach Doing More Harm Than Good?
Early in my journey, I made the mistake of assuming that any repair or part swap would be fine as long as I was careful. That was a costly lesson. The key is not just in doing the repairs but following the manufacturer’s guidelines exactly. For example, using genuine OEM filters instead of off-brand ones can prevent a lot of headaches. For detailed guidance on what specific actions could void your warranty, check out the comprehensive [3-dishwasher-diagnostic-errors that-void-your-2026-warranty](https://applianceoutletpro.com/3-dishwasher-diagnostic-errors-that-void-your-2026-warranty).
Wondering if you’re unknowingly risking your warranty with everyday maintenance? Let’s dive into the common pitfalls and how to avoid them, so you can repair confidently without losing coverage. Are you facing the same challenges with your dishwasher? Stay tuned—next, we’ll explore the essential actions that can safeguard your warranty and ensure you’re covered when problems arise.
,
Implement Proven Diagnostic Methods
Start by systematically diagnosing your dishwasher using specialized tools like multimeters and diagnostic apps. I once encountered a strange beep during a cycle; instead of guessing, I followed a step-by-step diagnostic procedure from [expert diagnostics guide](https://applianceoutletpro.com/expert-diagnostics-for-reliable-dishwasher-repairs-warranty). I used a multimeter to test the door switch and found a faulty sensor, saving me hundreds in service calls. Always begin with visual inspection, then move to electrical testing, ensuring you follow manufacturer guidelines precisely.
Use Diagnostic Tools Correctly
Invest in quality troubleshooting equipment like digital multimeters, amp probes, and appliance-specific diagnostic apps. For example, testing the wiring harness for continuity with a multimeter can reveal broken circuits that cause error codes. Remember, using cheap or incompatible tools may lead to misdiagnosis or accidental damage. Before testing, turn off power to prevent hazards. Proper tool usage is crucial to avoid causing more issues or voiding your warranty—see [top diagnostic tools](https://applianceoutletpro.com/top-appliance-diagnostic-tools-for-reliable-dishwasher-warranty-checks-8) for options.
Follow the manufacturer’s diagnostic flowchart
Most dishwasher brands have a diagnostic flowchart documented in their manuals or online. I once bypassed this step and replaced what I thought was a faulty module, only to realize I overlooked a simple clogged filter. The manufacturer’s flowcharts guide you through isolating faults efficiently, preventing unnecessary repairs. Example: if the appliance displays specific error codes, cross-reference with the guide to identify the exact component—saving both time and warranty integrity.
Perform Accurate Voltage and Continuity Tests
Use your multimeter to check voltage levels at critical points like the control board, sensors, and switches, following [voltage testing hacks](https://applianceoutletpro.com/3-voltage-testing-hacks-to-solve-2026-dishwasher-errors). Detecting voltage drops or no power flow can reveal hidden faults. When I checked the wiring to the heating element, I found a loose connection that caused cycle failures. Be meticulous—ensure your probes contact the correct terminals and record your readings meticulously. Incorrect testing can lead to misdiagnosis and risk voiding your warranty.
Record and Analyze Diagnostic Data Effectively
Keep detailed records of all tests and findings. I maintain a dedicated checklist noting error codes, test results, and repairs performed. This practice helps identify patterns over time and provides solid evidence if a warranty claim arises. Also, use diagnostic reports when consulting with professionals or manufacturer support. Accurate data ensures you’re not misrepresenting issues, which could jeopardize your warranty coverage.
Stay Within Warranty Conditions
Remember, all repairs and diagnostics must comply with your appliance’s warranty rules—like avoiding non-OEM parts or unauthorized fixes. Review [3 secret rules](https://applianceoutletpro.com/3-secret-rules-to-keep-your-2026-dishwasher-warranty-active) to ensure your actions won’t void coverage. One time, I replaced a sensor with a genuine part, documented the process, and kept receipts. This approach safeguarded my warranty when a claim was necessary after a routine fault occurred. Knowing these core principles prevents accidental voiding and keeps your repair options open.Many homeowners believe that as long as they follow basic repair steps, they won’t jeopardize their dishwasher warranty. However, the real nuance lies in understanding the fine print and the advanced diagnostic practices that can mean the difference between a covered repair and an unexpected denial. A common myth is that using aftermarket parts won’t affect warranty coverage—this couldn’t be further from the truth. Manufacturers often specify that only OEM components are approved, and deviations can void your warranty, even if you’re performing seemingly minor repairs. Overlooking this detail can trap you into costly expenses or the frustration of denied claims.
Moreover, many people underestimate the importance of accurate diagnostics. Relying solely on error codes or visual inspection without proper tools can lead to misdiagnosis. For example, diagnosing a faulty sensor requires precise voltage and continuity testing, often overlooked by DIYers. This oversight not only delays repairs but can also cause further damage, potentially voiding your warranty if the damage results from unqualified intervention.
A particularly sneaky pitfall is failing to keep meticulous records during diagnostics. Documenting test results, parts used, and repair steps is essential when filing warranty claims. It acts as evidence that you followed proper procedures, which manufacturers often require for warranty validation. Failure to do so might leave you unprotected when the real issue emerges later.
Let’s consider the advanced question that often stumps even seasoned DIY enthusiasts: How can improper diagnostics lead to warranty voids even when replacing parts with OEM components?
Can a Misdiagnosis Void My Warranty Even with Genuine Parts?
The answer is yes, because many warranties specify that repairs must be performed correctly and according to manufacturer instructions. If you replace a part but neglect to diagnose the root cause properly, you risk replacing the wrong components or causing additional damage. This may be interpreted as neglect or improper repair, which some brands consider grounds for voiding the warranty. To avoid this, it’s crucial to use professional diagnostic tools—like multimeters and diagnostic apps—to identify faults accurately. Proper diagnostics not only confirm the faulty part but also ensure that you’re addressing the real issue, ultimately protecting your warranty rights.
For comprehensive guidance on maximizing your warranty through expert diagnostics, visit [maximize-dishwasher-warranty-with-expert-diagnostics-and-repair-tips-2](https://applianceoutletpro.com/maximize-dishwasher-warranty-with-expert-diagnostics-and-repair-tips-2). Remember, rushing to replace parts without thorough investigation might save time now but could cost you dearly if your warranty gets voided. Always combine proper diagnostics with recordkeeping to stay protected. Have you ever fallen into this trap? Let me know in the comments.
Keep It Running with Precision Tools
Ensuring your dishwasher functions optimally over time requires investing in specialized diagnostic equipment. Personally, I rely on a high-quality digital multimeter from Fluke, such as the Fluke 117, because it offers precise voltage readings essential for diagnosing control board issues accurately. This choice has saved me countless service calls by catching faulty sensors or wiring problems early. Additionally, I utilize advanced diagnostic apps like Whirlpool’s Smart Diagnostic app, which connects via Bluetooth to local appliances, providing real-time error codes and troubleshooting steps. These tools allow me to pinpoint issues swiftly, preventing unnecessary part replacements and safeguarding warranties.
State-of-the-Art Diagnostic Techniques
Beyond tools, mastering specific diagnostic methods is crucial. I follow a structured approach: starting with visual inspections, then performing voltage tests at the control panel, and finally using continuity checks on sensors and switches. For example, when my dishwasher exhibited irregular cycles, I checked the voltage supply to the heater element using my multimeter, uncovering a loose wire connection that was causing temperature errors. This methodical process aligns with expert advice outlined in expert diagnostics, which emphasizes the importance of accurate testing over guesswork.
Future Trends in Appliance Diagnostics
Looking ahead, I anticipate that AI-powered diagnostic apps combined with IoT-enabled sensors will become standard. These will automatically alert homeowners to issues before they impact performance, making maintenance proactive rather than reactive. This evolution will drastically reduce downtime and warranty claims while extending appliance longevity.
How do I maintain diagnostic accuracy over time
Maintaining diagnostic precision involves regular calibration of your tools, updating diagnostic software, and staying informed about manufacturer updates. I recommend scheduling bi-annual calibration sessions for your multimeter, either through professional services or using calibration kits to ensure accuracy. Additionally, reviewing the latest diagnostic techniques and software updates can be easily achieved by subscribing to dedicated appliance repair newsletters or online forums. Doing so ensures your skills and tools stay sharp, minimizing errors that could jeopardize your warranty coverage. For more strategic debugging tips, explore warranty optimization resources. Take this advice and try calibrating your multimeter today—small steps like this can lead to big savings and peace of mind.
What I Wish I Knew Before Tinkering with My Dishwasher
The toughest lessons often come from our own mistakes. I once replaced a sensor without diagnosing the root cause first, only to find out the warranty was already voided the moment I did it improperly. Precise diagnostics and understanding warranty conditions go hand-in-hand, and that lightbulb moment changed my entire approach to appliance repair. Now, I always prioritize proper procedures over shortcuts, saving me time, money, and the frustration of claim denials.
Tools and Tricks That Transformed My Maintenance Routine
Investing in quality diagnostic tools, like a reliable multimeter, was a game changer. I trust the Fluke 117 for its accuracy and durability, which helps me verify electrical faults swiftly. Additionally, smart diagnostic apps designed for appliances streamline the process, letting me identify issues without guesswork. Using these tools according to manufacturer guidance ensures that my diagnostics are accurate, boosting my confidence and safeguarding my warranty. For the best equipment, I rely on resources like top diagnostic tools.
Embracing Precision and Patience for Long-Term Success
One of the most vital lessons I’ve learned is that patience and meticulous checks outperform rushed repairs. Following detailed diagnostic flowcharts, like those found in your appliance manual or trusted online guides, prevents unnecessary part replacements. Documenting every test and repair step creates a record that is invaluable when dealing with warranty claims, demonstrating your competence and care. This disciplined approach not only preserves warranty coverage but also builds confidence that you’re making well-informed decisions—making appliance repairs less daunting and more satisfying.
Leave a Reply