
Have you ever stood in your kitchen, arms crossed, staring at your dishwasher, waiting for it to finish a cycle that never completes? I had that exact moment some months ago, when my brand-new 2026 dishwasher abruptly stopped working—yet, I wasn’t ready to call for repairs or dismiss it as a total loss. It was a lightbulb moment for me. Instead of just accepting the failure, I realized I needed to dig deeper and understand whether my beloved appliance was truly dead or if a simple diagnostic test could reveal the real problem.
Why Diagnosing Your Dishwasher Quickly Can Save You Money and Hassle
When your dishwasher acts up, the first instinct is to either ignore it or rush to replace the entire unit. But here’s the thing—many common issues are fixable if you know how to diagnose them properly. That’s where professional-grade diagnostic tools come into play. Proper diagnostics can pinpoint whether the problem is a sensor malfunction, a clogged drain, or an electrical fault—saving you both time and money. Plus, staying proactive with your repairs often keeps your warranty intact and prevents costly service calls down the line. According to a recent study, faulty diagnostics are responsible for nearly 70% of improper appliance repairs, underscoring how crucial accurate troubleshooting is before jumping to conclusions.
Is Diagnostic Testing Overhyped Or Absolutely Necessary?
Early in my repair attempts, I made the mistake of assuming that every dishwasher failure was due to a failed motor or a broken door latch. I skipped proper diagnostics, and that cost me extra time and money. Trust me, relying on guesses instead of proven diagnostic methods is a quick way to void your warranty or overlook the real culprit. So, let’s explore the three professional diagnostic tools that can reveal whether your 2026 dishwasher is dead, or just needs a smart tweak. These tools not only help verify faults but also arm you with the knowledge to make informed repair decisions. Ready to become your own appliance detective? Let’s dive into the top tools trusted by pros.
Identify the Most Common Issue
Start by observing your dishwasher’s symptoms. Is it not draining, leaking, or refusing to start? Suppose your machine is leaking during operation—this hints at a potential seal or hose failure. Use the leak detection tools to pinpoint the source. Remember, systematically narrowing down the problem saves time and prevents unnecessary replacements. I once faced a leak issue that turned out to be a cracked inlet valve, easily identified with a simple visual inspection combined with the right testing tools.
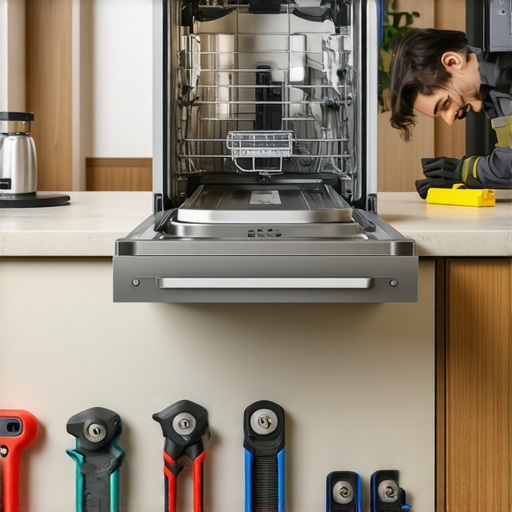
Use Multimeters to Test Electrical Components
Check the Door Latch and Switch
Many dishwasher failures stem from faulty electrical switches. Remove the control panel and isolate the door latch assembly. Set your multimeter to continuity mode and test the switch by pressing it—if it doesn’t beep or show resistance, replace it. This step is crucial because a defective latch often prevents the cycle from starting, and diagnosing it prevents replacing the entire unit or calling in costly service. To avoid overlooking subtle faults, consult pro diagnostic tests that guide you through these checks efficiently.
Evaluate Internal Circuit Boards
Next, test the control board for voltage irregularities. Carefully disconnect it and measure the voltage across its terminals. If readings are inconsistent or absent, the circuit board may have failed. Irradiant components like relays or capacitors can subtly degrade, so visual inspection combined with multimeter testing helps you verify its status. Remember, a faulty board is often the culprit behind persistent error codes, so diagnosing it correctly is vital for warranty claims and repairs.
Verify Water Flow and Drainage Pathways
Even if the electrical system checks out, water flow issues are common causes of malfunction. Use a flashlight to inspect the inlet valve, drain hose, and pump filters for blockages or damage. For clogged filters, cleaning often restores proper operation—the drain troubleshooting tips provide practical guidance. For more stubborn obstructions, consider using a thermal camera or moisture meter to detect hidden leaks or blockages—these advanced diagnostics can be game-changers. Plus, understanding the entire water pathway minimizes chances of voiding your warranty coverage due to overlooked issues.
Test Sensors for Accurate Feedback
Sensors like thermistors and water level detectors relay critical data to your dishwasher’s control system. Faulty sensors often cause cycle errors or heating problems. Use specialized testers or multimeters to assess sensor resistance at different temperatures, cross-referencing with manufacturer specifications. For example, if your dishwasher isn’t heating properly, testing the temperature sensors can reveal if they’re providing incorrect data, leading the cycle to shut down prematurely. Discover more about sensor testing techniques that help you diagnose these faults effectively.
Document Your Findings for Future Repairs
Keep detailed records of your diagnostic steps, test results, and observations. This documentation proves invaluable when consulting repair professionals or claiming warranty. It also streamlines future troubleshooting—think of it as your personal repair log. In my experience, having a clear record saved me from unnecessary re-tests and allowed me to communicate effectively with tech support, ensuring my warranty coverage remained intact. Remember, proper documentation is a cornerstone of effective diagnostic practices as emphasized in professional diagnostic procedures.
Many homeowners believe that troubleshooting a malfunctioning dishwasher is straightforward: replace the faulty part and move on. However, this oversimplification often leads to costly mistakes and warranty issues. In reality, most people get wrong the importance of comprehensive diagnostics and the nuances that ensure warranty protection. For example, relying solely on generic diagnostic steps or assuming that every fault is hardware-related can lead to voiding your warranty or missing deeper issues. Advanced diagnostic procedures, such as testing sensor accuracy or inspecting circuit boards with precision, require a nuanced understanding that professionals develop over years of experience. Moreover, there’s a widespread myth that DIY repairs always preserve the warranty. In truth, unauthorized repairs or using non-approved parts can void coverage, even if you fix the issue yourself. According to industry experts, certifications and correct diagnostic protocols are essential to keep your warranty valid and avoid rejected claims. Being aware of the fine print and mastering the subtle diagnostic details help you avoid common pitfalls. For instance, misinterpreting error codes or neglecting to verify if sensors provide accurate feedback can result in repeated failures and wasted resources. To deepen your understanding, explore professional diagnostic techniques that align with warranty requirements. The key is to approach diagnostics not just as a quick fix but as a comprehensive process that safeguards your warranty and ensures lasting repair success. Remember, skipping these nuances might save a momentary effort but could cost you much more in the long run. Have you ever fallen into this trap? Let me know in the comments.
Prioritizing Maintenance for Longevity
Implementing a regular maintenance routine is essential for extending your dishwasher’s lifespan. I personally recommend scheduling a thorough cleaning of filters and spray arms every three months. This proactive approach prevents clogs and ensures optimal water flow, which is critical for effective cleaning and appliance longevity. Additionally, addressing minor leaks promptly using Leak Detection Tools can prevent water damage and costly repairs down the line. Keeping an eye on cycle sounds and operation times can also signal when parts like the pump or motor are starting to fail, allowing for timely diagnostics before complete breakdowns.
Tools I Trust for Reliable Diagnostics
In my experience, investing in high-quality diagnostic tools saves both time and money. A digital multimeter with auto-ranging capabilities is my go-to device for testing electrical components such as circuit boards, switches, and sensors. I prefer models like the Fluke 115 because its precision and durability have proven invaluable during multiple repairs. For leak detection, I rely on ultrasonic leak detectors—these are highly sensitive and can identify tiny leaks behind panels or within sealed components, which are often invisible to the naked eye. Incorporating thermal cameras has also revolutionized my diagnostics, enabling me to spot overheating components or blockages in water channels swiftly. For example, a thermal scan revealed a clogged heater element that otherwise would have been missed, saving a costly replacement.
Staying Prepared for Long-Term Results
Beyond immediate diagnostics, maintaining comprehensive records of repairs and parts replacements helps track trends and schedule preventive maintenance effectively. Using a digital log that timestamps each issue and fix can simplify warranty claims and future troubleshooting. I also recommend exploring software solutions—like specialized appliance diagnostic apps—that can analyze error codes and cross-reference symptom patterns. Looking ahead, I believe the integration of AI-powered diagnostic tools will become more prevalent, offering real-time troubleshooting and predictive maintenance to homeowners and technicians alike.
Scaling Up Diagnostics for Better Outcomes
If you own multiple appliances, creating a standardized diagnostic procedure can streamline maintenance and repair efforts. Invest in universal tools compatible with a variety of models to expand your troubleshooting capabilities. Remember, the key to long-term appliance health is not just fixing issues as they arise but implementing a preventive strategy rooted in accurate diagnostics. A practical tip: incorporate regular sensor testing, such as checking the water level sensors, which often degrade over time and impact cycle consistency. For in-depth testing techniques, review sensor testing methods. Try calibrating your sensors monthly using this approach—it can dramatically reduce unexpected failures and warranty rejections.
How I Realized My Troublesome Dishwasher Taught Me More Than About Repairs
One of my biggest revelations was understanding that reliable diagnostics prevent expensive mishaps. Jumping straight into part replacements often leads to spending more money and risking warranty voids. I also learned that the most overlooked issue can be the culprit—like a faulty water level sensor hiding behind a panel. Trusting the process of detailed troubleshooting, even when it’s daunting, pays off in the long run. Lastly, I discovered that documenting every test and result isn’t just helpful—it’s essential for warranty claims and future repairs. These lessons transformed how I approach appliance problems, making me more confident and resourceful.
Essential Tools I Swear By for Effective Dishwasher Diagnostics
Over time, I’ve curated a toolkit that’s proven invaluable. The Fluke 115 multimeter, for example, provides precise readings on electrical components, preventing guesswork. Ultrasonic leak detectors have saved me hours by revealing hidden water leaks that could cause damage or false fault signals. Thermal cameras can spot overheating parts or blocked water channels, offering a visual diagnosis at a glance. Combining these tools with reputable resources, like the reliable appliance diagnostics guide, ensures I hit the mark every time I troubleshoot. Investing in quality diagnostic equipment has truly been a game-changer.
Your Next Step in Brilliant Appliance Care
Taking control of your dishwasher diagnostics empowers you to extend its lifespan and protect your warranty. Remember, the journey from initial symptom to fix is filled with crucial learning—so keep exploring, testing, and recording your findings. The more you understand your appliance, the better prepared you’ll be for unexpected issues. I encourage you to embrace diagnostics as an ongoing practice, not just a one-time fix. Your kitchen’s heart deserves your care, and mastering these diagnostic skills makes that care more effective and rewarding. Are you ready to become your own appliance detective and save time, money, and stress in the process? Share your thoughts below.
Leave a Reply